Introduction:
In my previous article I explained the way to Install Windows Server Backup Feature in Windows Server 2012.
In case you missed out the article here is the link
In today’s article you may learn the way to make a backup of the System State/Active Directory victimization the Windows Server Backup Feature in Windows Server 2012.
Just as, so far you’ve got already put in the Windows Server Backup Feature, currently we are going to move forward from there.
Step 1
Go to the Tools possibility provided by the Server Manager, left-click on that and scroll right down to the “Windows Server Backup” possibility.
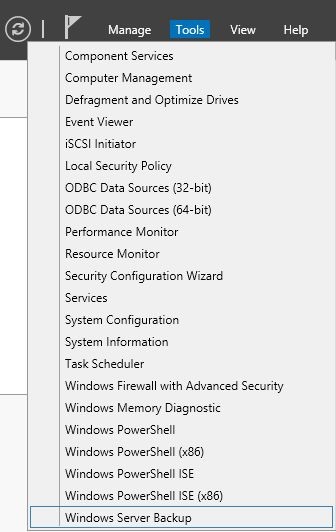
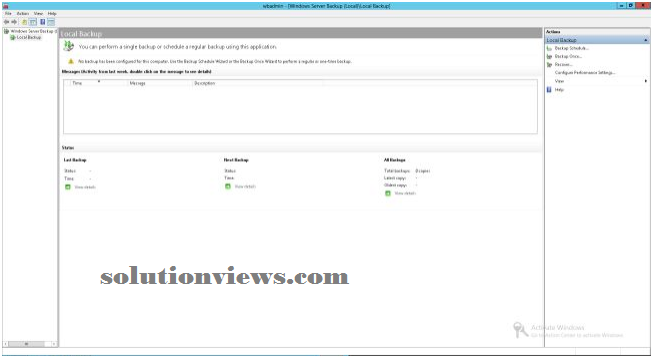
Now this kind of possibility are going to be opened:
Step 2
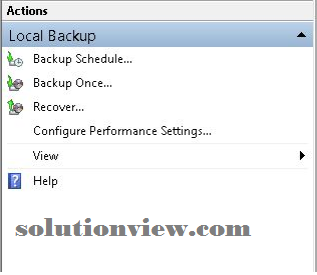
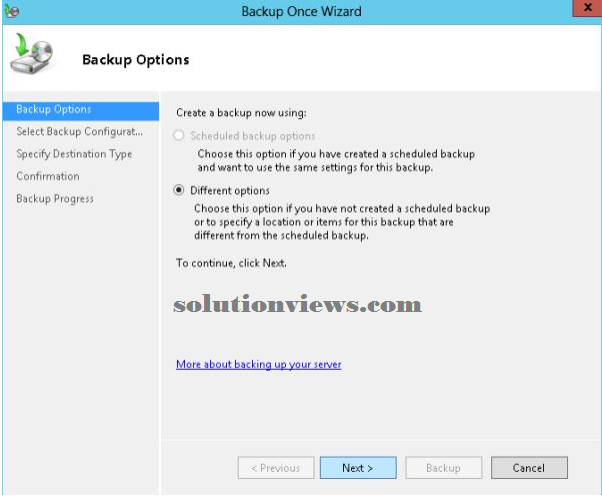
In the native Backup possibility you may get many choices like “Backup Schedule”, “Backup Once”, “Recover” etc. during this article we are going to produce a one-time backup, therefore click on “Backup Once”.
Now “Backup Options” are going to be on the market from that you want to choose the second possibility, “Different Options” then click on “Next”.
Step 3
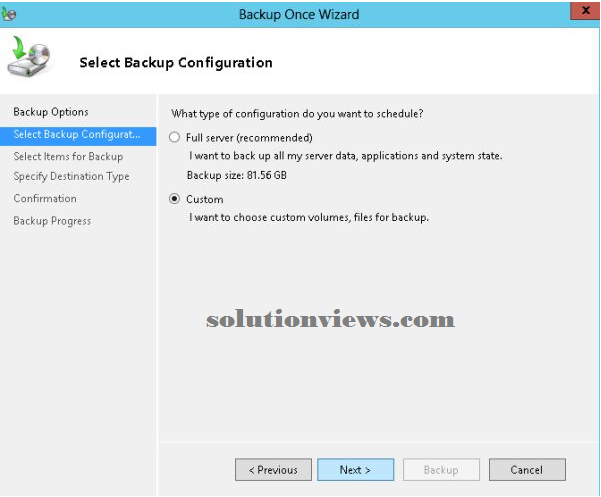
Now “Backup Configuration” are going to be on the market from that you’ll either choose to make a backup of the “Full Server” or choose the “Custom Option” that may provide you with freedom to selected from numerous choices for making a backup.
On consecutive page click on “Add Items” once that you may be ready to choose the item to make the backup of.
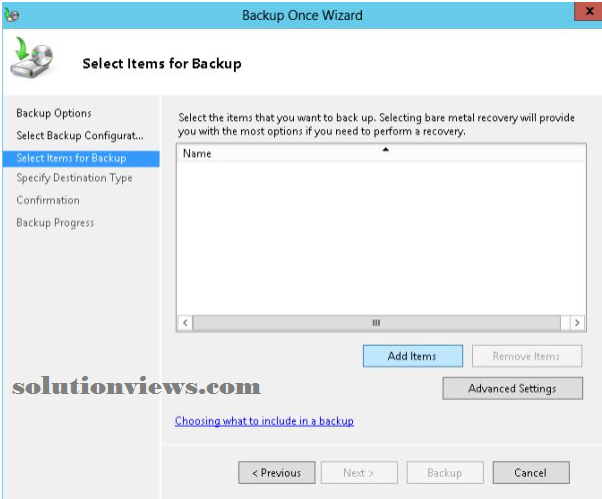
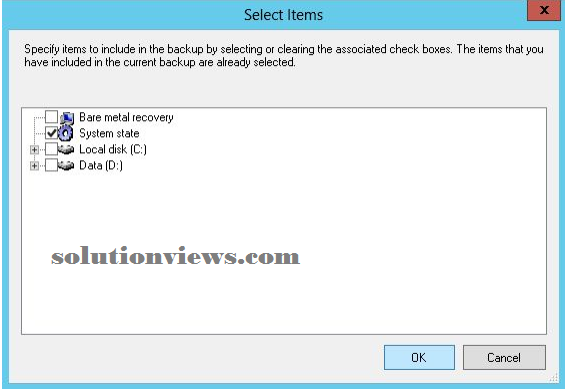
From the choices you’ll choose any Drive or System State or each. Here i will be able to produce a backup of solely the System State therefore i choose it and click on on the “OK” button.
Step 4:
Now you want to choose the “Destination Type” that may be either a “Local Drive” or any remotely shared folder.
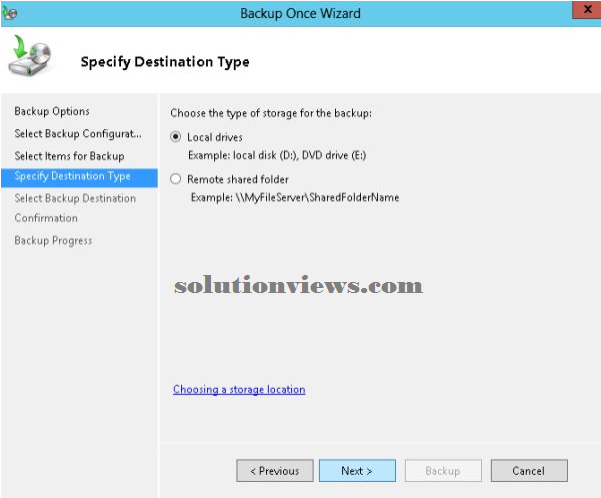
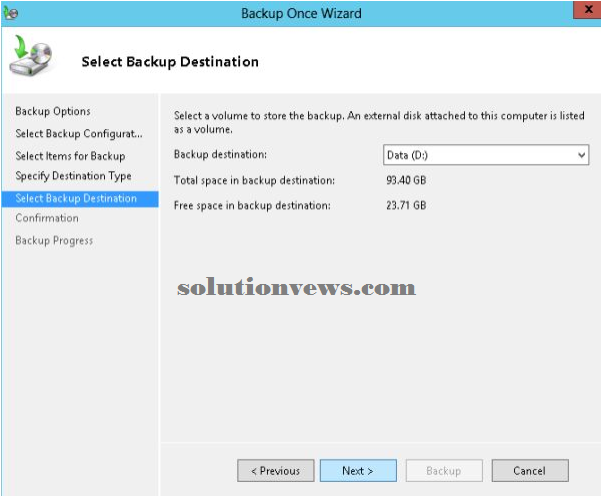
Since here I selected the native Drive, it’ll request from me during which drive i might prefer to produce the backup and the way abundant area is accessible therein drive. at that time click on “Next”.
Step 5
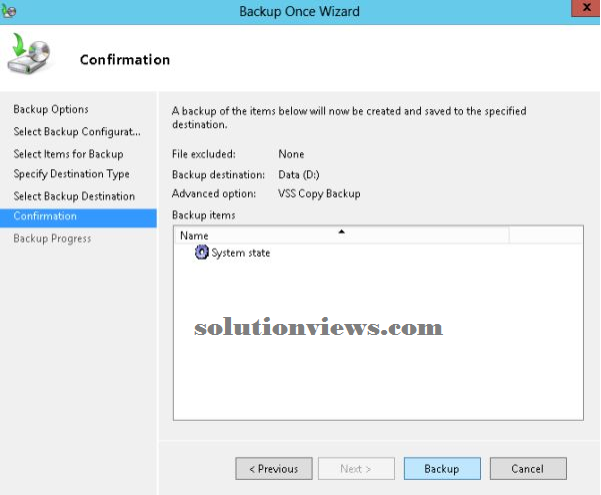
Now a Confirmation Page are going to be shown that may show you the total details of no matter you chose and can finally raise you to relinquish permission to make the backup. Click on “Backup” to begin the backup.
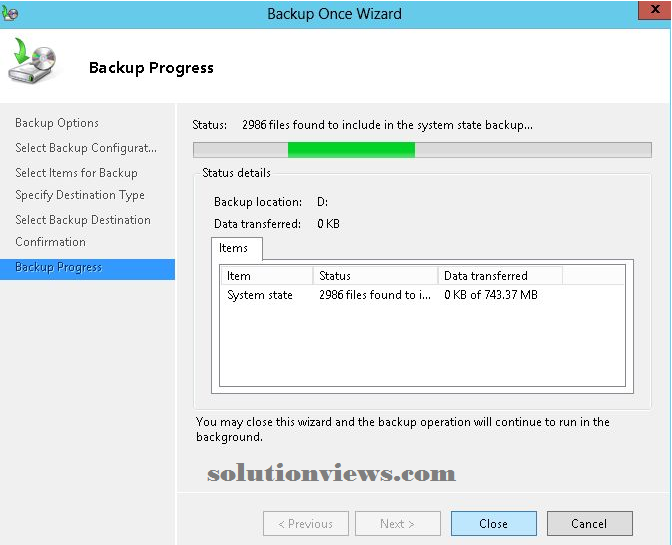
Now your backup can begin and inside many minutes your backup can are created.
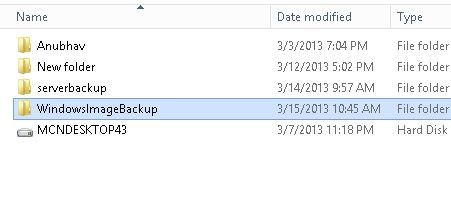
Now you’ll head to the required drive and make sure that the backup was created.