Every day, new security solutions are returning into the Azure security Center, like JIT VM Access, and these innovations more tighten the protection layer. We’ll keep you updated!
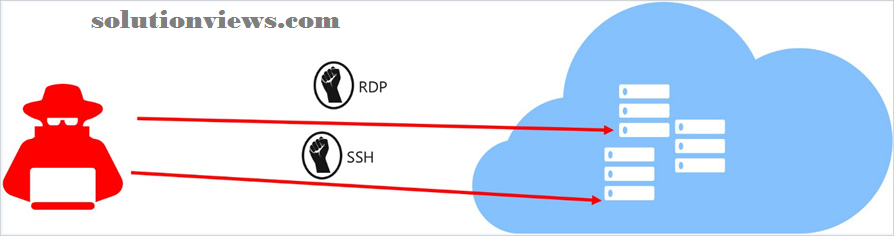
Experts are perceptive that hackers appear to be targeting the Brute Force or Port Scanning on management ports, like RDP and SSH, that are typically left open for directors to access systems in their cloud environments. Microsoft Azure has discharged a brand new feature to forestall simply that.
What is JIT VM Access?
With the new simply in Time Virtual Machine (JIT VM) Access mechanism, proclaimed in Gregorian calendar month 2018, the Microsoft Azure Security Center currently helps shoppers discover and obtain notified of attacks like those mentioned higher than. This new layer of security, that provides you with controlled access to VMs at any time, will considerably cut back this sort of attack exposure by permitting you to deny persistent access.
How will it Work?
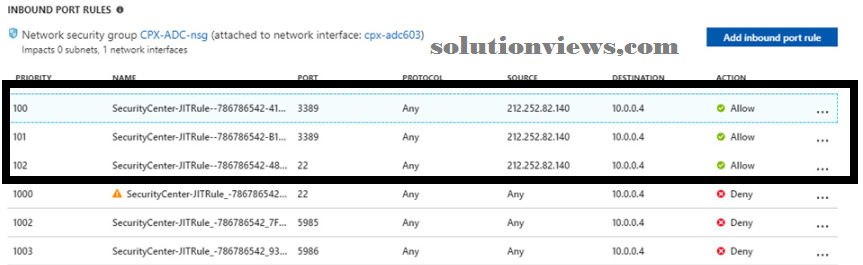
According to the protection policy you created, Azure Security Center will modify just-in-time (JIT) access on your existing VMs likewise as on your new created VMs. once JIT VM access is enabled, Azure security Center closes traffic to the ports outlined by making the Network security cluster rules. If necessary, you’ll be able to request to open the desired port for the approved amount of your time for the science addresses approved for the VM and just for users with the acceptable permissions. Requests are saved within the Azure Activity Log, thus you’ll be able to simply monitor and management access. you’ll be able to additionally modify JIT VM access, set up them with policy, and request access through PowerShell cmdlets. These new options are accessible at intervals the Azure Security Center normal rating tier and are free throughout the primary sixty days.
Let’s begin Configuring:
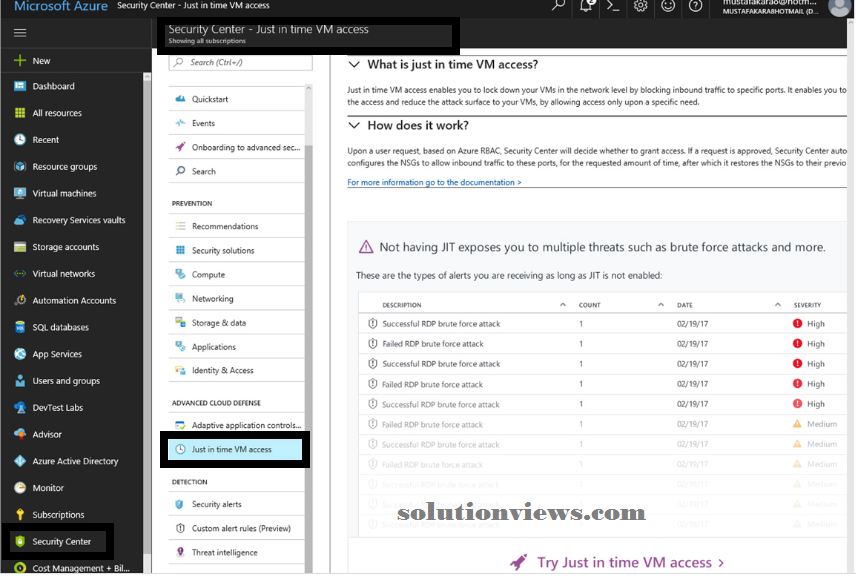
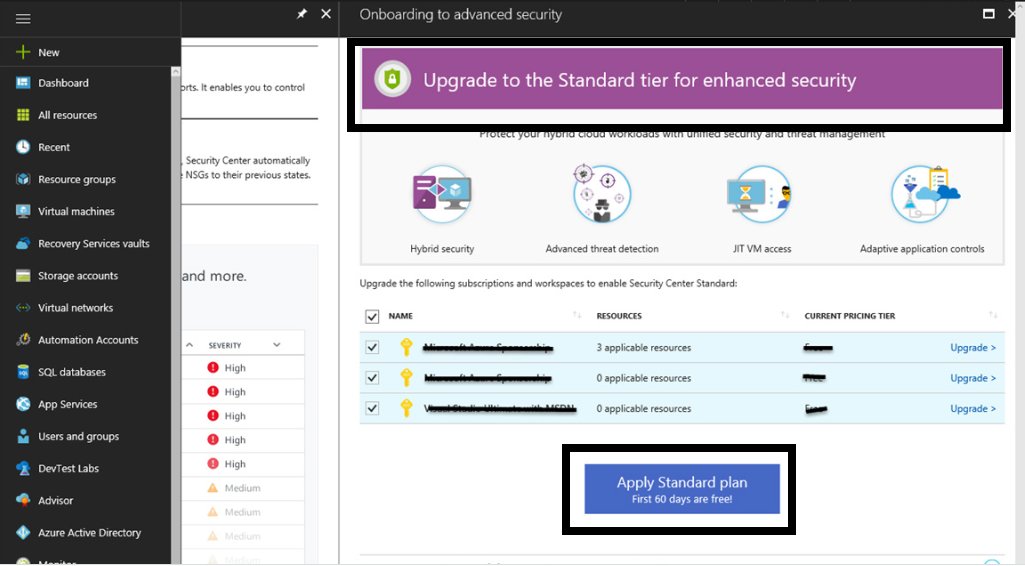
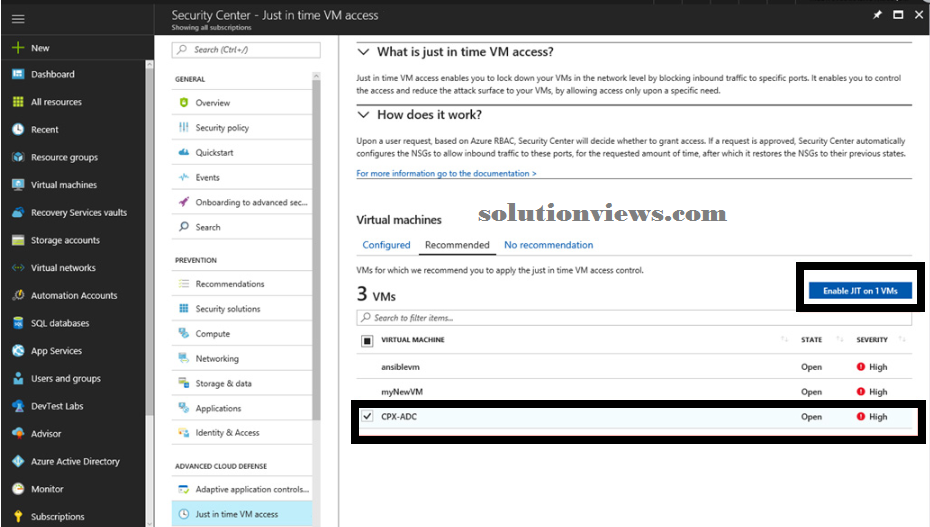
I signed in to the Azure portal on my very own account, clicked on the protection Center then clicked on JIT VM Access.
To get free access for the primary sixty days, press the “Apply normal Plan” button.
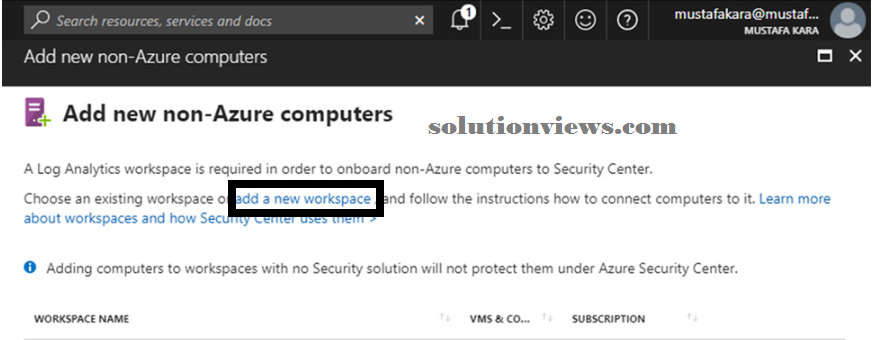
If you have got associate existing OMS space, you’ll be able to use it to store these logs. As I did not have one nonetheless, I created a brand new space.
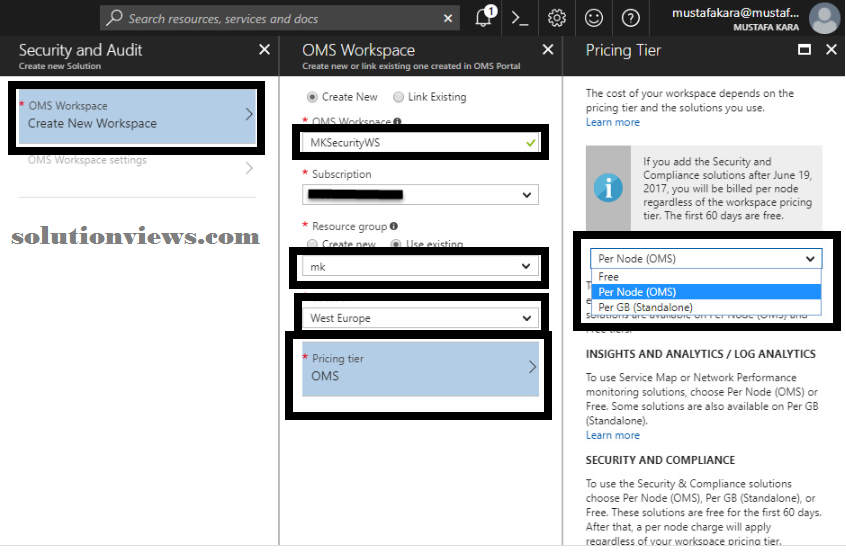
To create a brand new space, enter your OMS space name, choose your subscription, produce a brand new resource cluster or choose the present one, then press the “OK” button to complete the creation method.
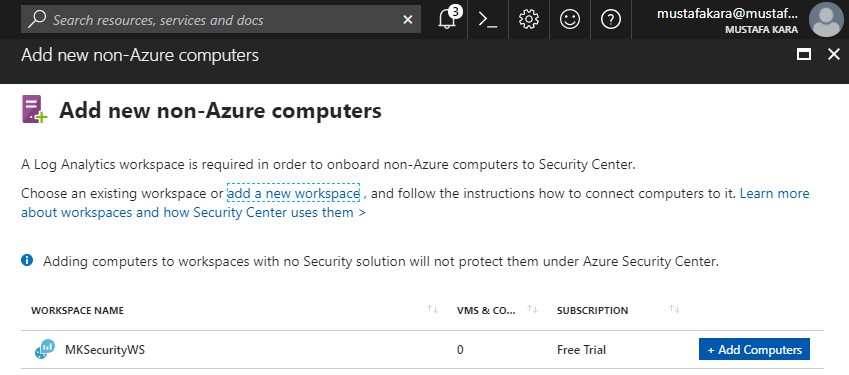
Our OMS space is prepared to record all JIT VM Access activities within the log.
The JIT VM Access is currently able to use. Currently I will choose the machine or machines I need to activate for JIT VM access then press the “Enable JIT” button.
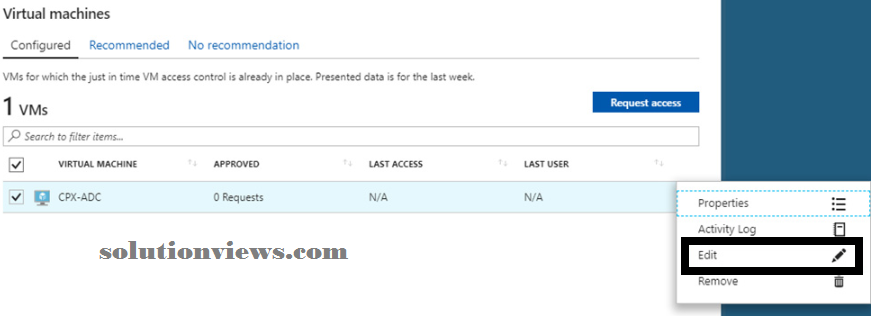
I will set up JIT VM Access currently and outline permissions and times for ports. i choose the VM for this and press the “Edit” button.
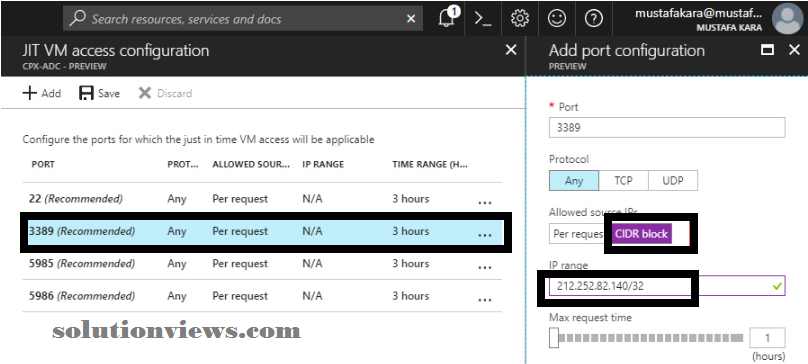
I use this section to open the port, to outline the supply science that’s allowed access. Again, I will set the time vary for access during this section.

Now, I enter my very own real science in 3389 RDP port and permit access for one hour.
Here are the activity logs for the machine that has JIT VM Access enabled.
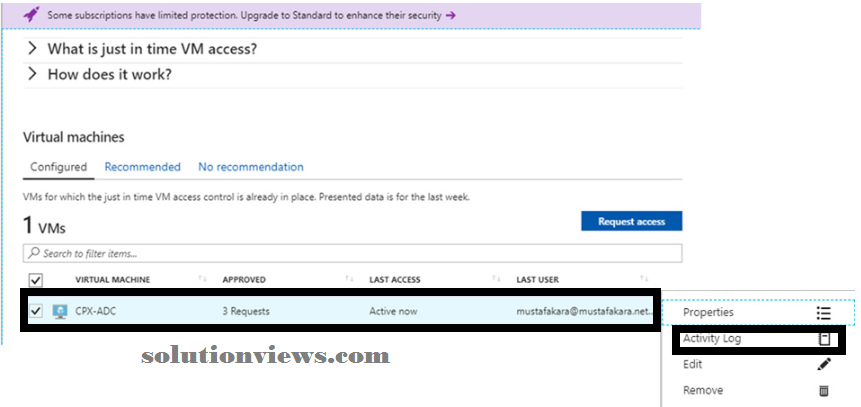
I will see the supply science address and destination science address of the machine within the activity logs. It’s additionally potential to ascertain the rules’ name and port data during this section.