Introduction:
This article explains a way to retrieve information from the info within the ASP. Internet API for retrieving the info we tend to use the rumpus.NET Entity information Model. The Entity information Model is Associate in Nursing entity relationship information model. The Entity information Model works with the SQL and different question Languages designed for invoking the declarative queries and updates in terms of entities and relationships.
The Entity information Model provides links and data for operating with the info utilized by the applications designed on the Entity Framework.
The following is that the procedure for retrieving the info from the info.
Step 1:
First we tend to produce a table and insert some information into this table.
Start SQL Server 2012.
Select “New Query”.
Create a info and a table.
Use the subsequent queries:
create info Demo
use the following Queries:
create table info(ID into IDENTITY PRIMARY KEY, Name varchar(50),Appointment varchar(50),Technology varchar(50), Task varchar(MAX) )
Insert into information values (‘A.P gods’’, ‘Software Developer’,’.NET, Database’, ‘Computer Graphics’)
Insert into information values (‘yashwant Kanitker’,’Programmer’,’.NET, PHP, JSON’,’Let US C’)
Insert into information values (‘E balaguruswami’,’Programmer’, ‘.NET, JavaScript’,’Object destined System’)
Insert into information values (‘R.S, Aggrawal’,’Software Developer’,’ Web API, MVC4′,’Design Analysis and Algorithm’)
Step 2:
Create ASP.NET internet API application.
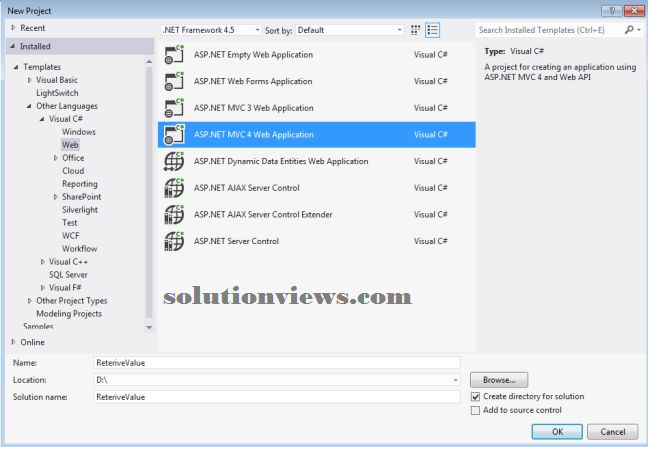
Start Visual Studio 2012.
From the beginning window choose “New Project”.
In the templet Window choose “Installed” -> “Visual C#” -> “Web”.
Select “ASP.NET MVC four internet Application” and click on on “OK”.
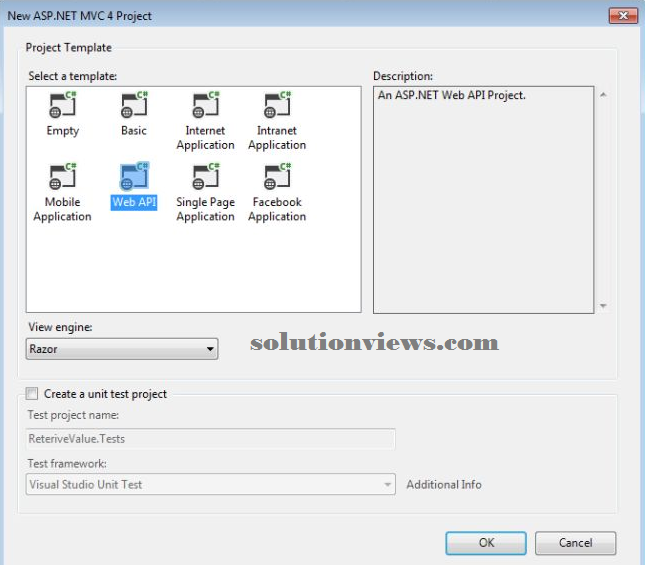
From the “MVC4 Project” window choose “Web API”.
Step 3:
Now add the Entity Framework to our application.
In the resolution mortal.
Right-click on the Models folder then choose “Add” -> “New Item”.
From the window choose “Installed” -> “Visual C#” -> “Data”.
And then choose “ADO.NET Entity information Model”.
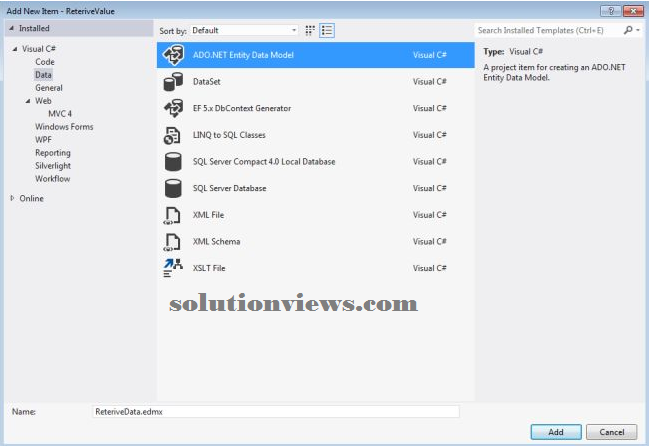
Click on the “Ok” button.
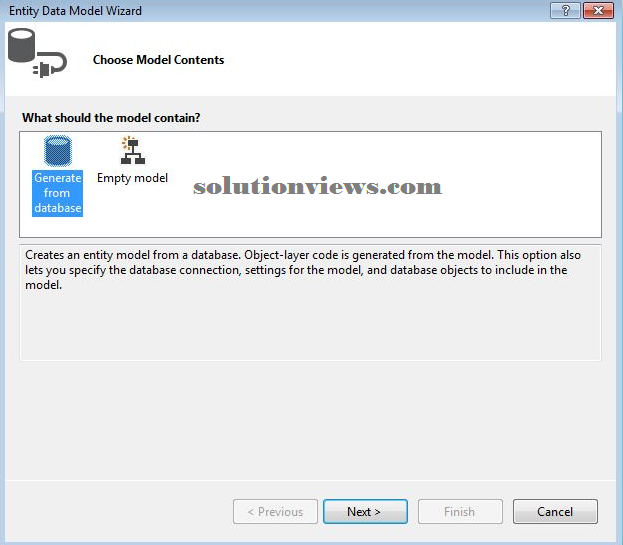
Step 4:
Now open the Entity information Model Wizard.
Click on “Generate from Database”.
Click on “New Connection”.
Enter your server name.
Choose your authentication, here we tend to use the SQL Server Authentication, then we tend to enter the user name and parole.
Select your info.
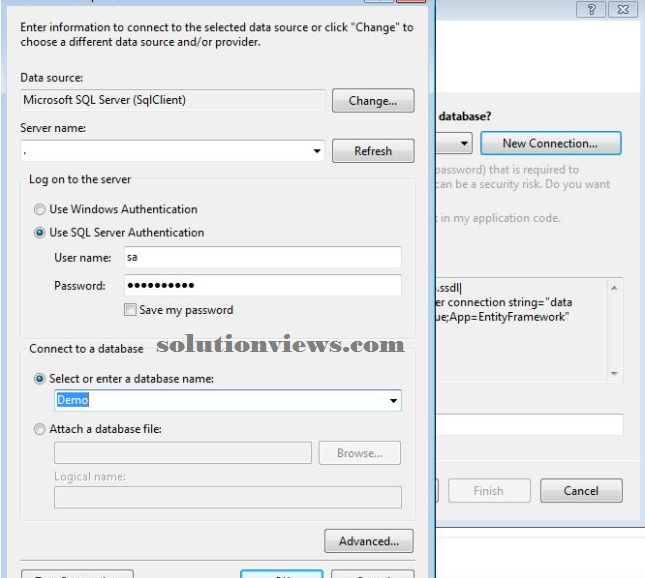
Click on the “Ok” button.
Step 5:
In this step:
We choose the “Yes, embody the sensitive information within the association string.”
Set the name of entity association string within the internet.config file.
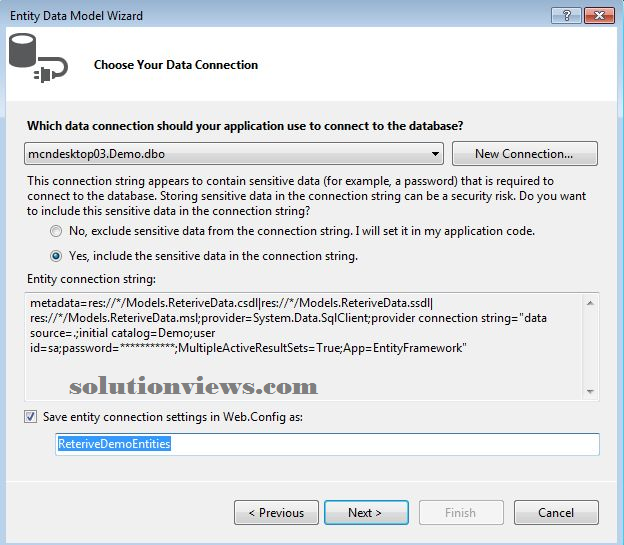
Click on the “Next” button.
Step 6:
In this step:
Choose your table.
Write the name of the Model Namespace
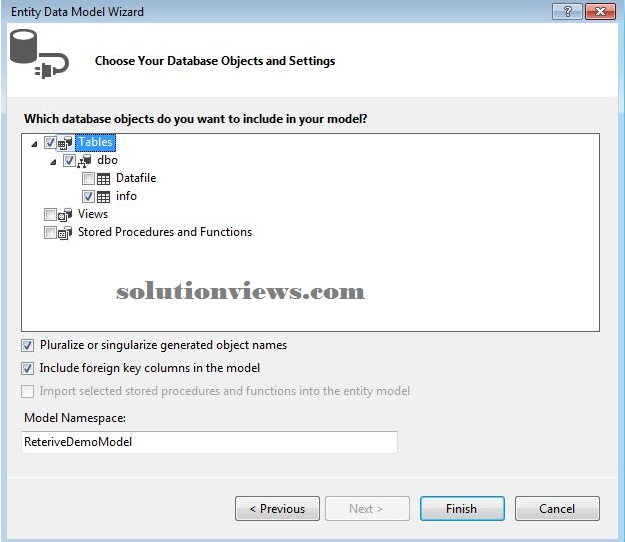
Click on the “Finish” Button.
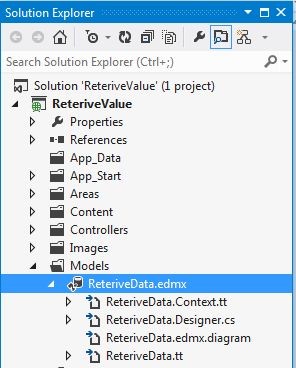
After adding the model, the answer mortal feels like this:
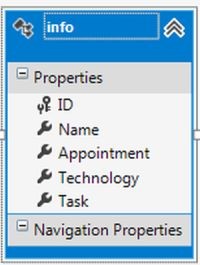
The table diagram appearance as within the following:
Step 7:
Open the house controller.
In the resolution mortal.
Select the Controller folder then choose “Home Controller”.
Enter this code:
using System;

using System.Collections.Generic;

using System.Linq;

using System.Web;

using System.Web.Mvc;

using ReteriveValue.Models;

namespace ReteriveValue.Controllers

{

    public class HomeController : Controller

    {

        ReteriveDemoEntities reterive = new ReteriveDemoEntities();

        public ActionResult Index()

        {

            return View(reterive);

        }

    }

}
Step 8:
In the the “index.cshtml” file:
In the resolution mortal.
Select the “View folder” then choose “Home” -> “index.cshtml”.
Write this code:
@model ReteriveValue.Models.ReteriveDemoEntities
@{

   ViewBag.Title = "Index";

 }
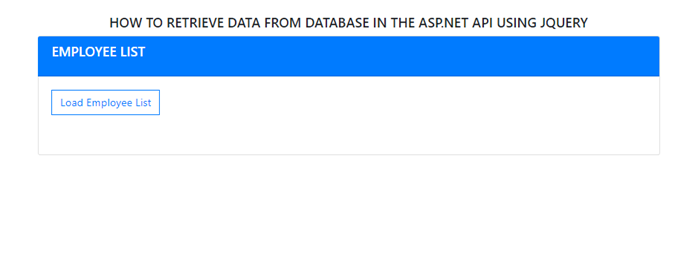
Reteriving Data From Database
 Index
</head>
<body>
<table style="margin-left: 25%; margin-top: 10px; border: 2px solid LightGray;">
 <tr>
 <th>ID</th>
  <th>Name</th>
    <th>Appointment</th>
     <th>Technology</th>
     <th>Task</th>
  </tr>
@foreach (var item in Model.infoes)
{
@item.ID
@item.Name
@item.Appointment
@item.Technology
@item.Task
}
Step 9:
Execute the appliance