If you are obtaining a blue screen on your laptop, during this guide, we’ll assist you to troubleshoot and quickly fix the difficulty on Windows ten.
On Windows ten, a Blue Screen of Death (BSoD) — additionally referred as “blue screen,” “stop error,” or simply “system crash” — can happen once a crucial error that the system is unable to method and repair mechanically.
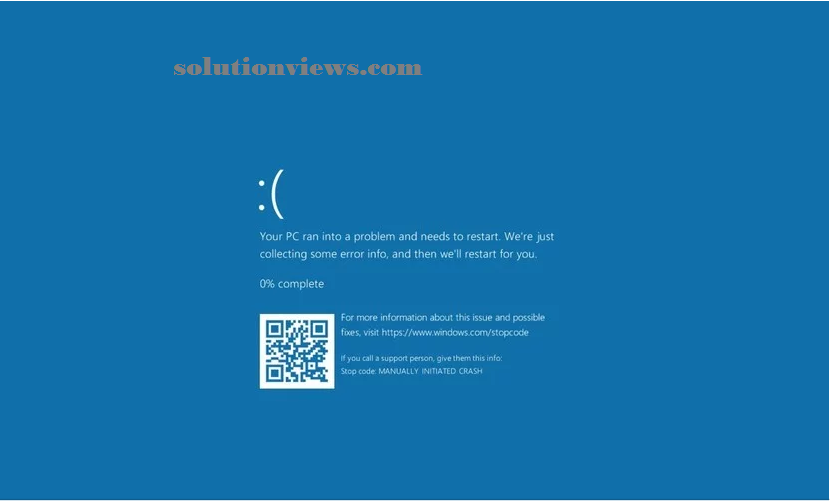
Usually, you’ll see a blue screen whereas upgrading to a brand new version of Windows ten, throughout startup, or suddenly whereas actively victimization the pc, and also the most frustrating issue is that it’s simply a screen with a blue background and a tragic character face while not enough info to work out the matter.
The screen can provide you with a touch message, like “Your laptop bumped into a tangle and wishes to restart. We’re simply assembling some error information, then we’ll restart for you.”
Or general stop error codes (such as VIDEO_TDR_TIMEOUT_DETECTED, PAGE_FAULT_IN_NONPAGE_AREA, CRITICAL_PROCESS_DIED, SYSTEM_SERVICE_EXCEPTION, or IRQL_NOT_LESS_OR_EQUAL) or positional notation code (such as 0x000000D1, 0x0000000A, or 0x0000007B), however they are simply hieroglyphics for many users.
Although stop errors square measure complicated, nearly always may be a downside with a top quality or feature update, buggy driver, incompatible package, or hardware connected issue.
In this Windows ten guide, we’ll walk you thru the steps and potential solutions to mend your device once a blue screen error.
How to fix blue screen issues throughout upgrade on Windows ten
How to fix blue screen issues with desktop access on Windows ten
How to fix blue screen issues while not desktop access on Windows ten
How to fix blue screen issues throughout upgrade on Windows 10:
When upgrading to a brand new version of Windows ten, it is common to envision blue screen errors as a results of Associate in Nursing previous program, third-party security package, or broken installation files. Usually, once a crucial error happens, the setup can rollback the device to the previous installation; however it will not fix the matter (that’s up to you to work out).
If you are obtaining errors throughout the upgrade method, you’ll be ready to fix the matter by uninstalling non-essential apps, clearing out a nasty transfer, disconnecting non-essential peripherals, or playing a clean installation of Windows.
Uninstall apps:
To uninstall any app that may not needed throughout the installation, use these steps:
1. Open Settings.
2. Click on Apps.
3. Click on Apps & options.
4. Select the app which will be inflicting problems and click on the Uninstall button.
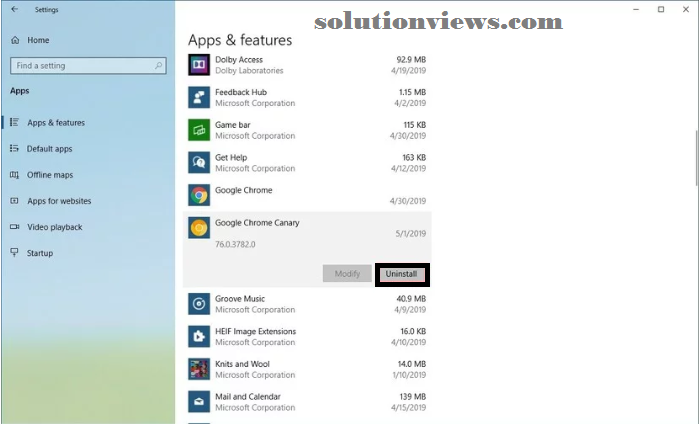
5. Click the Uninstall button once more.
6. Continue with the on-screen directions (as needed).
Once you complete the steps, you’ll got to repeat the steps to uninstall extra apps. Once the upgrade, you’ll be able to set up the apps once more.
Download upgrade files once more:
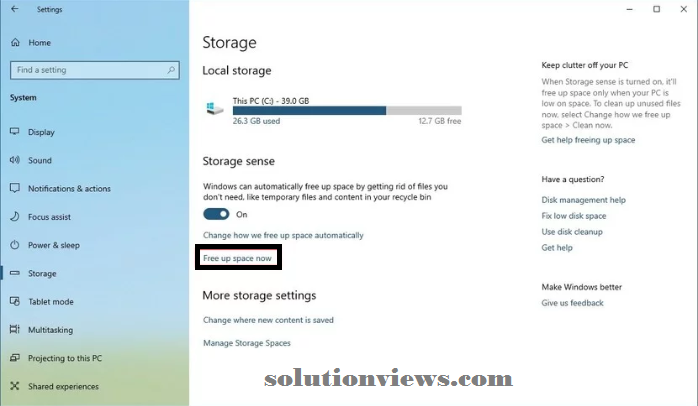
There’s a probability that you are seeing a blue screen due to broken installation files. If this is often the case, you’ll be able to use the Settings app to clear the previous files to permit Windows Update to re-download them once more victimization these steps:
1. Open Settings.
2. Click on System.
3. Click on Storage.
4. Under the “Storage sense” section, click the liberate area currently possibility. (If you are running the Windows ten might 2019 Update, below the “Local Disk” section, click the Temporary files item.)
5. Clear the preselected choices.
6. Check the Temporary Windows installation files possibility.
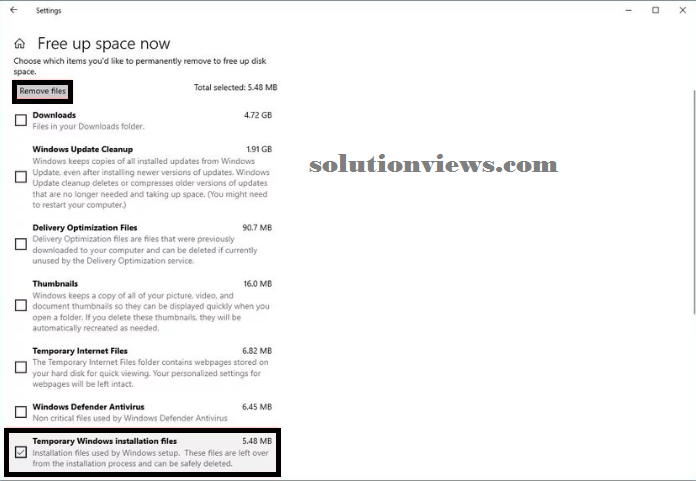
7. Click the take away files button.
8. After you complete the steps, attempt to upgrade to the most recent version of Windows ten victimization Windows Update.
If the matter is going on employing a USB installation media, then use the Media Creation Tool once more to recreate the bootable media.
Disconnect supererogatory hardware:
You may additionally see a blue screen error as a results of a hardware connected downside. To minimize the possibilities of errors, before continuing with a Windows ten installation, disconnect all non-essential peripherals, as well as external laborious drives, printers, secondary monitors, phones, and different USB or Bluetooth devices.
The upgrade method solely needs a mouse, keyboard, monitor, and a web association.
After the upgrade, you’ll be able to reconnect the devices to your laptop. If you continue with an equivalent downside, you’ll got to install the most recent service program from your manufacturer support web site. within the case that no fix appears to figure, then it may be a compatibility issue or the hardware might not work.
Perform a clean installation:
Perhaps one amongst the most effective ways that to forestall Blue Screen of Death errors throughout Associate in Nursing upgrade is to erase everything and begin from scratch with a recent copy of Windows ten playing a clean installation.
Before you’ll be able to proceed, you have got to create certain that your device will begin from USB, which suggests that you simply might have to alter the boot order within the essential Input/Output System (BIOS) or Unified protractile code Interface (UEFI) code on your device.
Typically, this method needs touch one amongst the perform keys (F1, F2, F3, F10, or F12), the ESC, or Delete key as shortly because the device starts. the sole downside is that these settings are going to be totally different per manufacturer, and even by laptop model. therefore certify to ascertain your device manufacturer’s support web site for a lot of specific directions.
While within the code interface, realize the “Boot” section, and tack together the boot order to begin from the USB bootable drive, and save the new changes.
To perform a clean installation of Windows ten, use these steps:
Warning: this is often a friendly reminder that you’re going to be creating changes to your current setup, which might cause issues and even knowledge loss if you do not have sex properly. It’s suggested to create a brief full backup before continuing.
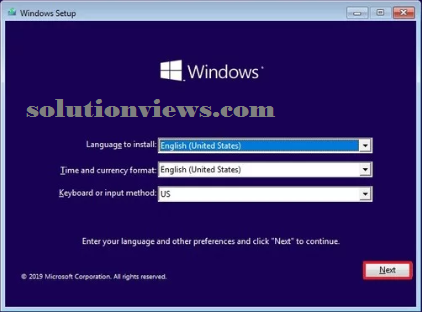
1. Start laptop with USB flash drive.
2. On “Windows Setup,” click succeeding button.
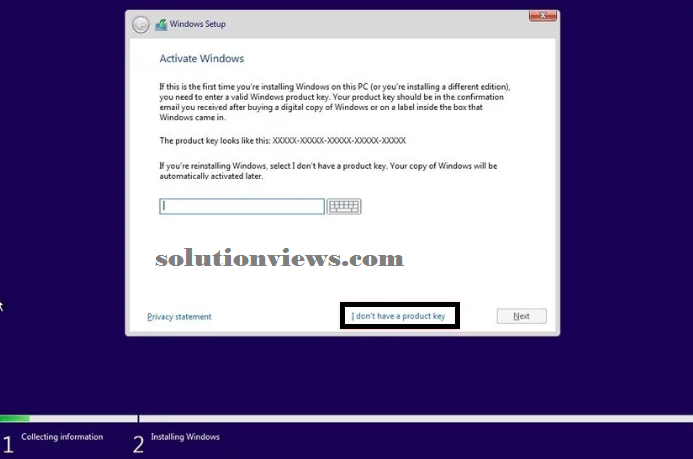
3. Click the Install currently button.

4. Click the I do not have a product key choice to continue (assuming that your laptop was already properly activated).
5. Select the edition of Windows ten (if applicable). This choice should match the edition your license activates.
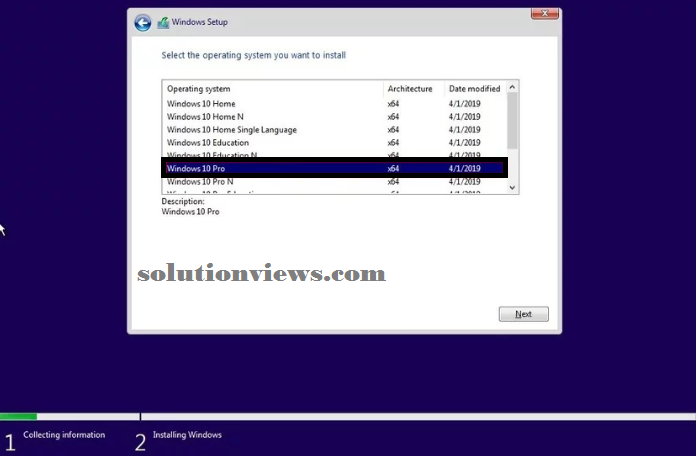
6. Click succeeding button.
7. Check the I settle for the license terms choice to continue.
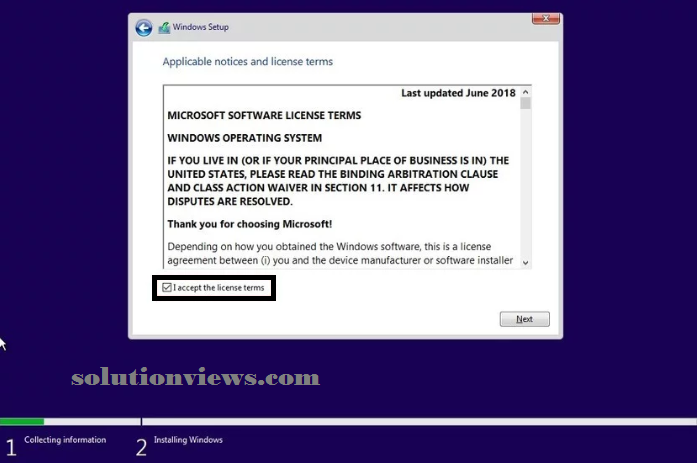
8. Click succeeding button.
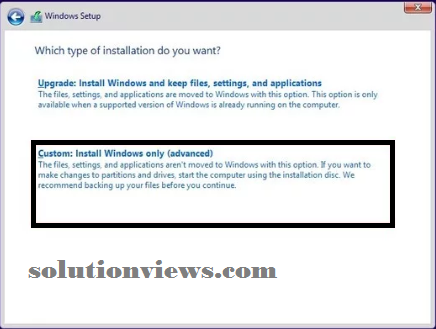
9. Click on the Custom: Install Windows solely (Advanced) possibility.
10. Select the partition with the present installation of Windows (usually “Drive 0”), and click on the Delete button to get rid of the partition from the disc drive.
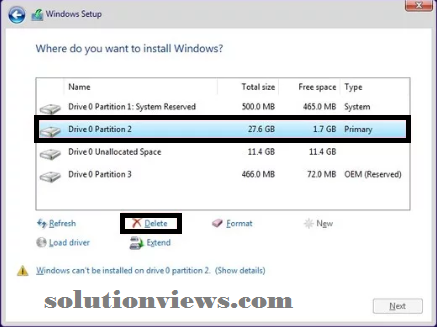
Quick tip: If you have got multiple partitions, on the first disc drive (Drive 0), choose and delete every one of them. The setup can recreate the specified partitions mechanically throughout the installation method.
11. Select the empty drive labeled “Drive zero Unallocated area.”
12. Click succeeding button.
Once you complete the steps, the setup can install a clean copy of Windows ten minimizing the possibilities of obtaining a blue screen error. once the installation, you’ll have to continue with the on-screen directions to complete fitting the installation making a brand new account and choosing your most well-liked settings.
2 Comments on “How to troubleshoot and fix Windows 10 blue screen errors ( Part 1 )”