Using the Azure Portal to Create Alerts for SQL Database Instances
Using the SSMS tool, creating a SQL database on Azure and accessing it from on-premises
Access the Azure Portal
On the left side of the Azure Portal, click “SQL Databases” (Home -> SQL Database)
As shown below, click on the Tab SQL Database and type the name of the database for which you want to set alerts:
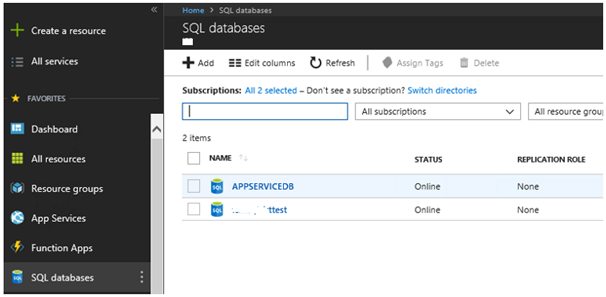
In my situation, I’ve chosen a database with the name “test”.
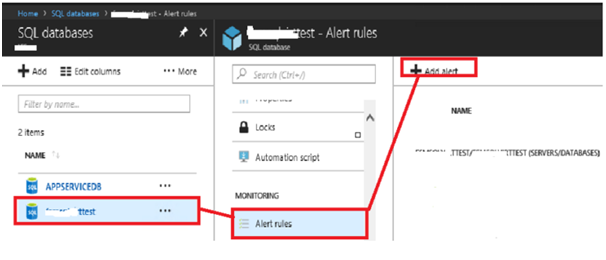
Select the Database “test”
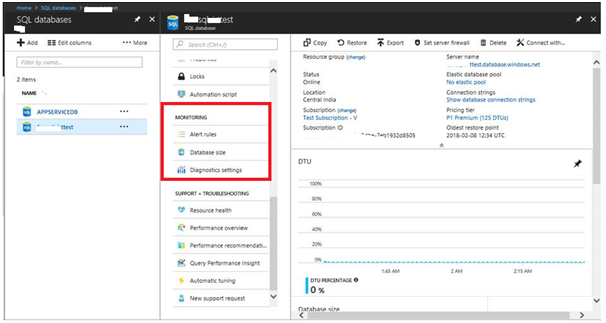
We’ll be redirected to a different page –> Home > SQL database > DB Name
With a full description, the key Tabs are located in the center of the page.
Overview
Settings
Monitoring
Assistance + Troubleshooting
As seen below, navigate to the “MONITORING” tab:
Configuration of Alert Rules in the Monitoring section
Simply click on Alert Rules.
You will see + Add alert in the center of the page.
Select the Add Alert option.
Add an alarm rule > Home > SQL databases > Database name – Alert rules
When you click Add an Alert, you’ll be sent to a screen containing the parameters that need to be supplied, as illustrated below:
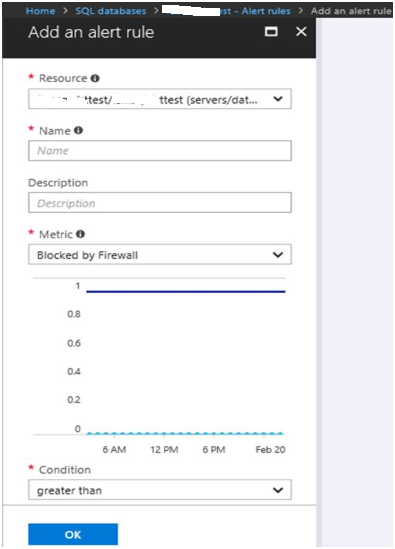
Here, we can update the database’s name according to your specification
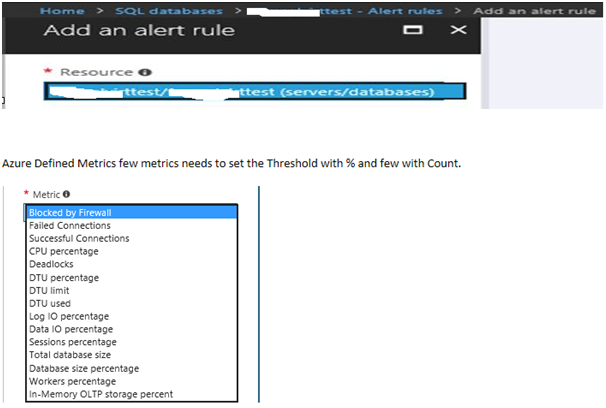
Now we need to set the Alerts sequentially.
Creating Notifications:
Alert 1: Firewall is preventing access
Nota bene: When developing alerts, ensure that we utilize the appropriate vocabulary for identification. Although we have fifteen metrics, we will create two alerts using the Threshold method, one with a count and one with a percentage. Additionally, we must establish two alerts: one for Warning and one for High.
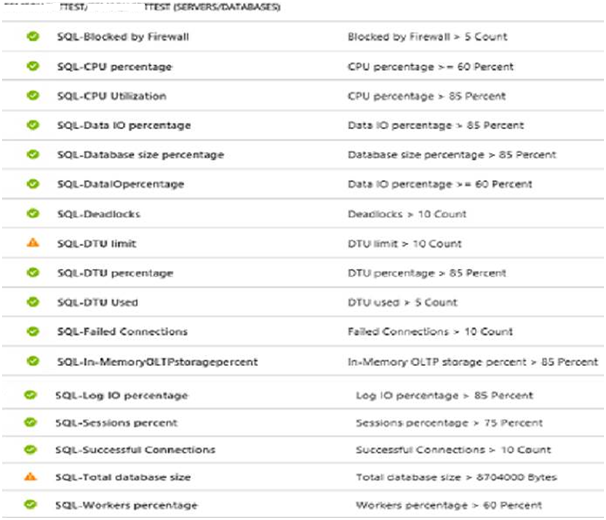
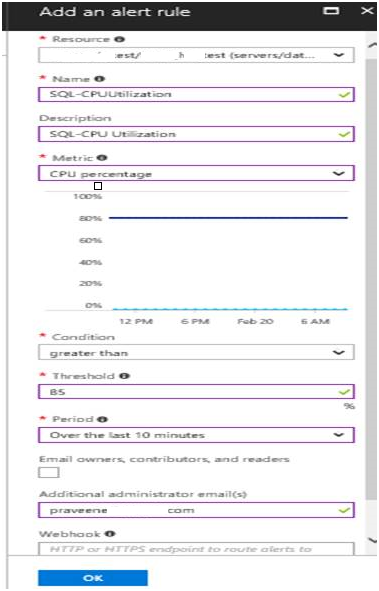
For the following High Alert conditions:
Condition >85 is classified as a “High Alert” condition.
As a Warning, if the condition is greater than 60. (And these can be changed per the client requirement)
Below is an example of an alert created using the Threshold Count
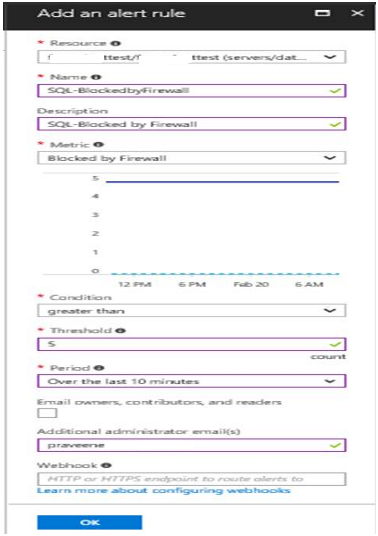
Select OK.
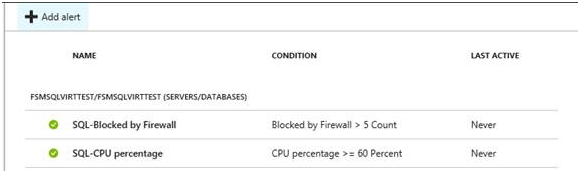
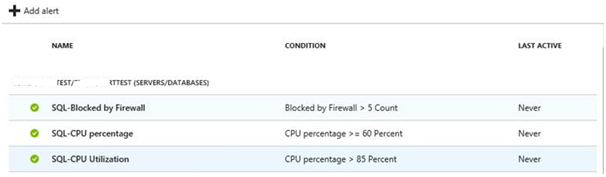
After clicking OK, the Alert status will be created as seen below:

Consider the creation of alerts for High and Warning levels by utilizing circumstances and selecting Threshold values.
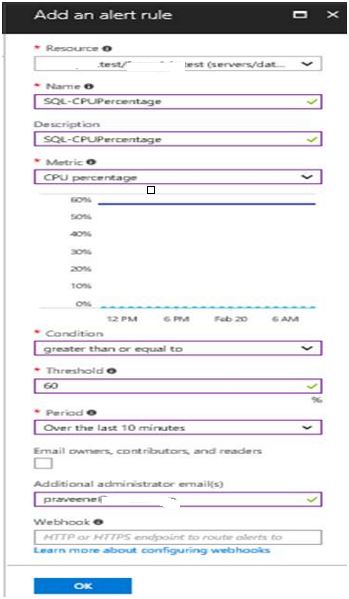
Select OK.
After clicking OK, the Alert status will be created as seen below:
CPU Utilization Alert (High)
Select OK.
After clicking OK, the Alert status will be created as seen below:
Yes, this concludes the process of creating SQL Alerts via the Azure Portal.
Now, based on the server’s performance, a ticketing tool alert will be triggered.