The Windows Server 2016 product family, along with the free Hyper-V Server 2016 offering, has been released. Now that the dust has settled and tens of thousands of words have been written about the new features, I’d like to provide a more straightforward introduction to Microsoft’s free standalone hypervisor offering. This post is not about those new features; it is about getting you started so you can begin experimenting with them.
What Is the Difference Between “Hyper-V Server” and “Hyper-V”?
The phrases “Hyper-V” and “Hyper-V Server” are frequently used interchangeably, causing considerable consternation. Microsoft has come up with some pretty creative code names for pre-release goods, but whenever you see a final Microsoft product with an interesting name, it was either acquired from another source or coined by the gaming division. Allow me to make a little distinction between these two concepts.
Hyper-V: Hyper-V is Microsoft’s hypervisor of type 1. One basic truth distinguishes it from everything else: Hyper-V does not ship independently. It is always bundled with another item. It is most appropriately classified as a “feature.” “Component” could also be used. Hyper-V is available in the following locations:
- Microsoft Windows 10
- Microsoft Windows Server
- Server Hyper-V
Hyper-V Server: Hyper-V Server is a self-contained product that is available for download straight from Microsoft. According to reports, its true name is now “Microsoft Hyper-V Server,” not simply “Hyper-V Server.” That, I’m prepared to wager, will not catch on. This product does not require you to make any purchases. Unless something changes from the prior version, you will also be able to upgrade easily to the following version.
Windows Server 2016 can be installed using either the Server Manager graphical user interface (GUI) or via Windows PowerShell. In both circumstances, the user must be an Administrator or a member of either the Administrators or Hyper-V administrators groups.
Let us begin.
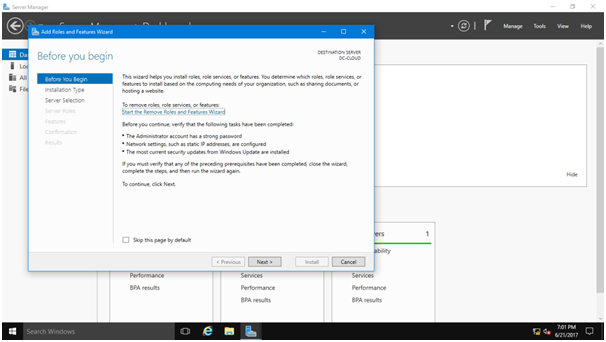
1 – Select Server Manager from the Start menu. Click Add roles and features on the Dashboard.

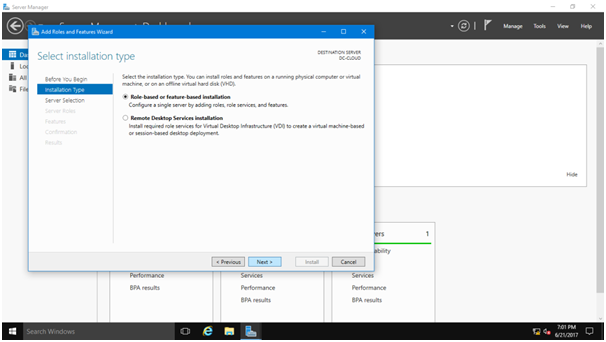
2 – On the before you begin page, click Next. Select either role-based or feature-based installation and click next.
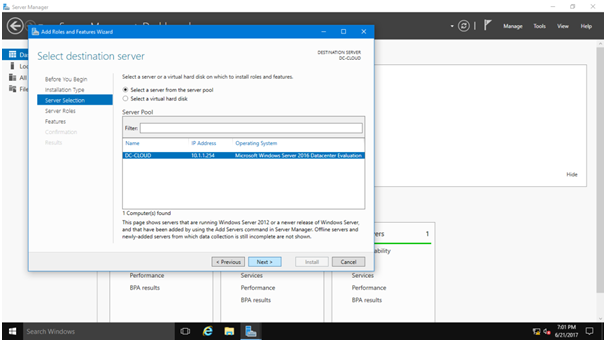
3 – In the subsequent box, click on the Select a server from theserver pool option and choose the server on which you want to deploy the Hyper-V server role. After selecting the server, click next.
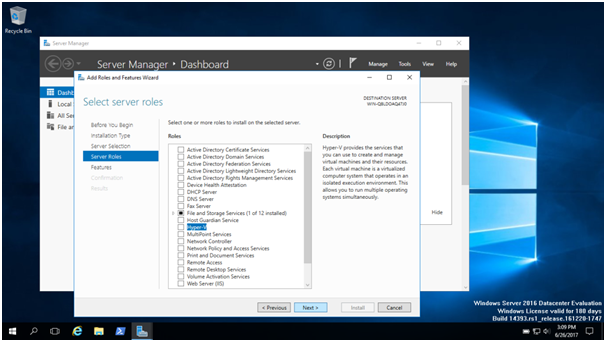
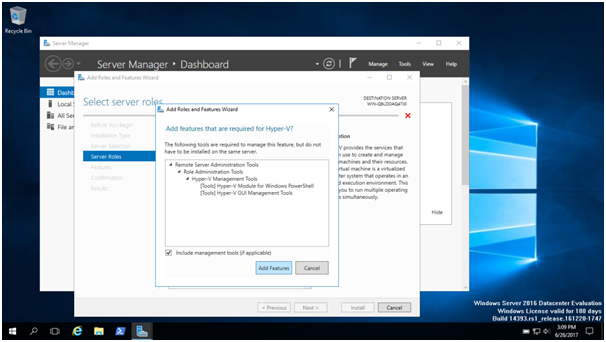
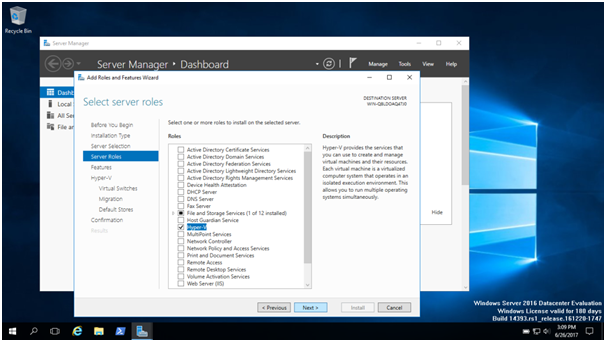
4 – Select the Hyper-V role; a box titled “Add Hyper-V-Required Features” will appear. Ascertain that the Include Management Tools are enabled, and then click Add Features.
Then click Next.
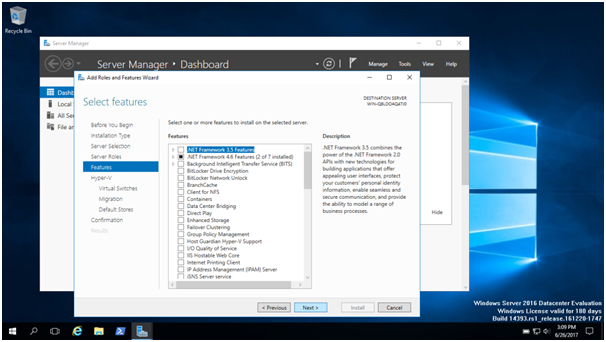
5 – On the Select server roles page, click Next. Then, on the Features page, simply click Next because no extra features are required.
6 – After reading the information on the Hyper-V role, click the Next button.
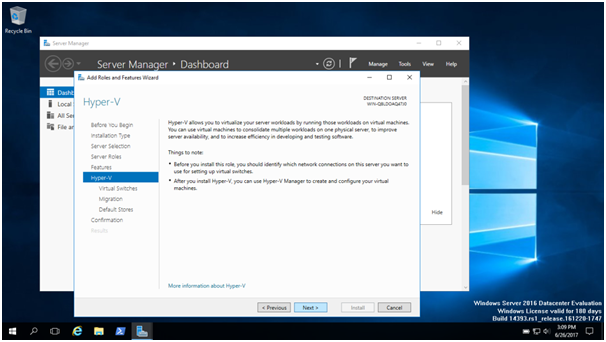
7 – The following step is to create Virtual Switches. Select the actual network devices on your system that will be virtualized.


Virtual machines will communicate with the physical network via the designated physical network adapter (if you have more than one available). Following the suitable network adapter selection,
8 – To proceed to the Migration screen, click Next. Leave the default options for migration alone and click Next.

Additionally, these parameters can be adjusted at a later date. Similar to VMware’s vMotion, Live Movement enables real-time migration of virtual machines to another physical host (server).
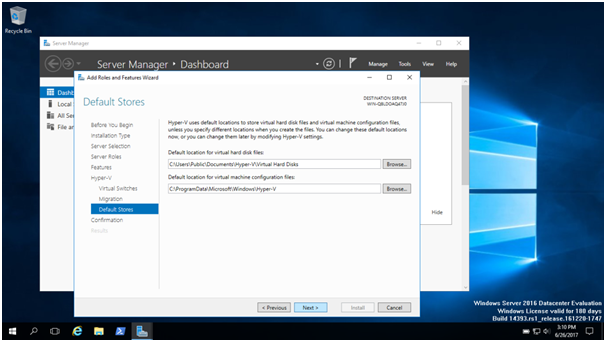
9 – Under Default Stores, you can specify the location of all virtual machines’ hard disc data and configuration files. This is the location of all virtual machine data. Additionally, an SMB shared folder (Windows network folder), a local drive, or even a shared storage device can be configured.
We’ll leave the default settings in place and click the Next button.
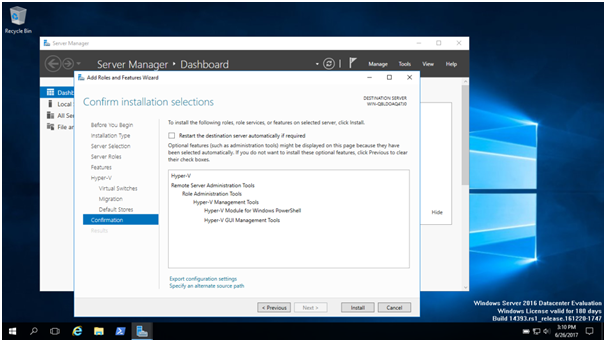
10 – The final screen allows us to review our configuration and then click on the Install button to begin the installation.
11 – Windows will now immediately begin installing the Hyper-V function and will update the installation window in real time, as illustrated below.

12 – Login following a reboot. Wait for the Server Manager to load (it will start automatically), then the hyper-V installation will continue automatically. Once completed,

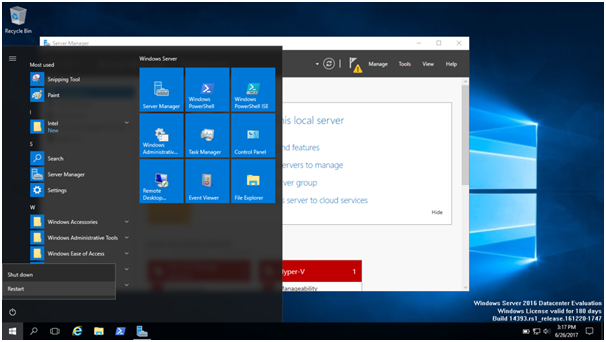
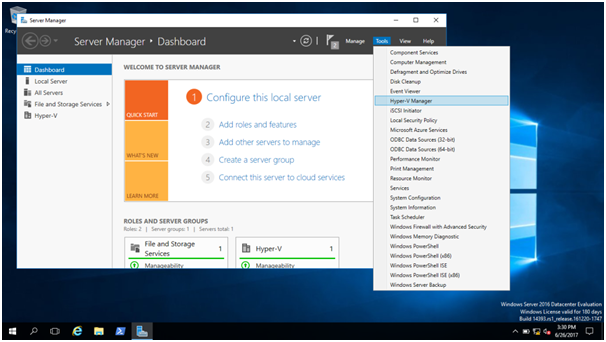
13 – From Server Manager, select Tools Hyper-V Manager.
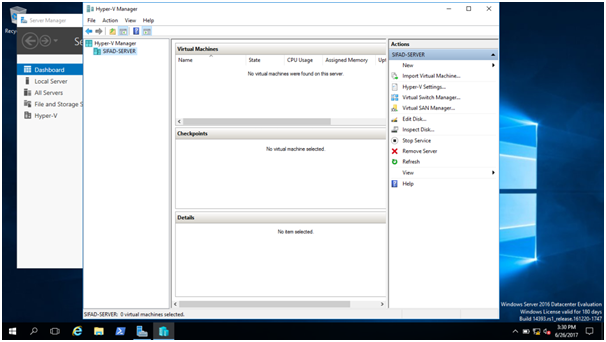
14 – Demonstrate Hyper-V Server Manager to you.
HYPER-V ROLE INSTALLATION USING WINDOWS POWERSHELL
The Hyper-V role can also be installed via Windows PowerShell. Surprisingly, the installation process begins with a single command.
1 – In PowerShell, type the following cmdlet to install the Hyper-V server role on Windows Server 2016.
Install-WindowsFeature –Name Hyper-V –ComputerNameSifad-Server –IncludeManagementTools –Restart