What is DHCP Guard in Hyper-V?
Enable DHCP Guard Network adapters configured with the DHCP Guard option will have any DHCP reply packets from the VM discarded by the Hyper-V switch. This means that if the VM is claiming to be a DHCP server when it shouldn’t be, although the server still sees the DHCP requests from clients and answers them, those responses never reach the network. Consider a multitenant situation. It’s crucial that one tenant not pretend that it’s a DHCP server and affect the others. The ideal practice is to enable this functionality on all virtual machine network adapters and disable it only on those virtual machines that are known as DHCP servers.
Infrastructure Requirement:
1 Hyper-V Server (VM-HOST)
1 DHCP Server (DC-CLOUD)
1 SUB DHCP Server (SUB-01)
Client PC running Windows 10 (CLIENT-10)
Let’s get started.
01 – Use Windows PowerShell to activate DHCP guarding
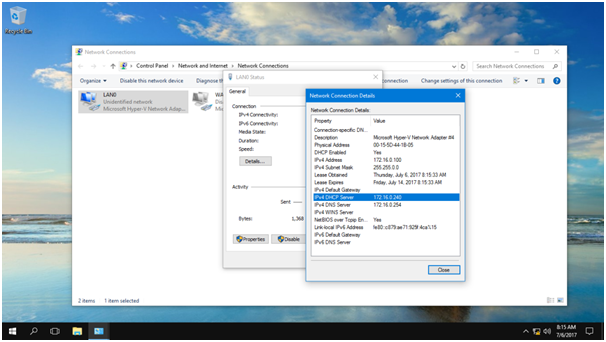
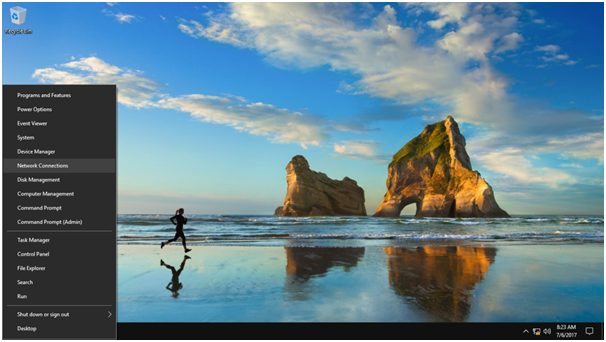
1 – On CLIENT-10, open Network Connections by pressing Window Key + X and choosing Network Connections.

2 – In the Network and Sharing Center window, click the LAN 01 hyperlink.
3 – In the LAN Status window, click Details. Note that it now has a DHCP Server IP Address of 172.16.0.254 (DC-CLOUD)
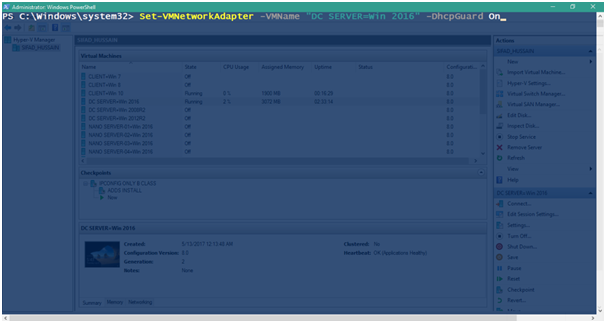
4 – On the physical host machine (VM-HOST), select Start, and then click Windows PowerShell.
At the Windows PowerShell prompt, type the following commands to block VM-HOST from issuing a DHCP lease, and then press Enter after each line:
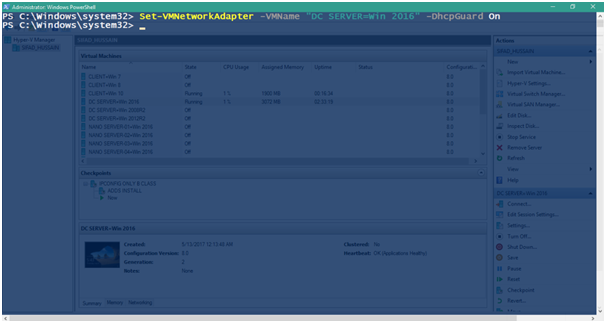
Set-VMNetworkAdapter-VMName “DC SERVER=Win 2016”-DhcpGuard On
5 – At the Windows PowerShell prompt, type the following commands to block VM-HOST from issuing a DHCP lease, and then press Enter after each line:
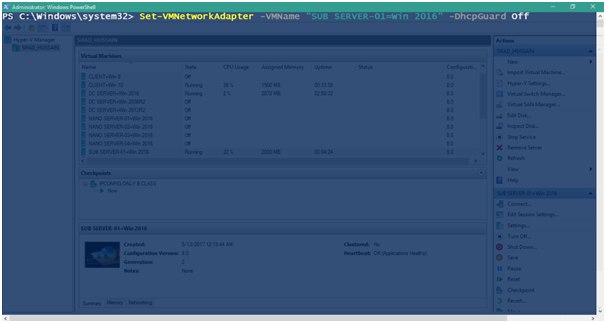
Set-VMNetworkAdapter-VMName “SUB SERVER-01=Win 2016”-DhcpGuard Off
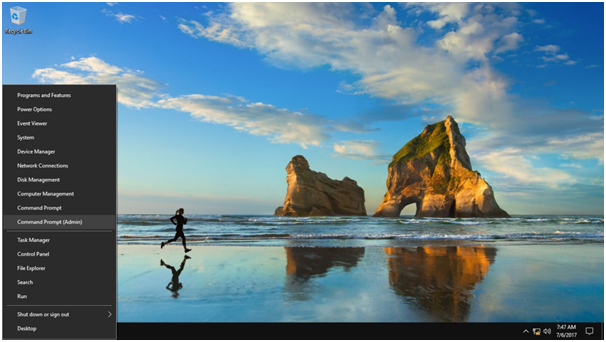
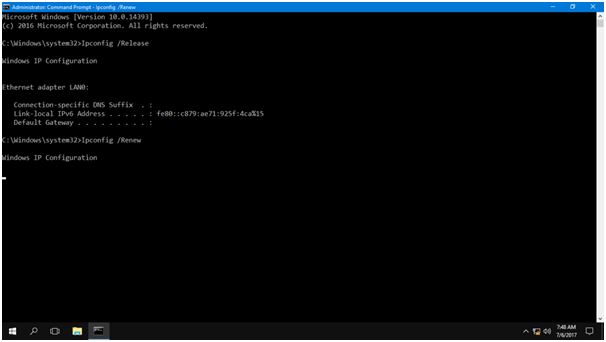
6 – On CLIENT-10, right-click Start, and then choose Command Prompt (Admin)
7 – In the Command Prompt window, type the following commands, pressing Enter after each line:
IPConfig/release
IPConfig /renew
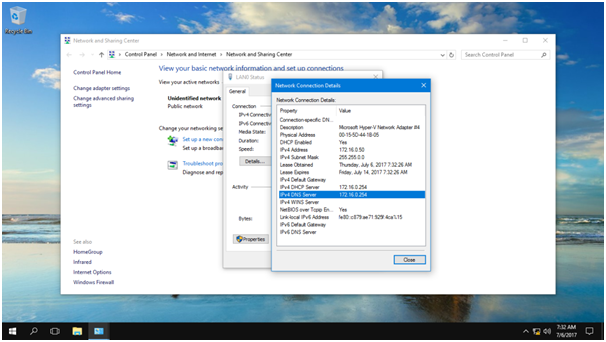
8 – On CLIENT-10, open Network Connections by pressing Window Key + X and choosing Network Connections.
9 – In the Network and Sharing Center window, click the LAN 01 hyperlink.

10 – In the LAN 01 Status window, click Details. Note that it now has a DHCP Server IP Address from SUB-01.