Windows
Server 2016 brings with it a wealth of recent practicality, as well as new and upgraded options that create it easier for directors to modify and manage High handiness on the DHCP service.
The High handiness mode
was doable within the past through the
cluster services, however it
wasn’t the simplest issue to put a network service on prime a cluster (especially on inheritance in
operation systems like Windows
2000/2003 then forth).
Introduced
in Windows Server 2008, the DHCP Failover feature permits the High handiness of
the service while not victimization clusters services.
My favorite state of affairs is
for those customers World Health
Organization have 2 domain
controllers per web site, and people 2 servers square measure accountable for the
authentication, time services (NTP), DNS, and currently DHCP. We
are able to give High handiness with simply 2 servers per location on all network services, wherever an easy network outage with the most web site won’t impact the native users.
This
article was written victimization Windows
Server 2016, and you’ll be speculative what has modified since the previous unharness on the DHCP service.
Well, the most important modification is that the removal support for
NAP during this new unharness. The DHCP servers running
Windows Server 2016 can now not enforce NAP
policies, and therefore the DHCP
scopes cannot be designed as NAP enabled.
Installing the DHCP
Service:
The installation method is easy and
frequently doesn’t need a restart. we are able to install victimization graphical interface victimization these following steps.
- Open Server Manager.
- Click on Add Roles and options.
- In the before you start, a welcome page are going to be displayed. Simply click on Next.
- In the choose Installation kind, leave the default setting, that is Role-based or feature-based installation, and click on Next.
- In the choose destination server, the native server ought to be listed, and click on Next.
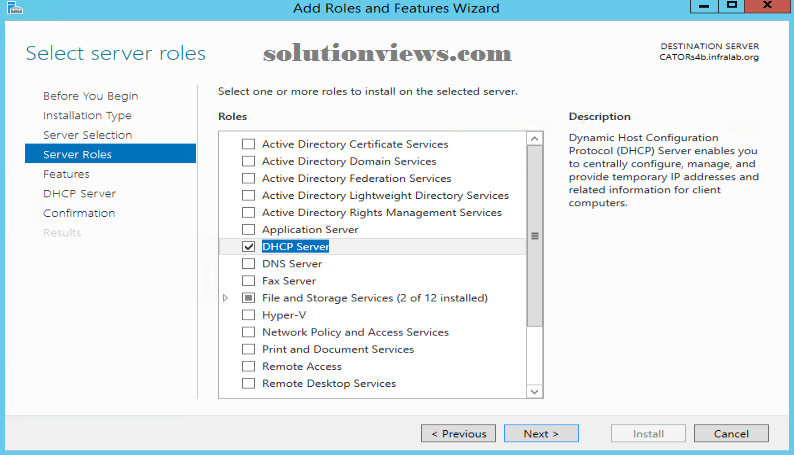
- In the Server Roles, choose DHCP Server. a brand new panel are going to be displayed. Click on Add options. Back to the wizard, simply click next.
- In the options, click next.
- In the DHCP Server, a short description of the DHPC service is going to be shown. Simply click next.
- In the Confirmation, an outline of what’s progressing to be deployed is going to be listed. Click on Install and look forward to the completion, and so click shut.
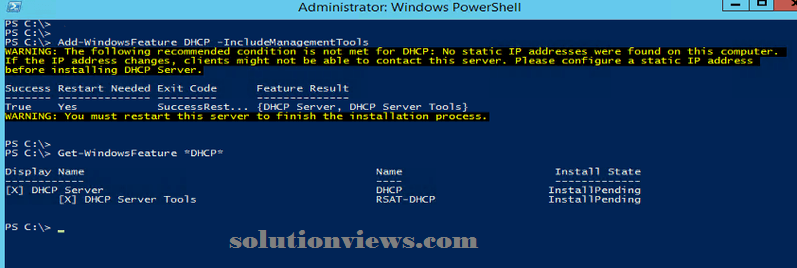
If you’re a PowerShell fan, simply open the PowerShell prompt as administrator and sort within the command below, and that we will save all the steps delineated within the previous section.
If a restart is needed here, you may be told by a message box. If not, let’s keep going. once deploying the role, the administrator should set up one or a lot of scopes, that essentially can outline the lease time, informatics vary to distribute to the devices, exclusion list, then forth.
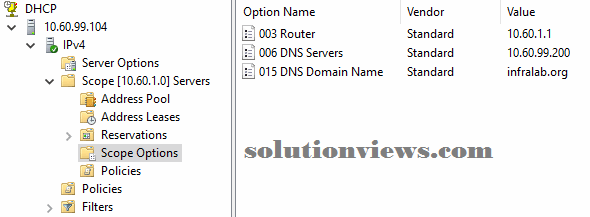
For this text, we tend to square measure progressing to produce one scope referred to as Servers on the primary DHCP Server and that we can outline Router, DNS Server, DNS name at the scope level, and that we can outline the vary from ten.60.1.100 to 10.60.1.150 for the sake of simplicity.
Configuring the DHCP Failover:
The DHCP failover is designed through a wizard which will be started by right-clicking on any given existent scope and so set up Failover.
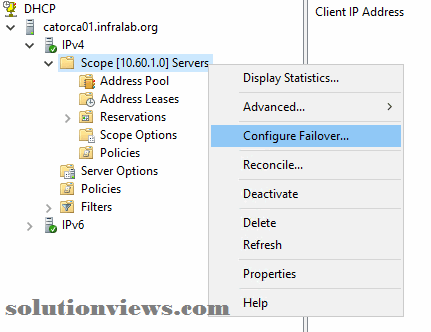
The first page of the DHCP Failover wizard permits the administrator {to choose to picket pick out} all scopes designed on the existent server (default setting) or select a selected scope. We’ll leave the default settings and so click Next.