This article will walk you through the process of installing and configuring a DNS server on Windows Server 2016/2012 R2. We’ll also demonstrate how to make forward and reverse lookup zones. For starters, we’ll examine what the DNS service is and what it’s used for.
DNS (Domain Name Mechanism) is a system for determining a host’s IP address from its domain name and vice versa. DNS server—the DNS server is a network service that offers and maintains DNS functionality. The DNS server could be in charge of the zone where the corresponding machines are located. Because the DNS system is hierarchical, if the DNS server is unable to determine the IP address of the host based on the domain name, it can forward the request to the upstream server.
The DNS server role is usually installed at the same time as the Active Directory domain controller role. You can deploy the DNS server role separately if you don’t need AD.
Important! Make sure your DNS server has a static IP address before installing.
Let’s get started.
The quickest method is to perform the following PowerShell command (with administrator access) to install the DNS server role in Windows Server 2016:
Install-WindowsFeature DNS -IncludeManagementToolsYou can also install the DNS server role from the Server Manager GUI. Open Server Manager and click on Add Roles and Features.
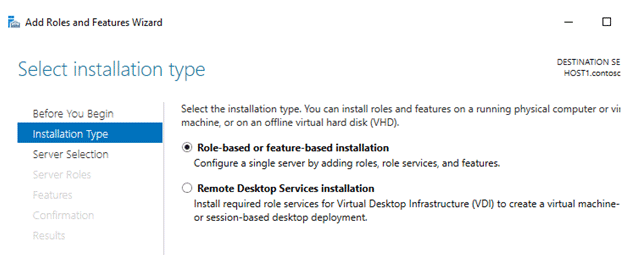
Select Role-based or feature-based installation option and click on Next.
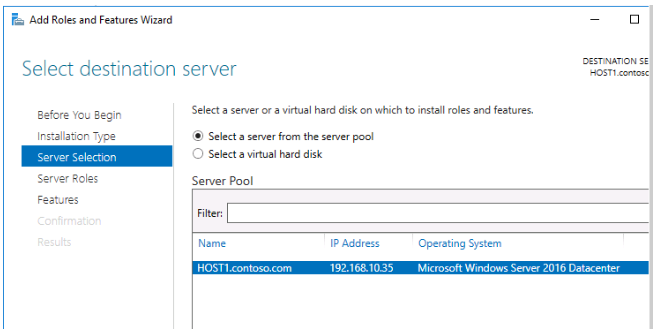
Here you need to select desired server you’d like to install DNS Server (usually this is the current server).
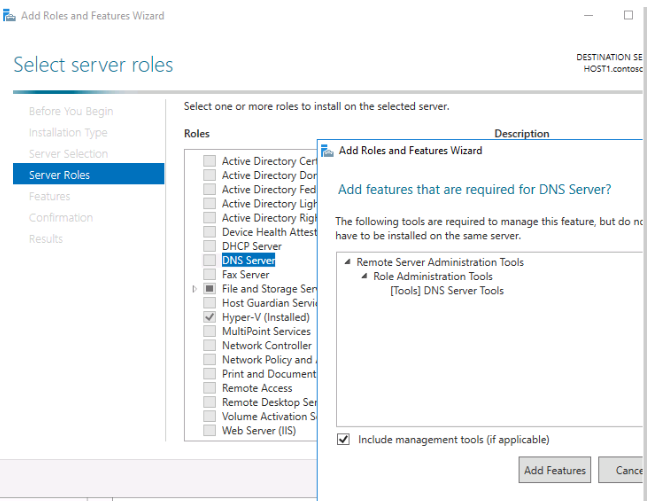
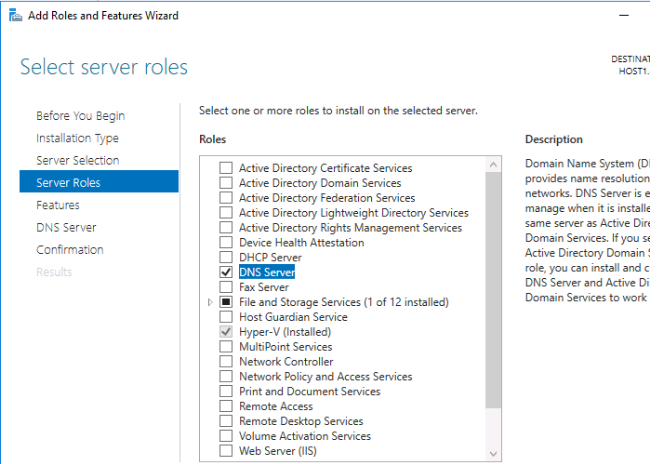
Select DNS server from the Server Roles list and click Next. The DNS administration panel and PowerShell DNS module will be installed automatically if you click Add Features on the popup window. These tools cannot be installed if you want to control this DNS server remotely.
Now you can see that item DNS is checked.
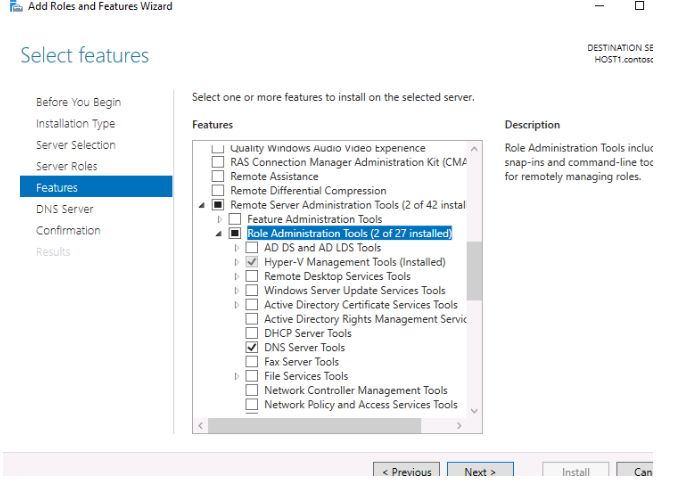
No additional features required for this step, but we want to be sure that DNS Server Tools is already selected. To check this, click on Remote Server Administration > Role Administration Tools. Then click on Next.
Confirm and press install

Installation process started, it may take few minutes.
DNS Server Installation is successfully completed, click on Close.

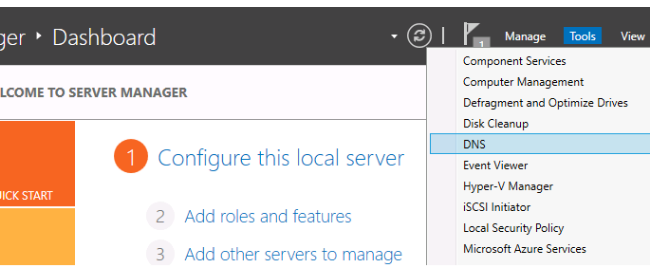
As a result, the DNS server’s server role has been installed. You can now set up your DNS Server. Click Tools in the upper right corner of Server Manager and select DNS from the drop-down list to start DNS server management tools.
To open the zone list, select your server on the left side of the DNS Manager window.
On your DNS server, there are currently no zones setup. This server is referred to as caching. Zones are portions of the namespace that the server is in charge of. To convert a name to an IP address, forward lookup zones are employed. On the other hand, the reverse lookup zone matches the IP address with the hostname. The presence of a reverse lookup zone on the DNS server is not required, although it is simple to set up and enables complete DNS functionality.
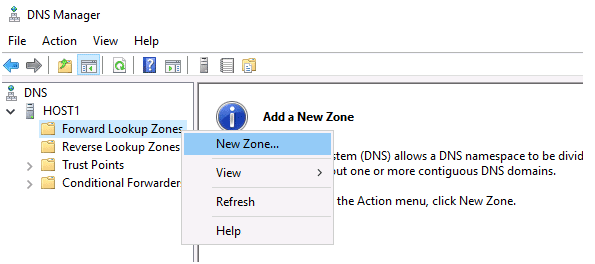
To open the New Zone Wizard, right-click on Forward Lookup Zones and select New Zone from the context menu.
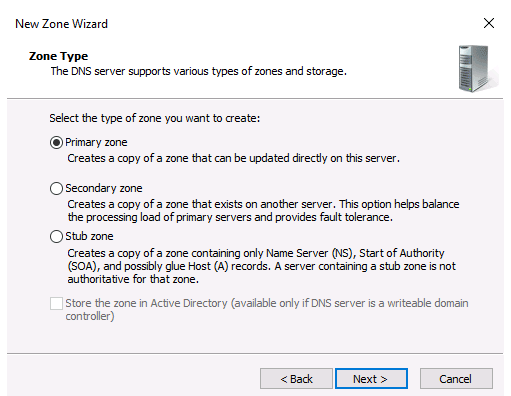
In this window click Next.
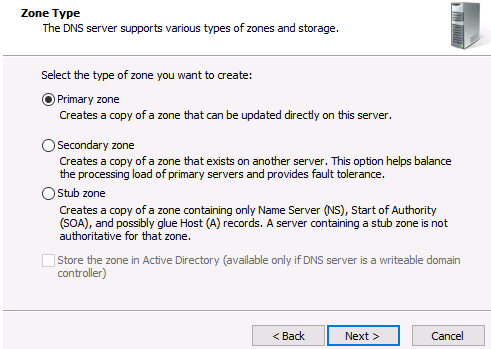
You can choose the type of DNS you want to use in this stage. The primary zone will be on your server, while the secondary zone will be on a different one. In big networks, the secondary zone is utilised for load balancing. To proceed, select Primary zone and click Next.
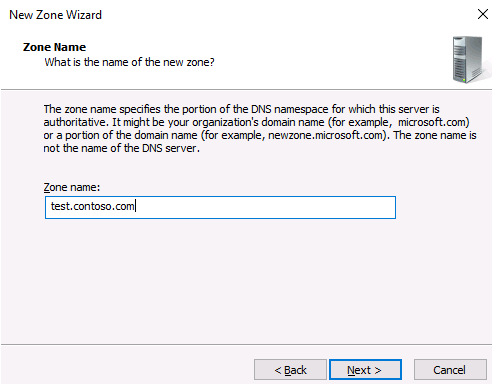
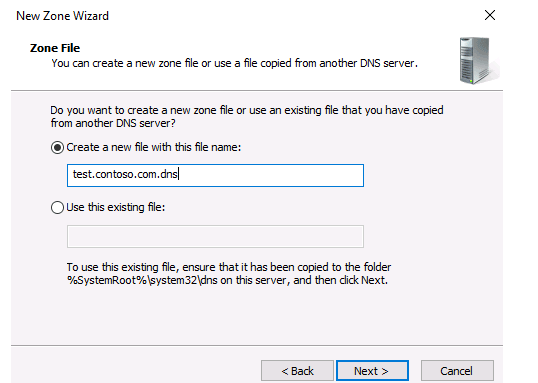
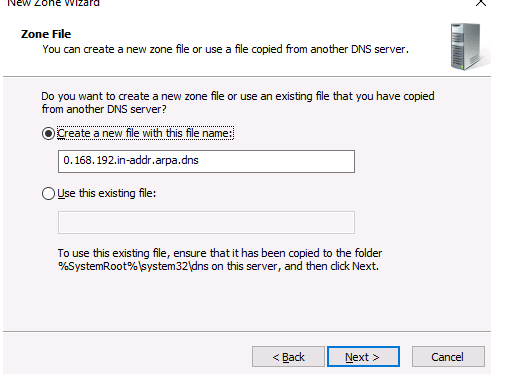
Enter any name for new zone file and click on Next button.
Specify the name of the zone file.
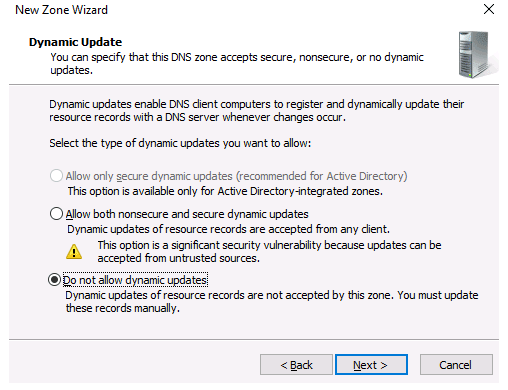
DNS clients can use dynamic updates to automatically register their resource records in the DNS database, but if the network is tiny, we can update the DNS database manually. Allowing dynamic updates is encouraged, but only if DNS will be used only on your local network. Otherwise, the “New Zone Wizard” will alert you that this item may pose a security concern.
Simply click Finish in the next window.
That’s all there is to it; the forward zone has been established. Adding DNS records to the zone is how the zone is set up. DNS records come in a variety of shapes and sizes. Consider the following DNS record types:
- A-record (AAAA-record)—matches the hostname and IP address;
- CNAME-record—used to forward to another name;
- MX—mail entry, points to mail servers;
- NS—points to DNS server.
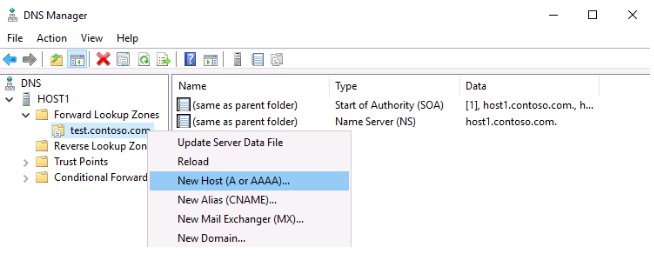
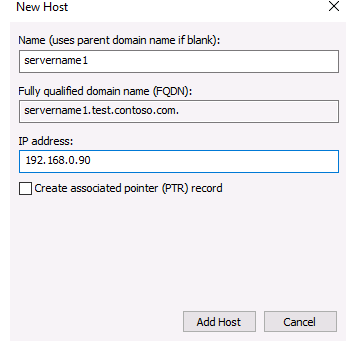
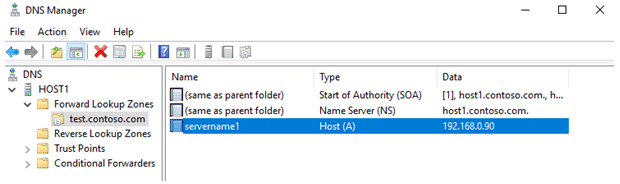
In the appropriate areas, type the name and IP address of your DNS Server, and then click Add Host.
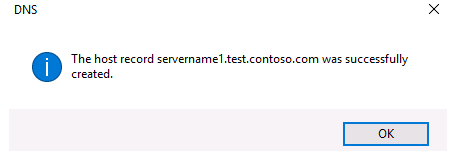
The node has been created, according to the message.
The host record was created successfully.
You can also create an A record using PowerShell:
Add-DnsServerResourceRecordA -Name 'client1' -ZoneName 'test.contoso.com’ -IPv4Address 192.168.0.100As you can see on the right side of the DNS Manager window, the new host is now created. You can create records for client computers in exactly the same way.
Reverse Lookup Zone should now be included. Right-click on Reverse Lookup Zone and select New Zone from the action menu to open the New Zone Wizard.
Next, follow the same instructions as for the Forward Lookup Zone, and then click Next.
To proceed, select Primary zone and click Next.
Here you need to select the type of IP-address, check on IPv4 and click on Next to continue.

In Network ID field enter the first three octets of your DNS Server IP-address.
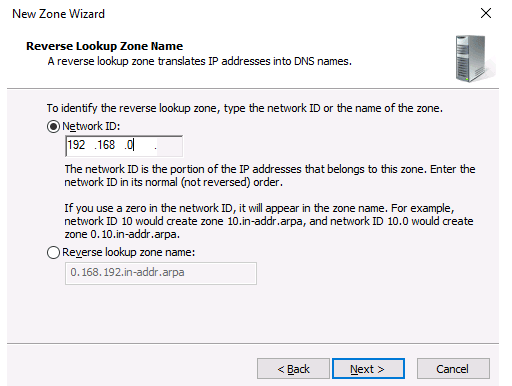
click on Next.
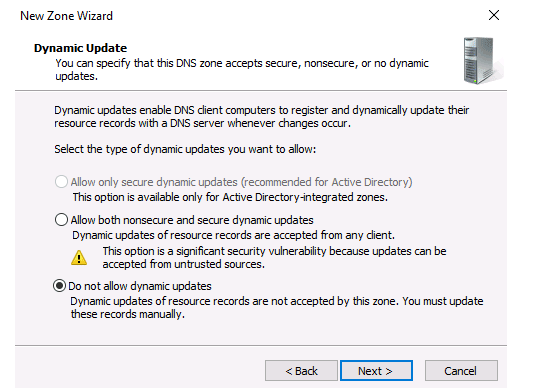
Check Do not allow dynamic updates and press Next.
After pressing the Finish button, your DNS server will be configured and ready to use.
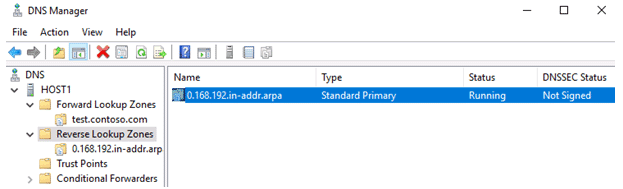
Reverse Lookup Zone is now created, as you can see on the right side of the DNS Manager window.
In order to obtain domain name or IP address mapping using the command nslookup:
Nslookup client1.test.contoso.comDon’t forget to check which DNS server is configured in the network interface’s settings (it should be, respectively, the IP address of the current server).
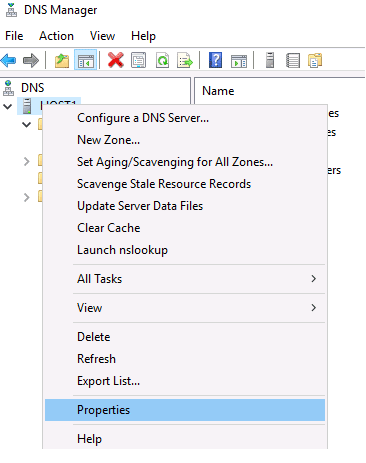
DNS Forwarders must be configured in order for a DNS server to resolve addresses in other zones. To do so, go to your server’s properties in the DNS Manager panel.
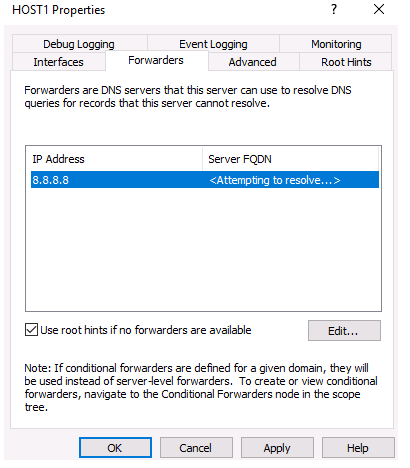
Go to the Forwarders tab, click the Edit button and add the address of the external DNS server to which you want to forward requests (for example, 8.8.8.8).
You can also configure DNS Forwarders using the command:
Add-DnsServerForwarder -IPAddress 8.8.8.8 –PassThru