Configure roles/features on nodes for prime convenience
- Server manager → Add roles and options.
- In the choose installation kind page, choose Role based mostly installation.
- Select destination server for this role.
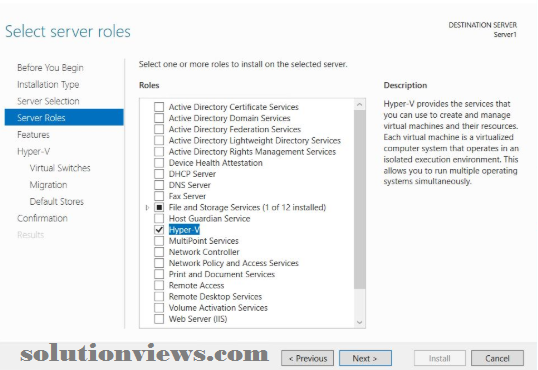
In the list of roles displayed, choose Hyper-V .The ‘Add options that area unit needed for Hyper-V window’ is displayed. This window shows the dependencies that may be put in. Click Add options.

5. The choose options window is displayed next. Choose Failover clump. The options that area unit needed for Failover clump can appear within the next window. This window shows the dependencies that may be put in with this feature. Click Add options.
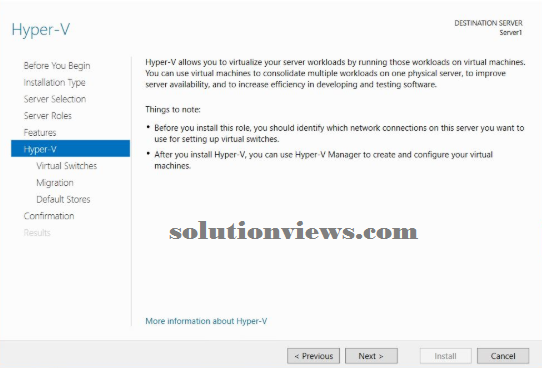
Next, the Hyper-V window is displayed
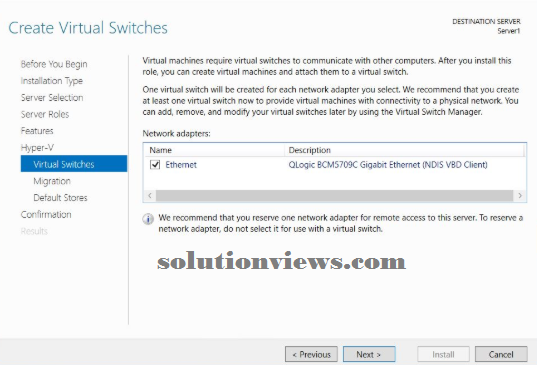
The produce Virtual Switches window is displayed. In Network adapters, choose the network that you simply wish your virtual machine to use for the cluster. If you’ve got multiple NIC’s listed here, select the acceptable ones.
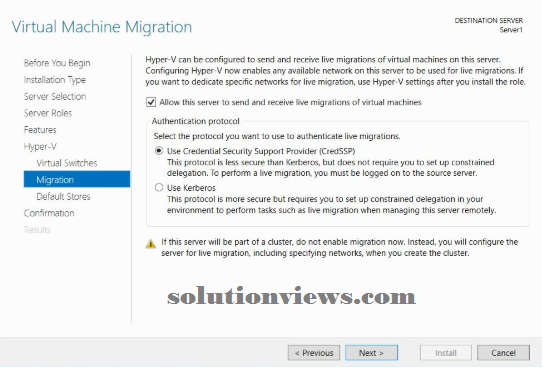
8.The Virtual Machine Migration window is displayed. Select “Allow this server to send” and “Receive live migrations of virtual machines”. this enables the VM to transfer between your nodes wherever needed.
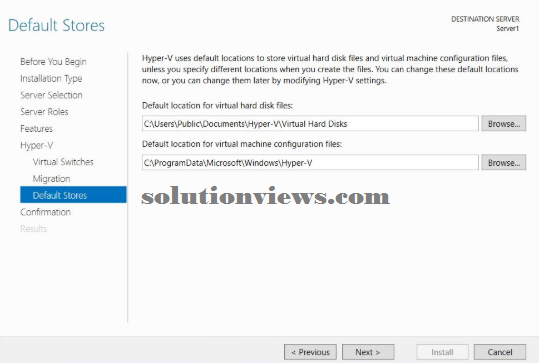
9. The Default Stores window is displayed. Don’t modification the default stores.
- Confirm your installation alternatives and click on Install.
10.Connecting to iSCI network drives
- Start the iSCI instigator and hook up with your 2 SAN drives:
- Click begin → Windows body Tools → iSCI instigator.
- Ensure the drives area unit set to permit co-occurring connections. this can be designed on your SAN. Certify you’ve got granted access to your 2 cluster servers.
- Connect to the SAN drives:
Open the iSCI instigator → Targets tab→ Enter the IP address for the SAN.
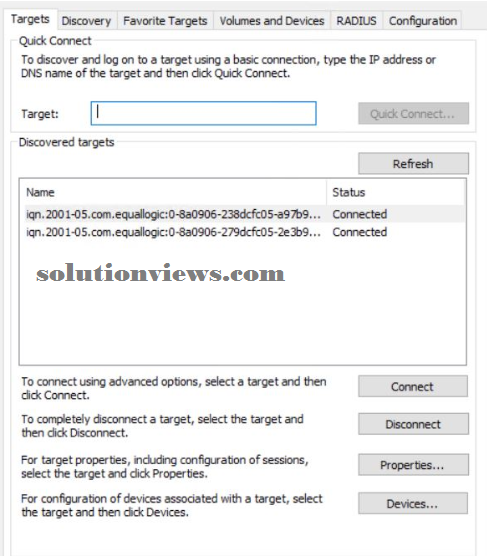
- Click fast Connect. Your drives area unit displayed.
- Highlight a drive, then click hook up with hook up with every drive.
- When a drive is connected, click done.
Click the Volumes and Devices tab.
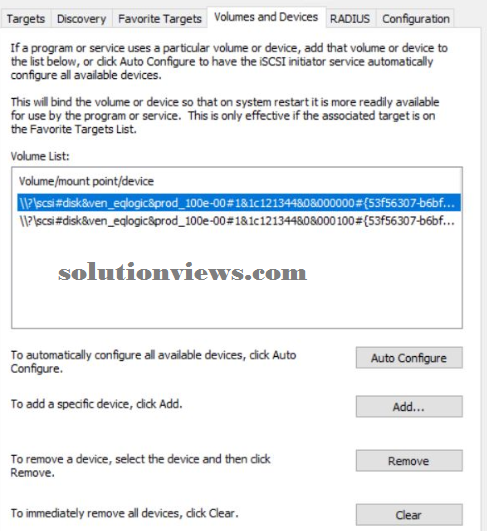
Click Auto-configure → OK. Once you area unit connected on the primary machine, click begin → Windows body tools → laptop Management → Disk Management.
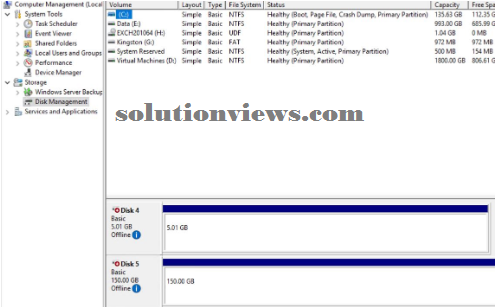
- Bring the disks on-line
- Right-click the disk range.
- Select on-line.
- Repeat the higher than step for the second drive.
- Initialize the disks:
- Right-click the disk range next to at least one of the new drives.Select
- Initialize disk.
- In the box that seems, make sure that each your new disks have a tick next to them.
- Set as MBR.
- Click OK.
- Configure the new drive:
Right-click the primary drive.
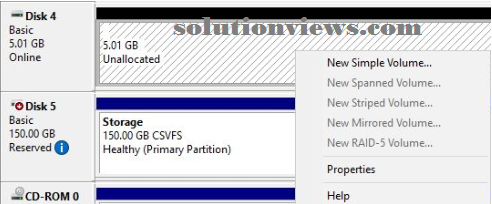
- Select produce new straightforward Volume.
- Leave the defaults in situ.
- Choose a drive letter to assign.
- Label your drives:
5GB drive—label the drive as Quorum
150GB (larger drive)—label it as ClusterStorage
- Repeat the higher than steps for the second drive
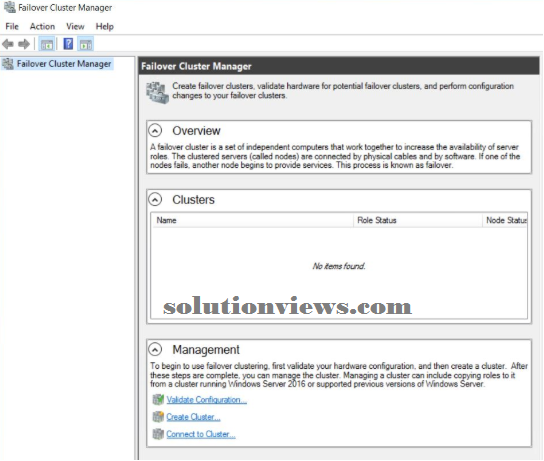
Create the failover cluster:
From the OS of any of the nodes created within the higher than steps, do the following:
Click begins → Windows body tools → Failover Cluster Manager to launch the Failover Cluster Manager. Click “create cluster”. Click next on the ‘Before you begin’ window.
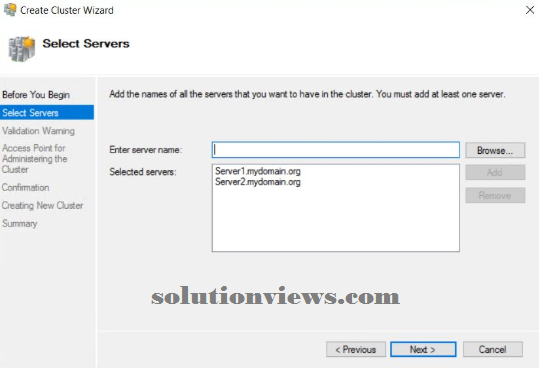
In the next window, enter the server names that you simply wish to feature to the cluster. Or else, you’ll be able to find them via Browse. Click Add → next.
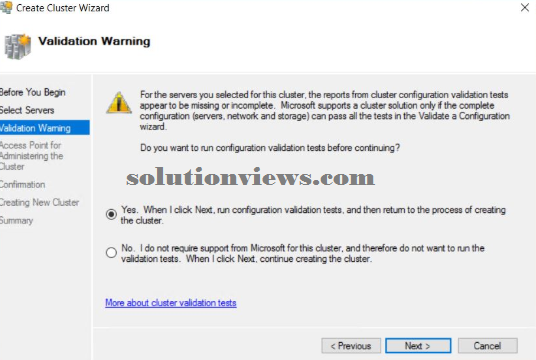
Validation warning window is displayed. choose affirmative to “allow verification of the cluster services”.
- When you click next, the Validate a Configuration wizard is displayed. Continue by clicking next.
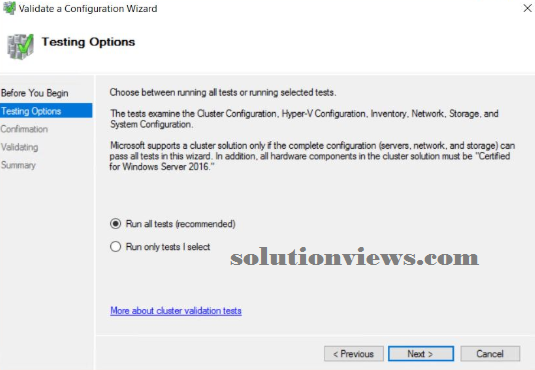
In the testing choices window, choose “Run all tests” (recommended).The next window can allow you to ensure the list of tests that may be passing Windows
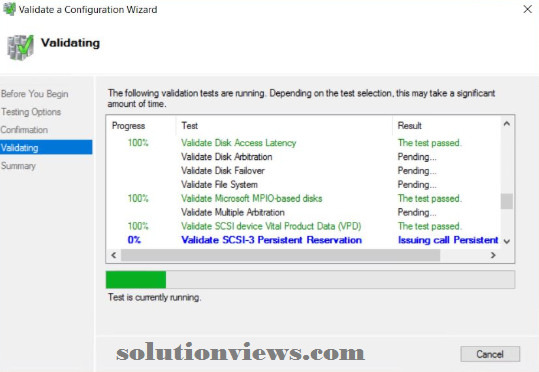
The certificatory window is displayed whereas the entire clump tests area unit being run. This method could take many minutes betting on your network infrastructure and therefore the range of nodes you’ve got chosen to feature to your cluster. Once the tests area unit completed, check the report, and fix configuration errors, if any. The cluster setup can fail if any errors exist.
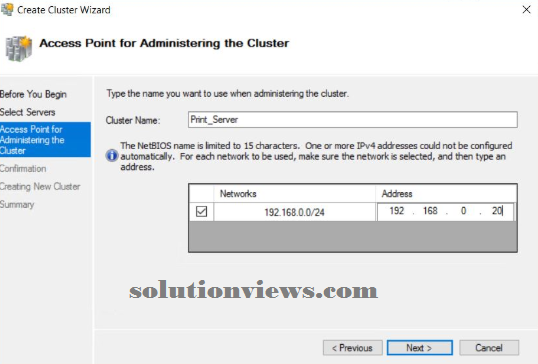
The ‘Access purpose for Administering the Cluster’ window within the produce Cluster wizard is displayed. In Cluster Name, enter a reputation for your cluster. Within the out there network offer Associate in Nursing IP address for the cluster.
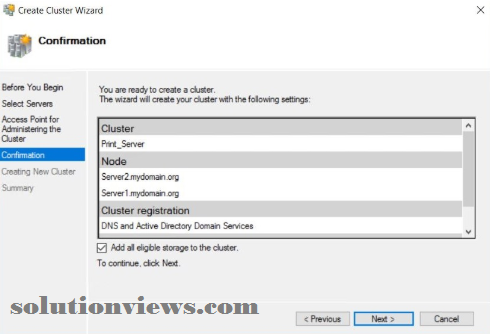
- After clicking next, the confirmation window is displayed. This window
lists the settings to be applied to your new cluster.
- Select the “Add all eligible storage to the cluster” check box. The system can currently try and assign any storage it will notice. The system makes an attempt to make the new cluster in your domain.
- This may take {whereas short time minutia momenta as there area unit many checks and tests area unit conducted while the system is designed.
When the method is complete, the outline window is displayed stating that the cluster wizard completed with success.
Check to verify that the cluster is designed properly
In the Failover Cluster Manager, navigate to Nodes.
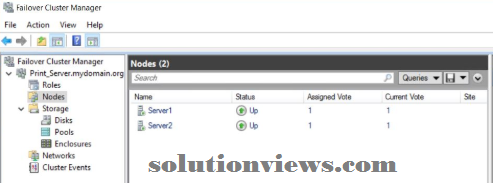
- Check that all nodes within the cluster area unit on-line. If they’re not, head to the server that’s offline and convey the system on-line to affix the cluster.
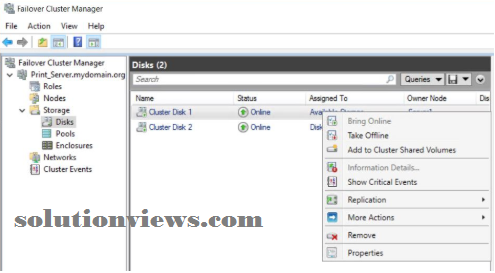
Navigate to Storage → Disks.
a. The system detects the port drives and displays them here. If you were setting this up with solely 2 nodes, then the 5GB gathering cluster would are appointed as Disk Witness in gathering. The designed space for storing is appointed to out there Storage.
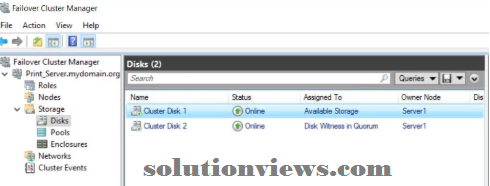
- Configure this storage to be a part of the cluster.
Right-click the disk appointed to out there storage; then choose “Add to Cluster Shared Volumes”. The cluster is currently appointed to Cluster Shared Volume.
Check the Cluster Events folder for any problems with the cluster. If there aren’t any problems, you’ll be able to set up your virtual machine within the cluster atmosphere.