The Printer Migration Wizard tool is used to conduct the print server migration. You can use the Printbrm.exe command line utility or the MMC Print Management snap-in to run it. The migration wizard can be run on the source server (if it has a GUI) or on any other machine that has the Print Management snap-in installed. The Printbrm.exe migration wizard is not available on the Server Core.
You can use the Migration Wizard tool to export all of the drivers, printer settings, and print queues to an export file that can then be imported to the target server. The final step is to decommission the source server and assign the same name and IP address to the target server as the original. This manner, all clients will be able to print without having to change their settings. If the target server cannot be given the same name and IP address as the source server, all clients must be reconfigured (manually or by GPO) to utilise the new print server after the migration is complete.
Configure Target Windows 2016 Core Server
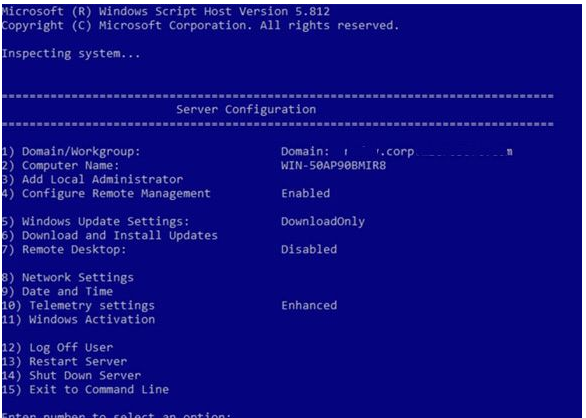
After installing the OS in Server Core mode, you need to perform its basic configuration using the sconfig utility:
After you have configured all the required server settings, install the Print and Document Services role by using the following PowerShell command:
Install-WindowsFeature Print-Services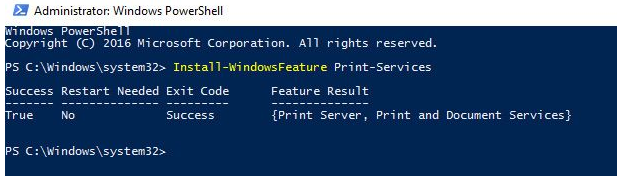
Now you can start the print spooler service:
Set-Service -Name "Spooler" -StartupType automatic

Start-Service -Name "Spooler"
To allow remote management of Core server, enable a number of firewall rules:
Enable-NetFirewallRule -DisplayName "Windows Management Instrumentation (DCOM-In)"

Enable-NetFirewallRule -DisplayGroup "Remote Event Log Management"

Enable-NetFirewallRule -DisplayGroup "Remote Service Management"

Enable-NetFirewallRule -DisplayGroup "Remote Volume Management"

Enable-NetFirewallRule -DisplayGroup "Windows Firewall Remote Management"

Enable-NetFirewallRule -DisplayGroup "Remote Scheduled Tasks Management"

Enable-NetFirewallRule -DisplayGroup "Windows Management Instrumentation (WMI)"

Enable-NetFirewallRule -DisplayGroup "File and Printer sharing"
Additional. You must install and configure the relevant components if the target server must support LPR, IPP, or WSD.
Exporting the Source Print Server’s Settings to a File
It’s a good idea to upgrade the drivers on the source server to Package-Aware versions before migrating (Package-aware printers have entries in their INF files that support point and print with packages).
Important. During the migration, you should utilise the most recent version of the migration wizard. The migration wizard from the Print Management console (printmanagement.msc) on Windows 10 is used in this example. Both servers must have access to the Print$ share.
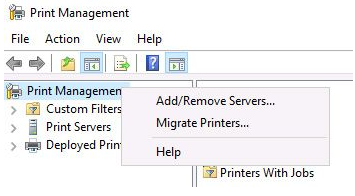
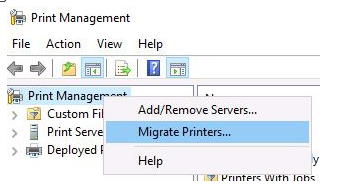
Start the Print Management console, right-click Print Management, and choose Migrate Printers from the drop-down menu.
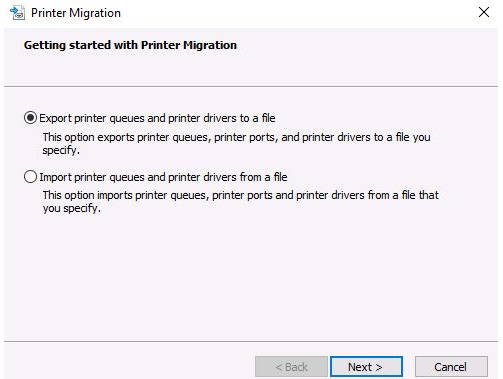
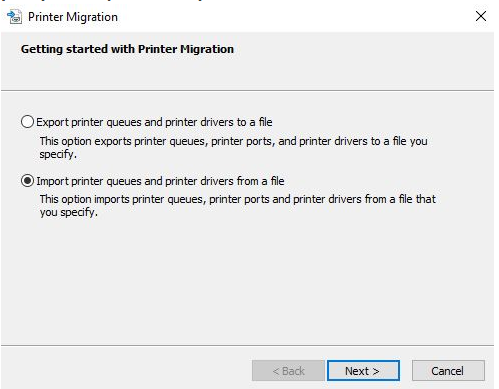
Select option Export printer queues and drivers to a file.
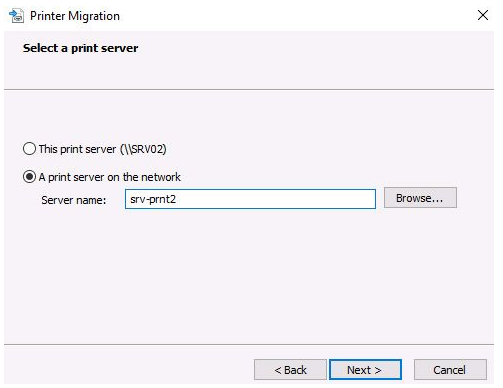
Enter the name of a new print server.
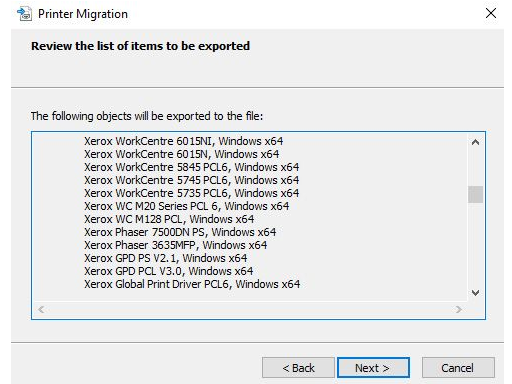
Review the list of objects to export.
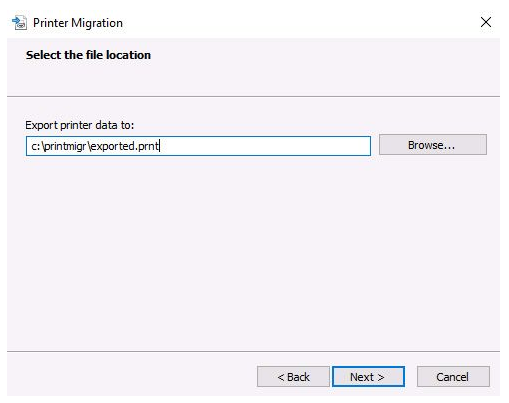
Select export file.
Wait until the export is complete. The size of the export file can be quite large. In our case, 80 printers and about 60 drivers were installed on the print server. The file size was about 1.4 GB.
Data Importing from a File to a Target Server
You must first establish at least one printer before you can begin importing printers. Otherwise, the print$ shared folder will not be created on the new server, and the migration process will be terminated by the PrintBRM error Event ID 71.
Relaunch the Migration Wizard.
Select an option From a file, import printer queues and printer drivers.
Then choose Import mode: Existing printers should be overwritten. List of entries in the directory: Don’t include any printers in your list.
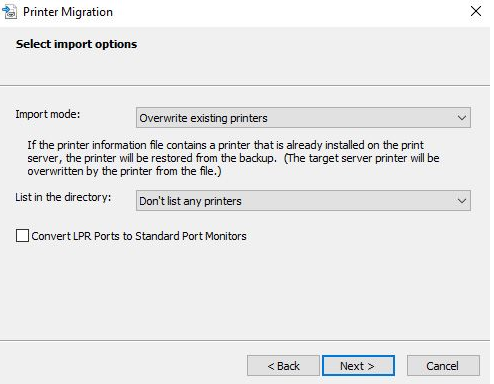
Because printers have already been published in Active Directory in this situation, we will not republish them in order to avoid creating duplicates.
Following the completion of the import, the wizard will prompt you to analyse any mistakes that happened throughout the procedure. On the destination server, you can manually install troublesome printers.
Users are being transferred to a new print server.
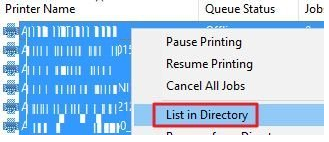
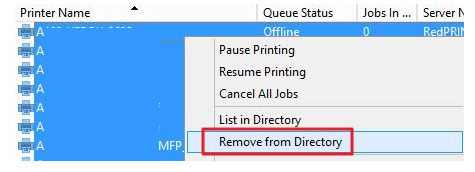
You can rename the source and target servers once you’ve configured all of the printers on the destination server. However, you must first erase the printer’s publications from Active Directory before renaming the source server. Select all printers in the Print Management panel, right-click, and select Remove from Directory.
Rename the source server so that you can assign its name to the new server. After renaming, you can publish printers of the new print server in AD: