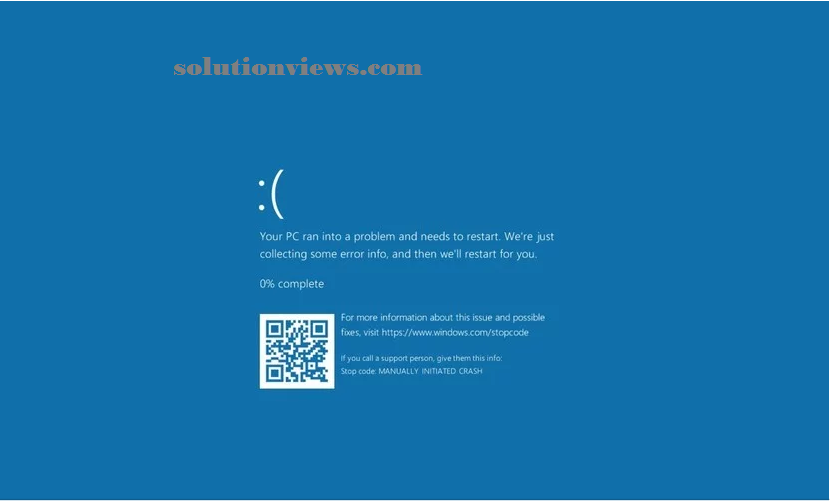
How to fix blue screen issues while not desktop access on Windows 10:
Although once you see a Blue Screen of Death error, typically, you’ll be able to restart your device to continue victimization the device. Different times, you’ll not be ready to access the desktop to troubleshoot and fix the matter.
If you are unable to access the desktop, you’ll be able to use System Restore, Safe mode, and even the advanced startup atmosphere to troubleshoot the difficulty.
Quick tip: once your device refuses to begin with a blue screen message once putting in new hardware, attempt disconnecting it to substantiate the new device is inflicting the matter.
Fixing blue screen with System Restore:
If System Restore is enabled and designed, you’ll be able to use a restore purpose to undo changes which will be inflicting a stop error with these steps:
Launching Advanced startup from boot:
To launch the Advanced startup settings, use these steps:
1. Start your laptop.
2. As shortly because the Windows emblem seems on your screen, press the facility button to interrupt the boot sequence.
3. Repeat steps No. one and a pair of 2 a lot of times.
After the third interruption, Windows ten can open into the Advanced Startup atmosphere, and then you’ll be able to continue with the steps below to use a restore purpose.
Launching Advanced startup from USB:
Alternatively, you’ll be able to use a Windows ten installation media to open Advanced startup victimization these steps:
1. Start your laptop employing a USB installation media.
Quick tip: If your device is not ranging from USB, you’ll have to alter your system’s BIOS settings to create certain it will boot from USB. Usually, you’ll be able to access the BIOS by powering up your device and pressing one amongst the functions, Delete, or ESC keys, however certify to ascertain your manufacturer’s support web site for a lot of specific details.
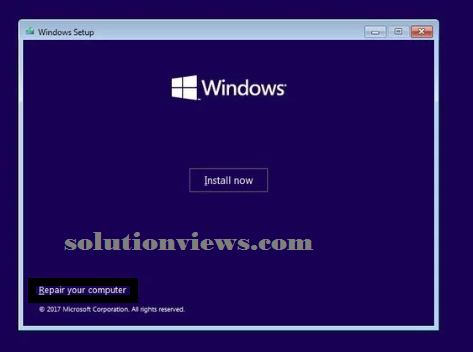
2. Click next button.
3. Click the Repair your laptop link within the bottom-right corner.
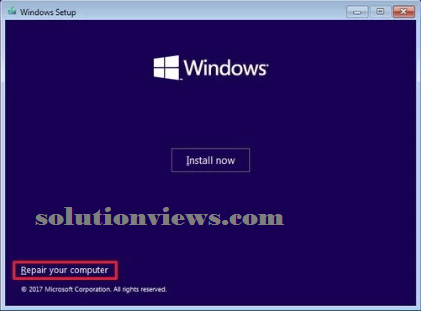
Once you complete the steps, continue with the
Using Restore purpose to mend stop error:
To use a Restore purpose to undo system changes, use these steps:
1. Click the Advanced Startup possibility.
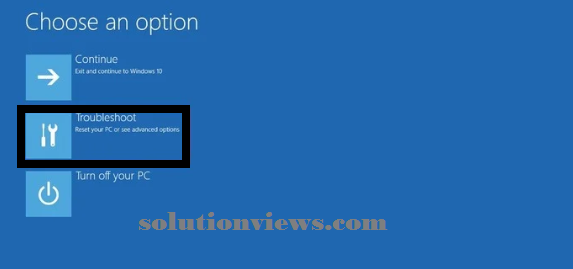
Quick note: If you are accessing Advanced Startup from a USB media, you will see the Troubleshoot possibility instead.
2. Click the Troubleshoot possibility.
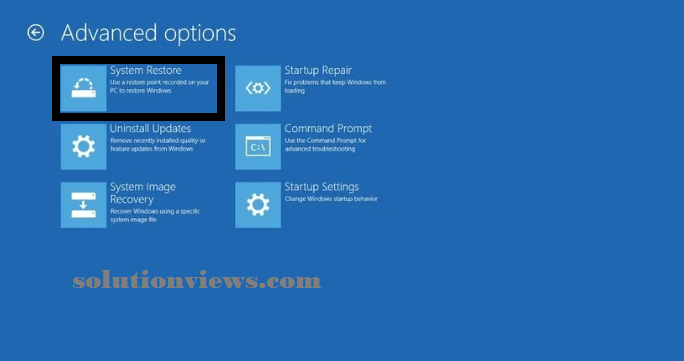
3. Click the Advanced choices button.

4. Click the System Restore possibility.
5. Click succeeding button.
6. Select the foremost recent acknowledged operating restore purpose that you simply assume can resolve the the blue screen downside.
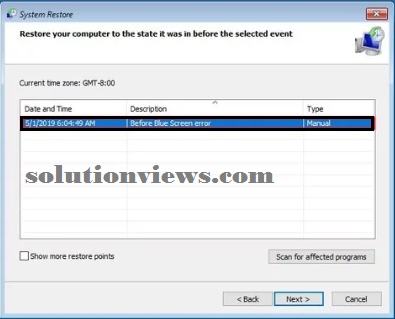
7. Click the Scan for affected programs button to work out the apps which will be affected once the restore purpose was created.
8. Click the shut button.
9. Click succeeding button.
10. Click the end button.
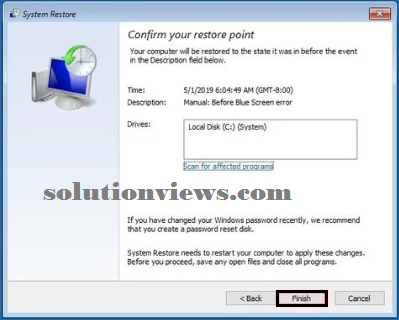
After you complete the steps, System Restore can take away updates, drivers, and changes designed once the restore purpose was created while not touching your files to mend the error.
Fixing blue screen with Safe mode:
You can additionally begin your laptop in Safe mode to uninstall updates, drivers, and undo system changes which will be inflicting blue screen errors victimization these steps:
Launching Advanced startup from boot:
To launch the Advanced startup settings, use these steps:
1. Start your laptop.
2. As shortly because the Windows emblem seems on your screen, press the facility button to interrupt the boot sequence.
3. Repeat steps No. one and a pair of 2 a lot of times.
After the third interruption, Windows ten can open into the Advanced Startup atmosphere, and then you’ll be able to continue with the steps below besides in Safe mode.
Launching Advanced startup from USB:
Alternatively, you’ll be able to use a USB bootable media to open Advanced startup victimization these steps:
1. Start your laptop employing a USB installation media.
Quick tip: If your device is not ranging from USB, you’ll have to alter your system’s BIOS settings to create certain it will boot from USB. Usually, you’ll be able to access the BIOS by powering up your device and pressing one amongst the functions, Delete, or ESC keys, however certify to ascertain your manufacturer’s support web site for a lot of specific details.
2. Click next button.
3. Click the Repair your laptop link within the bottom-right corner.
Once you complete the steps, continue with the Safe mode directions below.
Using Safe mode to mend stop error:
When you see a blue screen error, and you cannot access the desktop, use these steps besides in Safe mode:
1. Click the Advanced Startup possibility.
Quick note: If you are accessing Advanced Startup from a USB media, you will see the Troubleshoot possibility instead.
2. Click the Troubleshoot possibility.

3. Click on Advanced choices.

4. Click the Startup Settings possibility.
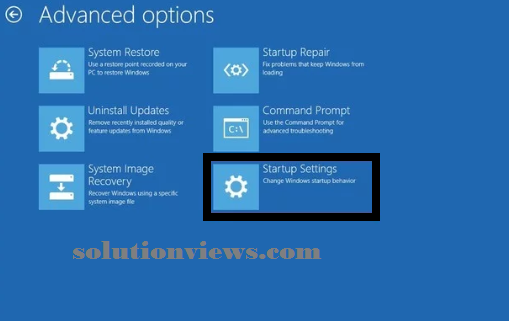
5. Click the Restart button.

6. After your laptop reboots, press F4 (or 4) to pick out the alter Safe Mode possibility.

While in Safe mode, counting on the difficulty, the steps below can assist you to uninstall Windows ten updates and drivers.
Uninstalling updates:
To uninstall a Windows ten update, use these steps:
1. Open panel.
2. Click the Uninstall a program possibility.
3. Click the read put in updates possibility from the left pane.
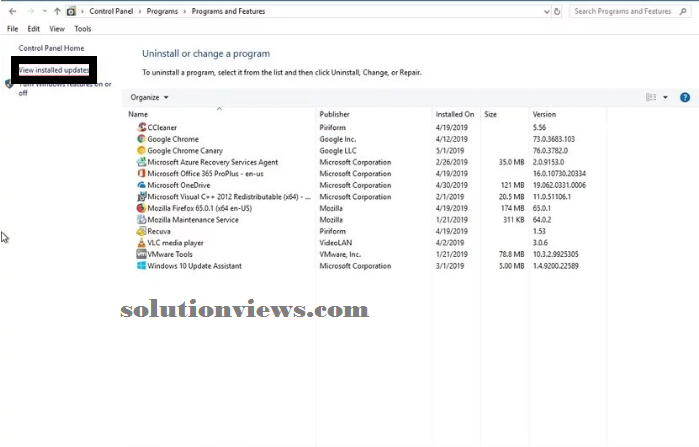
4. Right-click the foremost recent update.
5. Select the Uninstall possibility.
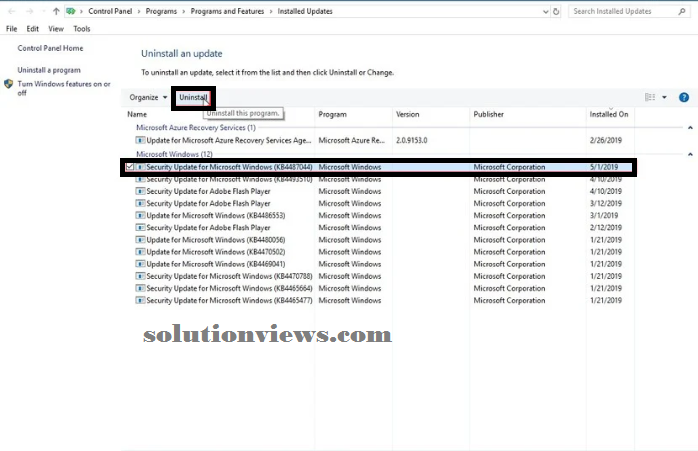
After you complete the steps, restart your laptop to complete the task.
Uninstalling drivers:
To uninstall a tool driver, use these steps:
1. Open Start.
2. Search for Device Manager and choose the highest result to open the expertise.
3. Expand the device inflicting the matter.
4. Right-click the device and opt for the Uninstall device possibility.
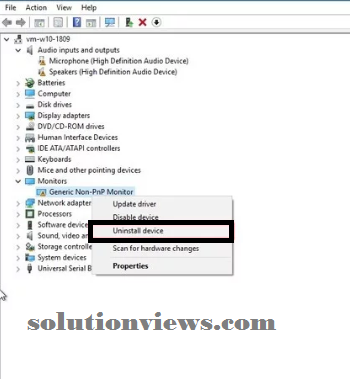
5. Click okay to ensure.
Once
you complete the steps, boot your
device to complete the
task.
If
your laptop isn’t any longer showing a BSoD
message, you’ll be able to temporary
block an equivalent update
or driver from putting in mechanically once more.
Using Advanced startup:
Alternatively,
Windows ten additionally includes a
feature that permits you to get rid of the foremost recent updates for
the Advanced startup atmosphere while not the requirement to use System Restore or Safe mode victimization these steps:
1. Launching
Advanced startup from boot
2. To
launch the Advanced startup settings, use these steps:
3. Start
your laptop.
As shortly because the Windows emblem seems on your screen, press the facility button to interrupt the boot sequence.
Repeat steps No. one and a pair of 2 a lot of times.
After the third interruption, the device ought to boot into Advanced Startup, then you’ll be able to continue with the steps below to get rid of the foremost recent updates inflicting issues.
Launching Advanced startup from USB:
Also, you’ll be able to use a USB bootable media to induce to the Advanced startup settings victimization these steps:
1. Start your laptop employing a USB installation media.
Quick tip: If your device is not ranging from USB, you’ll have to alter your system’s BIOS settings to create certain it will boot from USB. Usually, you’ll be able to access the BIOS by powering up your device and pressing one amongst the functions, Delete, or ESC keys, however certify to ascertain your manufacturer’s support web site for a lot of specific details.
2. Click succeeding button.
3. Click the Repair your laptop link within the bottom-right corner.

Once you complete the steps, continue with the directions below to uninstall a top quality or feature update.
Removing quality and have updates:
To uninstall the most recent quality or feature update inflicting blue screens, use these steps:
1. Click the Advanced Startup possibility.
Quick note: If you are accessing Advanced Startup from a USB media, you will see the Troubleshoot possibility instead.
2. Click the Troubleshoot possibility.

3. Click on Advanced choices.

4. Click the Uninstall Updates choices.
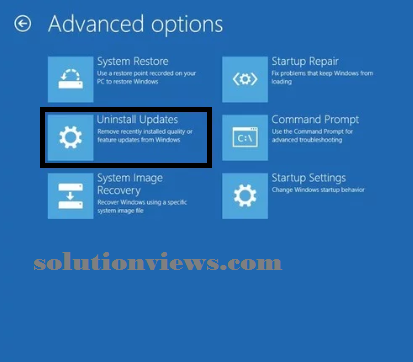
5. Click the Uninstall latest quality update possibility.
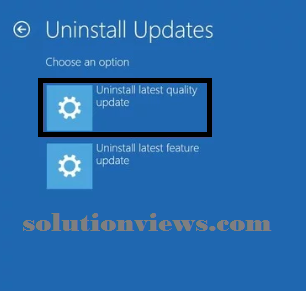
Quick tip: you’ll be able to additionally choose the Uninstall latest feature update possibility and continue with same steps to get rid of the recent upgrade of Windows ten (as long as it has been but 10 days since the installation).
6. On reboot, sign-in along with your credentials.
7. Click the Uninstall quality update button.

8. Click the Done button.

9. Click the Continue possibility.
After you
complete the steps, Windows ten can take away the most
recent quality update or feature update probably fixing the Blue Screen
of Death on your device.
To deploy and install windows in an azure click on the following link:
One Comment on “How to troubleshoot and fix Windows 10 blue screen errors ( Part 3 )”