One of the nice options to manage Azure UNIX system VMs is that the serial console, which supplies direct access to the interface (ttyS0) on the UNIX system VM. You don’t want SSH or gap ports on your NSG to possess console access to your server. The feature works by default all UNIX system distributions (SUSE could also be associate exception if you’re victimization associate older version). There area unit a handful of straightforward needs should that has got to that has to} be met: a password-based user is needed and therefore the boot medicine settings must be enabled. We have a tendency to write a way to manage Azure boot medicine during a previous article, that you’ll be able to access here.) Whenever that you just have to be compelled to enter the recovery mode, you may be grateful for this Azure feature. The Red Hat recovery tools and recovery mode might be used for a straightforward mistake sort of a wrong entry on the /etc/fstab, a filing system designed within the /etc./fstab, a hardware module, firewall settings, GRUB (grand unified boot loader), SSH configuration, so forth. During this article, we have a tendency to area unit getting to cowl the method of convalescent the Red Hat UNIX system system victimization all 3 strategies obtainable. If you’re finding out for Red Hat certification, that’s a requirement to understand before programming your communication. we are going to conjointly see however Microsoft Azure options will facilitate a UNIX system administrator reset the basis countersign while not previous data of the countersign.
Red Hat booting method and recovery tools obtainable:
The GRUB is comprised of 2 stages. The primary stage comes from the MBR partition that’s loaded into the memory by the BIOS. The second stage is once we see the GRUB menu, and that we will choose that kernel/operation system we would like to use, and it reads the kernel into memory and transfer the management to the kernel to finish the boot up method.
However, we will act with the second stage and use 3 obtainable strategies to perform configuration to repair the system:
Break: It doesn’t need the basis countersign, and therefore the / is mounted in read-only mode
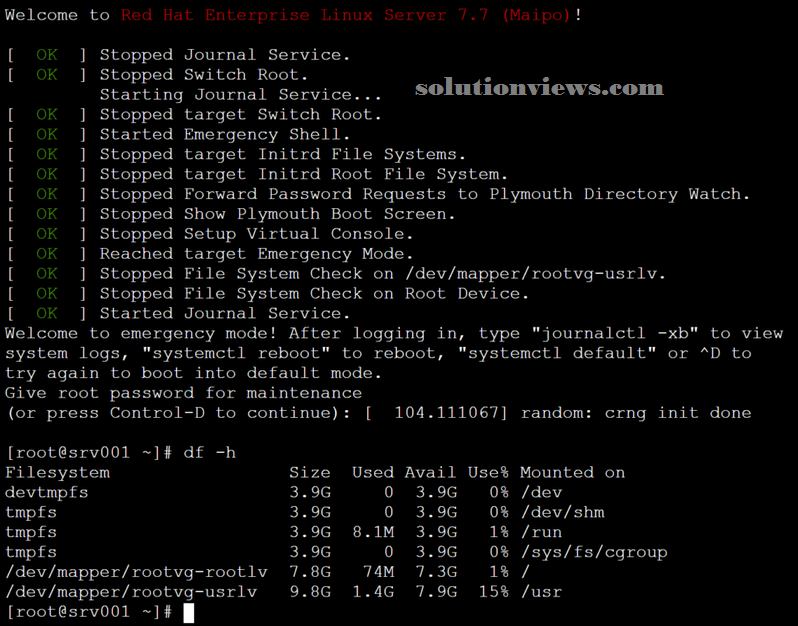
Emergency: It will need root countersign. solely root is mounted in read-only mode, solely a number of services area unit loaded, the network isn’t activated, and no different file systems area unit tried to be mounted.
Rescue: It will need root countersign, all file systems area unit mounted, and a few essential services area unit started.
It is a best observe to mend /etc/fstab and different configuration problems on UNIX system victimization either rescue (first option) or emergency as your set up B.
Recovering the root password:
Let’s assume the worst-case state of affairs — you don’t apprehend the basis countersign, and you don’t have the other obtainable user (in Azure, we’ve some ways that around it, and that we can get there during a minute).
When you don’t have the basis countersign, the upkeep and rescue modes don’t seem to be obtainable as a result of they need you to enter the basis countersign on the terribly opening move.
We area unit left with the rd.break mode, which may modification the basis countersign. Victimization the serial console future within the Azure Portal, anticipate the GRUB menu to indicate up and kind e.
Using rd.break, we have a tendency to area unit interrupting the boot method by not permitting the system to require over and continue the conventional booting method of the software.
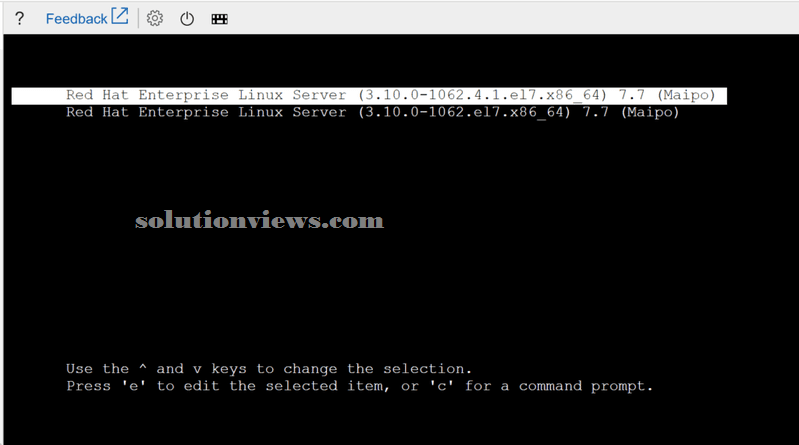
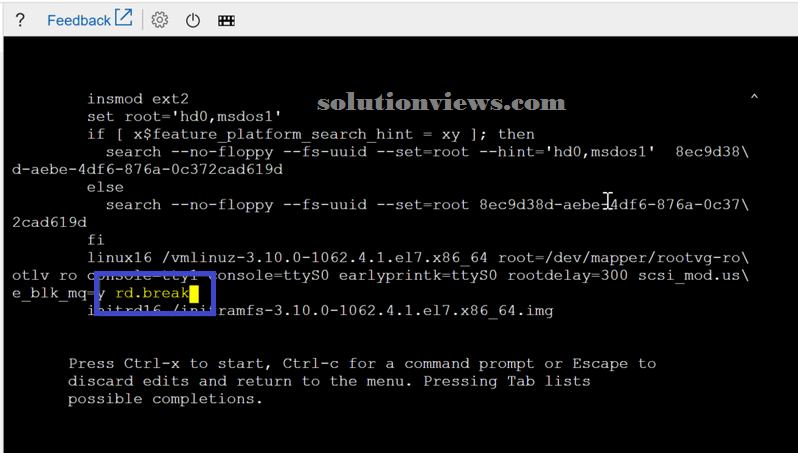
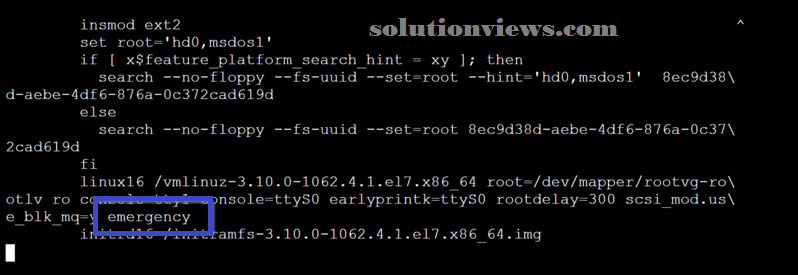
We can use the arrow to navigate, and that we have to be compelled to head to the road that starts with linux16, that is that the instruction that instructs the kernel to require over throughout the boot method. We have a tendency to area unit getting to add rd.break at the tip of that line (you will use the proper arrow to induce to the tip of the road or ctrl-e). When adding the new string, press ctrl-x to begin the boot method.
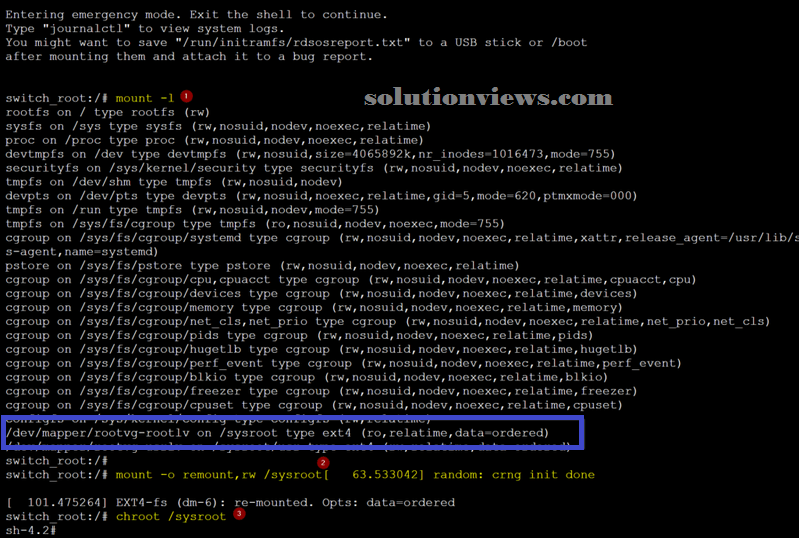
Although a number of the steps I’m getting to use here don’t seem to be needed, i favor to use them to recollect the particular actions while not reading the merchandise documentation whenever. First, i would like to check what we’ve mounted when we have a tendency to get access to the console by running mount -l (Item 1).
Then, we are going to rummage around for the /sysroot from the list to recollect that it’s on read-only mode, and that we have to be compelled to modification that to be ready to modification the root’s countersign.
The following commands are going to be accustomed mount the /sysroot as read-write. Our next step is to cheroot jail, which means our reality are going to be inside the /sysroot folder.
mount -o remount,rw /sysroot
chroot
/sysroot
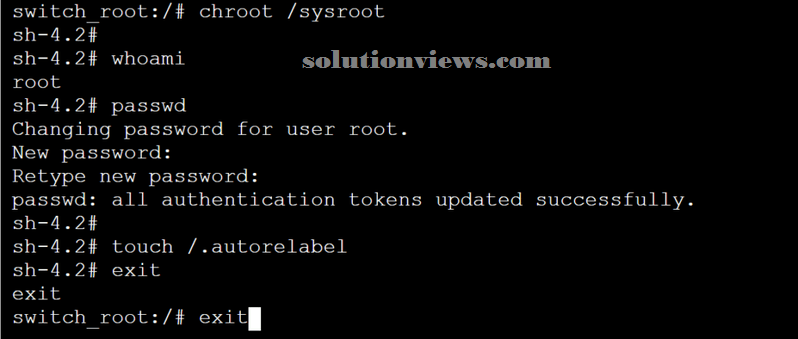
We have access to the basis of our software. We have a tendency to area unit getting to run whom to create positive that we have a tendency to area unit root, and so we are going to modification the countersign, instruct SELinux to relabel all files with the right contexts.
whoami
passwd
touch /.autorelabel
exit
exit
Using emergency mode:
We need to feature the string emergency at the tip of the linux16 line, as represented within the image below.
After getting into the root’s credentials, we will see that solely the basis was mounted.
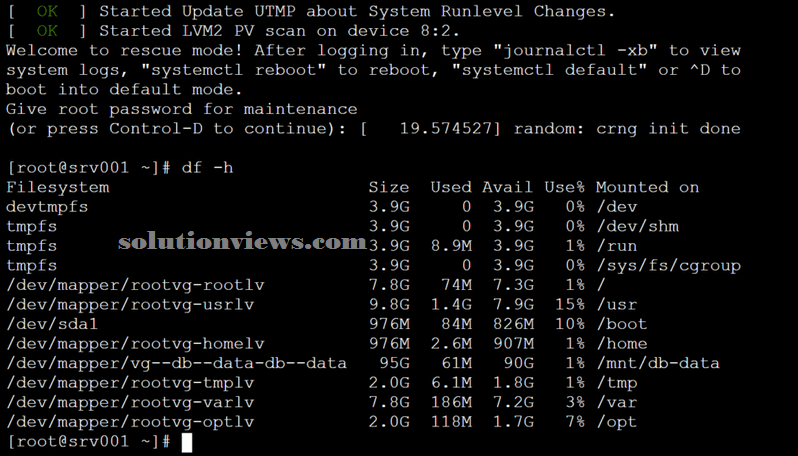
Using rescue mode:
The rescue mode follows an equivalent logic from the previous makes an attempt. the sole distinction is to feature a rescue string at the tip of the linux16 line.
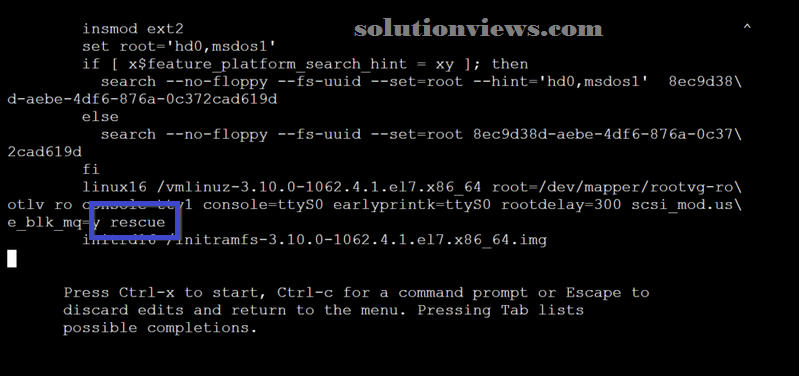
The distinction once victimization rescue is that the variety of mounted filing system partitions.
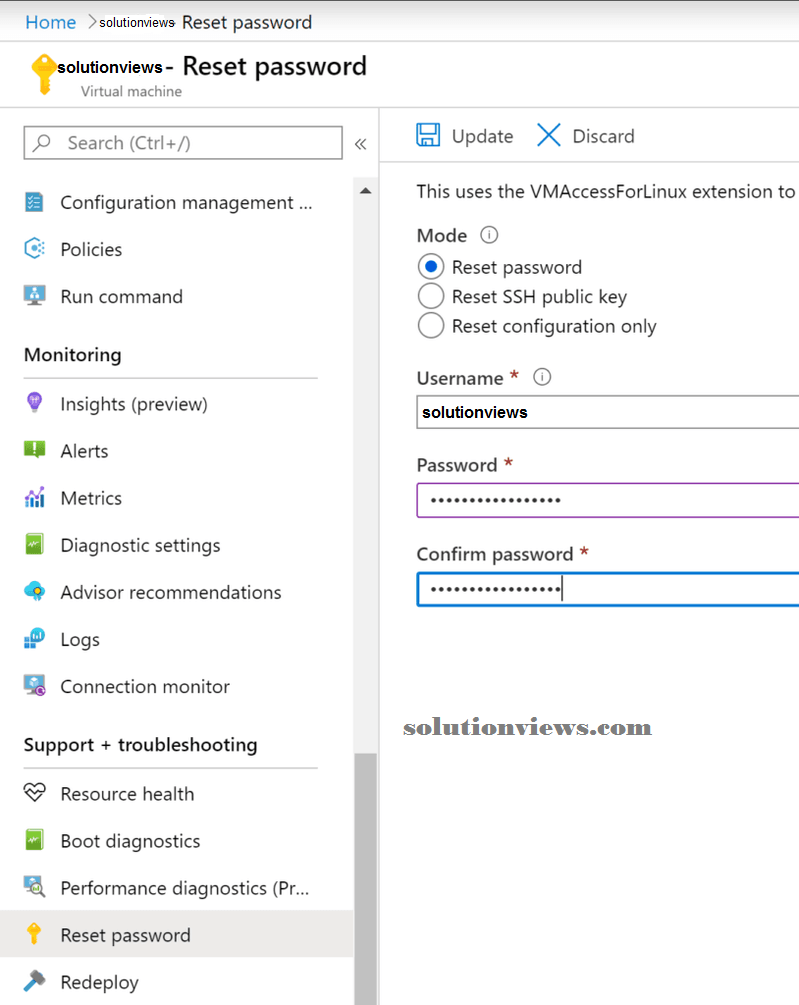
Azure and making new user capabilities:
We went through the method to use rd.break to alter the basis countersign. As long as you have got associate software, we will profit of Microsoft Azure to feature a replacement user and use that user to reset the basis countersign — and with no period involved!
In the UNIX system VM blade, we’ve the Reset countersign possibility, and it permits the creation of a spic-and-span user. Within the example below, we have a tendency to area unit adding the user attendant to Red Hat UNIX system.
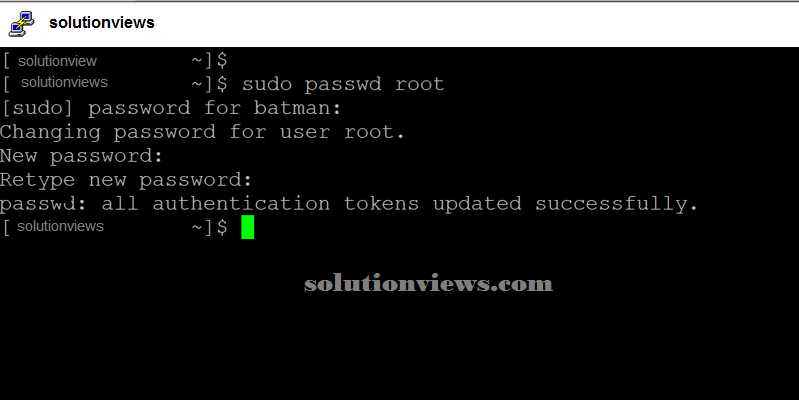
Now that we’ve a user on the specified VM, we will manifest victimization the new credentials and use sudo password root and reset the root’s countersign.
If need any help in how to setup server on linux please click the below link: