We’ll show you how to convert an ESD file to a WIM file using the Command Prompt, the DISM tool, or PowerShell scripts in this tutorial. Microsoft developed the ESD file, which is a new highly compressed file-based image distribution format. Instead of the traditional WIM (Windows Imaging Format) image, ESD (Electronic Software Download) image files are utilised to install the Windows operating system. ESD files, unlike WIM files, cannot be opened or mounted on Windows (unless they are being converted). The ESD file has a read-only attribute. Instead, during the clean install or update procedure, Windows uses them internally.
The issue is that many administrators who use WDS/MDT/SCCM to install Windows 10 across a network must make the same adjustments to the Windows Image file. So, today, we’ll show you how to convert ESD to WIM image quickly. We’ll start by determining what the install.wim and install.esd files are, as well as how they differ. Install.esd and install.wim are compressed operating system archive files that can include many Windows editions (Professional, Home, Enterprise, etc.). During Windows installation, all files from the install.wim/esd image are extracted to the computer’s system disc.
When you compare the size of a wim and an esd file, you’ll see that the esd file is smaller since it’s compressed more strongly (a new type of compression called Recovery is utilised). This compression type compresses the Windows installation files even further, resulting in a 30% reduction in the size of the install.esd file over the install.wim file.
Hint: Instead of the inefficient LZX compression algorithm used for WIM files, a more efficient LZMS compression algorithm is utilised to compress ESD files.
The install.esd format is used by Microsoft to distribute the most recent Windows 10 releases. It aids customers in reducing network traffic while updating to the latest Windows 10 release.
The install.esd file is inconvenient since the DISM (Deployment Image Servicing and Management) tool will not mount this Windows image. As a result, injecting drivers, security updates, or changing some Windows deployment options is difficult in such an image. In this case, the simplest solution is to convert the install.esd file to install.wim and then work with the install.wim file alone.
Extraction of the Install.esd file from the Windows 10 ISO
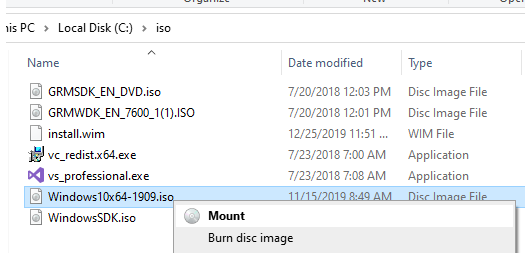
Using the Media Creation tool or the Windows 10 Upgrade Assistant, you can produce a Windows 10 installation ISO image.
The first step is to open your File Explorer programme. Mount your Windows 10 ISO image by right-clicking it.
Using the Media Creation tool or the Windows 10 Upgrade Assistant, you can produce a Windows 10 installation ISO image.
The first step is to open your File Explorer programme. Mount your Windows 10 ISO image by right-clicking it.
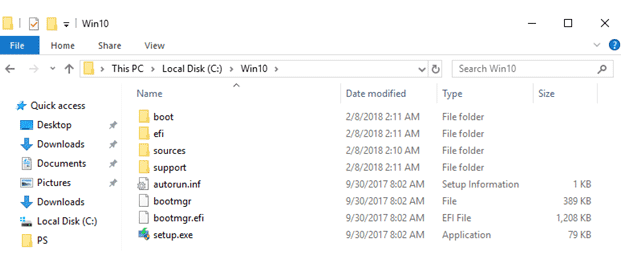
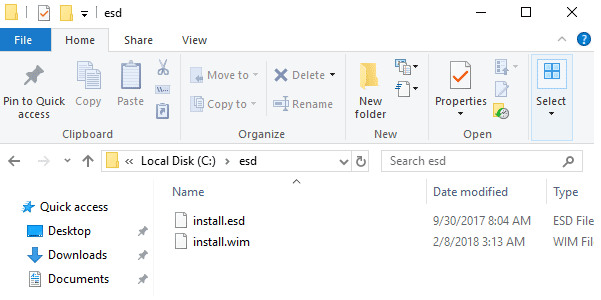
Go to C:\ drive and create a folder Win10. Copy all files from Windows 10 ISO image into it.
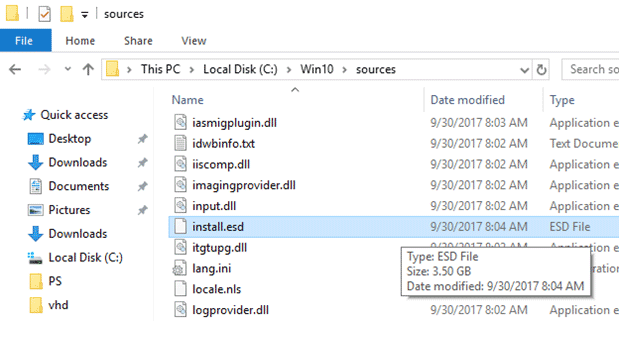
After you’ve copied all of the files, go to the Sources folder and create a copy of the install.esd file.
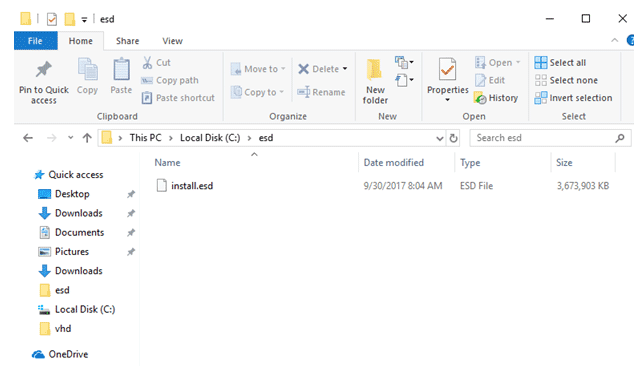
Now create another folder on your C:\ drive – name it ESD. Paste install.esd file into this folder.
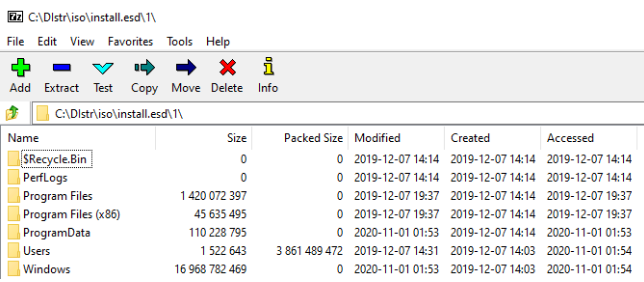
Clue. What Is an ESD File and How Do I Open It? The archiver tools can be used to view the contents of install.esd. Take, for example, the use of 7 zip. You can browse the folders in the esd file by using the 7zip archiver to open the esd file.
Using the DISM file to convert ESD to WIM on Windows 10
The next step is to open Command Prompt as an administrator. We must enter the folder that we have just established. Enter the following:
cd c:\esd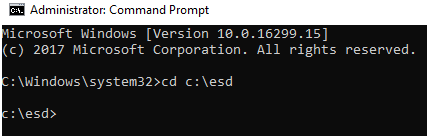
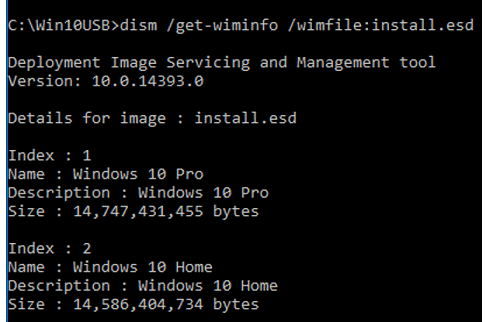
The install.wim or install.esd file, as previously stated, can include many Windows Editions. Each OS edition is kept in the install.esd file and is assigned an index (index 1, 2, 3, 4, etc.). Using the DISM tool, you may get a list of Windows editions from your install.esd file. To see a list of all Windows editions in your image, run the following command:
dism /Get-WimInfo /WimFile:install.esd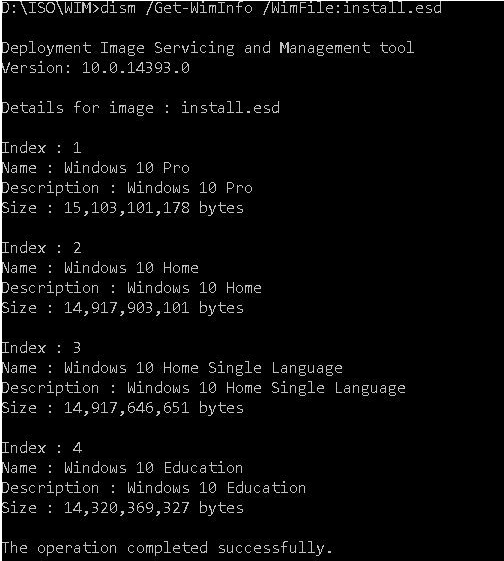
As you can see, in the install.esd file there is an image of 4 versions of Windows 10 with the indexes: 1, 2, 3, 4.
Deployment Image Servicing and Management tool
Version: 10.0.16299.15
Details for image: install.esd
Index: 1
Name: Windows 10 Pro
Description: Windows 10 Pro
Size: 15,103,101,178 bytes
Index: 2
Name: Windows 10 Home
Description: Windows 10 Home
Size: 14,917,903,101 bytes
Index: 3
Name: Windows 10 Home Single Language
Description: Windows 10 Home Single Language
Size: 14,917,646,651 bytes
Index: 4
Name: Windows 10 Education
Description: Windows 10 Education
Size: 14,320,369,327 bytes
The operation completed successfully.
Locate the Windows 10 edition index number that you require (we are choosing Index 1, since we are using the Windows 10 Pro edition).
You can extract the specified Windows edition installation image from the esd file and convert it to the WIM file format with the following command:
dism /export-image /SourceImageFile:install.esd /SourceIndex:1 /DestinationImageFile:install.wim /Compress:max /CheckIntegrityClue: In DISM, there are four alternative compression formats that can be employed to compress a WIM picture. In the DISM /Compress parameter, there is a matching option for each of them:
/Compress:none — no compression used;
/Compress:fast — default WIM image compression type (XPRESS compressions);
/Compress:maximum — maximum compression (LZX compression);
/Compress:recovery — this type of compression converts WIM image to ESD format (LZMS compression). As a result, the size of the esd file can be 30 percent smaller than the size of the original wim file. For compressed archives, recovery Microsoft recommends using the esd file extension for images compressed with the recovery compression type.
For pictures in Recovery format, the DISM utility only has three options: Dism /Export-Image, Dism /Apply-Image, and Dism /Get-WimInfo.
The image exporting process begins, and it can take a long time. Conversion is a resource-intensive activity that puts a lot of strain on your computer’s processor and memory. It takes 10-30 minutes to complete, depending on your computer hardware.

You may extract many Windows versions from the esd to the install.wim file, which is a helpful hint. For example, you may use the following commands to produce a WIM image file for Windows 10 Home (index:2) and Pro (index:1) editions:
dism /Export-Image /SourceImageFile:install.esd /SourceIndex:1 /DestinationImageFile:install.wim /DestinationName:"W10 PRO version 1909" /Compress:max /CheckIntegrity

Dism /Export-Image /SourceImageFile:install.esd /SourceIndex:2 /DestinationImageFile:install.wim /DestinationName:"Win10 Home version 1909"
In the same way you can add any other Windows edition to your wim file.
Once ESD conversion is completed, you can copy your new WIM image file and go to Win10 original folder, then to Sources and replace install.esd file.
ESD to Install conversion. PowerShell and WIM
You can also convert your ESD file to WIM image format using PowerShell cmdlets.
To get the Windows editions from the install.esd file, open an elevated PowerShell shell and run the following command:
Get-WindowsImage -ImagePath "f:\sources\install.esd"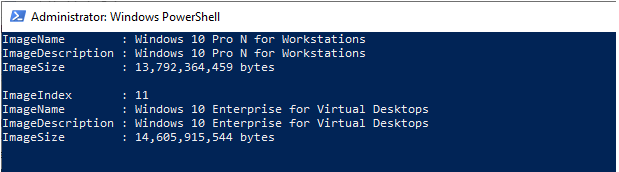
Now you can use the Export-WindowsImage cmdlet to convert Install.ESD to Install.WIM with PowerShell:
Export-WindowsImage -SourceImagePath F:\sources\install.esd -SourceIndex 10 -DestinationImagePath C:\esd\install.wim -CheckIntegrityUsing DISM++, convert ESD to ISO (GUI)
If you prefer not to apply command-line tools, you can convert your ESD file using the graphical third-party programme Dism++. This is a straightforward and free tool for working with Windows image and WIM/ESD files. Dism++ (www.chuyu.me/en/) should be downloaded and run.
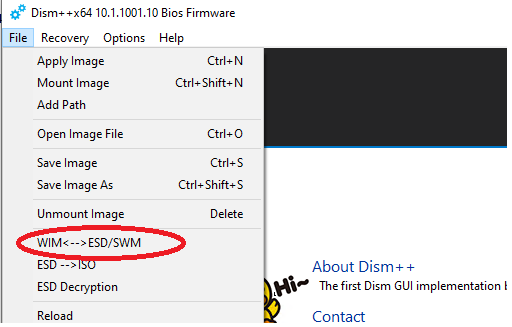
Select File > WIM > ESD/SWM file;
Select your source esd file and target wim image path;
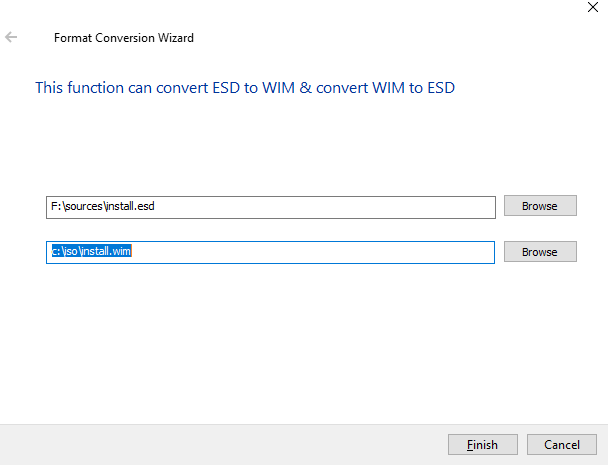
Wait until the conversion procedure is complete before pressing Finish.
Hint: You can also use DISM ++ to convert an ESD or WIM file to a Windows ISO image that can be installed on computers.
Using the NTLite Tool, convert Install.esd to Install.wim.
For providing Windows images, NTLite is a popular solution. It can be used to not only integrate driver files or updates into wim, but also to set up automatic Windows and application installation. You can convert ESD files to WIM format using one of the NTLite options.
NTLite is available for non-commercial use at no cost. It’s available for download at https://www.ntlite.com/download/.
Run NTLite and follow these instructions to convert install.esd from a Windows 10 image to install.wim format:
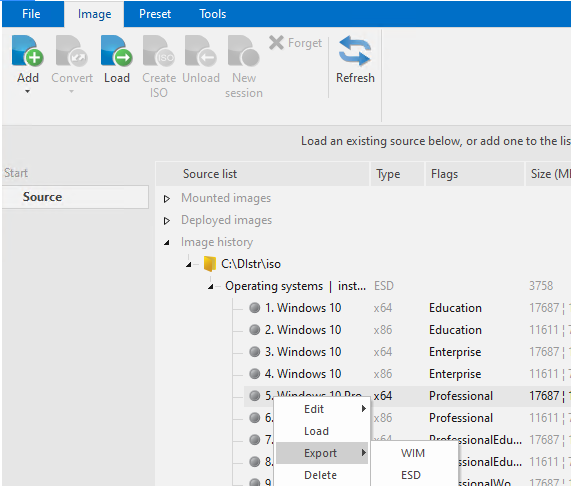
1- Select Image file (WIM, ESD, SWM) > Add.
2- Choose the install.esd file that you want to use.

3-Select the Windows edition you want to export as a WIM file from the ESD image;
4- In the context menu, choose Export > WIM. Alternatively, select Export all > WIM from the heading Operating System.
5- Wait for NTLite to complete the process of exporting the Windows image from the ESD file to the WIM format. It took me roughly 10 minutes in my situation.
The DISM utility can be used to mount the install.wim file that results. You can inject drivers, change Windows features, and make other changes to the image by slipstreaming Windows security updates into a.wim file. You may now use it to make your own Windows installation images, which you can then import into MDT, WDS, or SCCM.