Will be ranging from the Installation and Set-up of the newest Dynamics 365 (currently offered – version eight.2.0002.0112). For Installation, I’ll be exploiting three servers (Web, App and DB) for every (Front finish role, face role and Database) specifically. AD is already designed in an exceedingly separate server which might be accustomed produce the preparation user account and also the service accounts for all the separate services running.
Opening Ports in Restricted Environment:
The first issue to begin with is gap the ports between all the three servers (Web, App and DB) to form positive they not solely communicate with one another however with AD and also the Exchange Servers moreover, for the whole setup.
A brief description has already been provided within the Microsoft D365 article here. But the clear pictorial diagram however the servers are connects via totally different ports are delineated here.
Since in my state of affairs, the online Server contains each the side Role + preparation Administration Server moreover because the Sql Server contains decibel + SSRS combined; the CRM property with port details would be one thing like below:
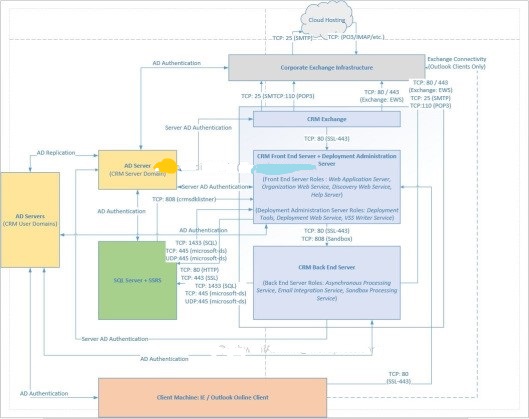
| Source | Destination | Port(s) | Description |
| Client Machines | Web Server | TCP80, TCP443 | Default web application port; may be different as it can be changed during Microsoft Dynamics CRM setup. For new websites, the default port number is 5555 |
| Web Server | DB Server | TCP80, TCP443 | Port require for connectivity between CRM Web and SSRS |
| Web Server | App Server | TCP80, TCP443 | Port require for connectivity between CRM Web and CRM App |
|
Web Server & App Server | AD | TCP445, UDP445 | Active Directory service required for Active Directory access and authentication. |
| Web Server | DB Server | TCP445, UDP445 | Active Directory service required for Active Directory access and authentication. |
| App Server |
DB Server |
TCP445, UDP445 | Active Directory service required for Active Directory access and authentication. |
| Web Server | App Server |
TCP808 | CRM SDK Listener |
| App Server | Web Server | TCP808 | CRM SDK Listener |
| DB Server | Web Server | TCP808 | CRM SDK Listener |
| App Server | Exchange |
TCP25 (SMTP) / TCP110 (POP3) / TCP80 / 443 (Exchange : EWS) | Port require for connectivity between CRM App to SMTP server (SMTP / POP3 / Exchange EWS) |
|
Web Server & App Server | DB Server | TCP1433 |
Port require for connectivity between CRM (Front End Role / Back End Role) and DB |
TCP110 (POP3) /
TCP80 / 443 (Exchange : EWS) Port need for property between CRM App to SMTP server (SMTP / POP3 / Exchange EWS)
Web Server
&
App Server decibel Server TCP1433 Port need for property between CRM (Front finish Role / side Role) and DB
Note: additionally all server need the following;
DNS name resolution on TCP/UDP:53
NetBIOS name resolution on TCP:139 / UDP:137,138
NTP time synchronization on UDP:123
DCOM and RPC on TCP:135 / UDP:1025
Accounts with Minimum Permissions:
The next step would be making the preparation Administrator Account (CrmAdmin – accustomed run Microsoft Dynamics CRM Server Setup) and repair accounts with minimum permissions. Before that it’s value reading the Microsoft TechNet article concerning {different totally completely different completely different} server roles here & different service accounts with minimum permissions here.
As suggested, it’s higher to possess completely different service accounts for many of the services therefore i might produce the following:
| Service Account | Purpose |
| CrmSandbox | Microsoft Dynamics 365 Sandbox Processing service account |
| CrmAsynchronous |
Microsoft
Dynamics 365 Asynchronous Processing Service and Asynchronous Processing Service (maintenance) services account |
| CrmMonitoring | Microsoft Dynamics 365 Monitoring service account |
| CrmVss | Microsoft Dynamics 365 VSS Writer service account |
| CrmDeployment | Microsoft Dynamics 365 Deployment Web Service account |
| CrmAppPool | Microsoft Dynamics 365 Application Service account |
| CrmAdmin | Microsoft SQL 2016 Service account (same admin account) |
| CrmDbAgent | Microsoft SQL 2016 Agent Service account |
| CrmDbReporting |
Microsoft SQL 2016 Reporting Service account |
The most crucial of them is providing permission to the preparation Administrator Account (CrmAdmin) at Active Directory, that I’ve mentioned in another article: https://solutionviews.com/2018/06/17/d365-installation-minimum-permissions-required-for-deployment-administrator.
The rest of permissions, I’ve enclosed them as a section of my Installation procedures within the net, App and decibel servers severally.
Installation of CRM 2016:
Dynamics 365 is AN upgrade to Microsoft Dynamics CRM 2016. As of currently there’s no separate installer directly for D365 therefore would initial got to Install the Dynamics CRM 2016 in every of the net, App and decibel servers with their specific needed roles and later upgrade to D365. Transfer the setup files to the individual servers from the link here.
Note: check that the Windows Search service is enabled and began already before beginning the installation, failing therefore may end in the subsequent error: https://solutionviews.com/2018/06/17/action-microsoft-crm-setup-common-installwindowssearchaction-failed
Since I’ll be explaining the method in details with scores of screenshots, the article would get quite long therefore I’ll be separating the Installation (Web, App and DB) in separate web log post.
- DB-Server Installation with SQL, SSRS and Dynamics CRM news Services
- Web-Server Installation with IIS and Dynamics CRM Front_End_Role
- App-Server Installation with Dynamics CRM Back_End_Role
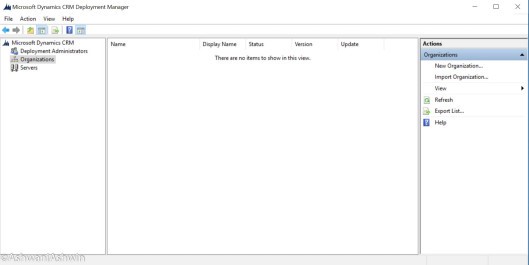
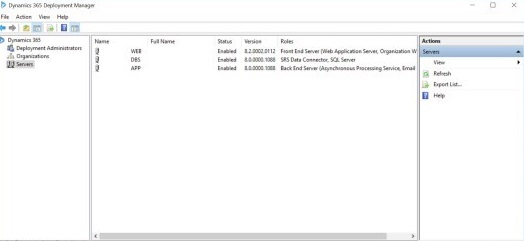
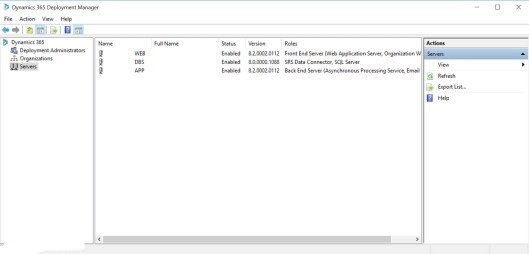
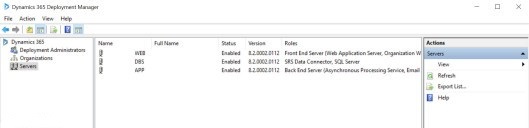
Review the Installation via the preparation Manager:
After the Installation is completed with the server roles (Front finish and Back End) and also the news Extension setup, open the preparation Manager.

Deployment Administrators: – It holds the account won’t to run Microsoft Dynamics CRM Server Setup.
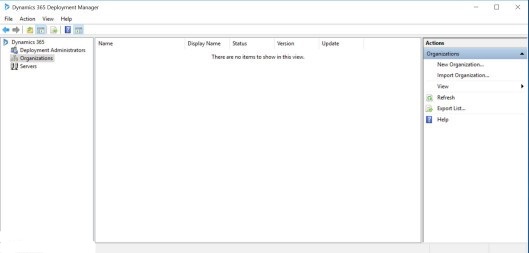
Organizations: – it might be empty by default when the primary installation.
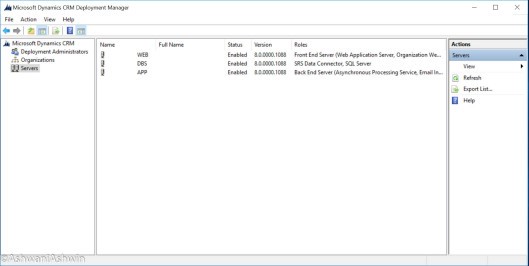
Servers: Points out all the servers connected for this readying. Notice that everyone the three server versions are mentioned as 8.0.0000.1088.
Upgrade to Dynamics 365:
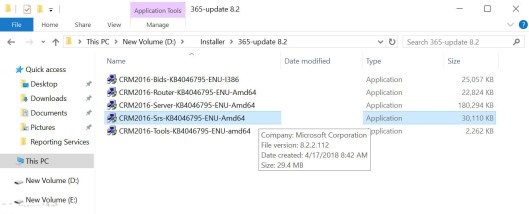
Now that the Dynamics CRM 2016 has been fully put in, next step would be to upgrade the CRM 2016 (ver eight.0) to latest out there update: eight.2.2 (Dynamics 365). Transfer and duplicate the Upgrade to the individual servers from the link here.
Web-Server:
Browse to the folder with the newest update:

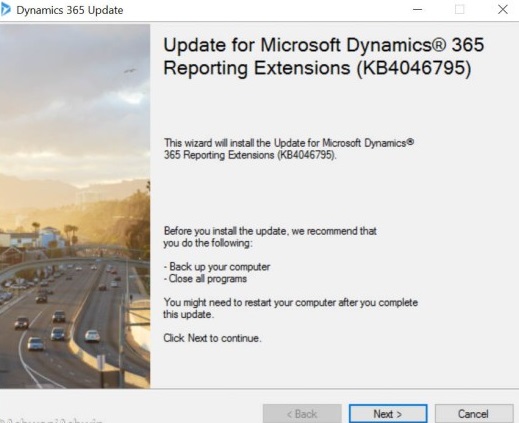
Double click on the CRM2016-Server-KB4046795-ENU-Amd64 to upgrade.
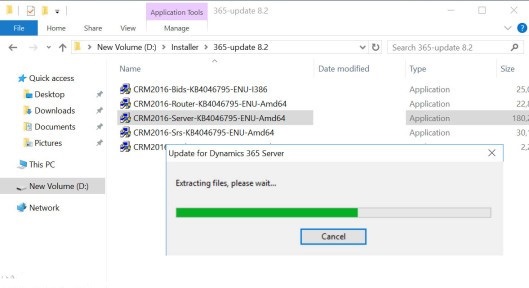
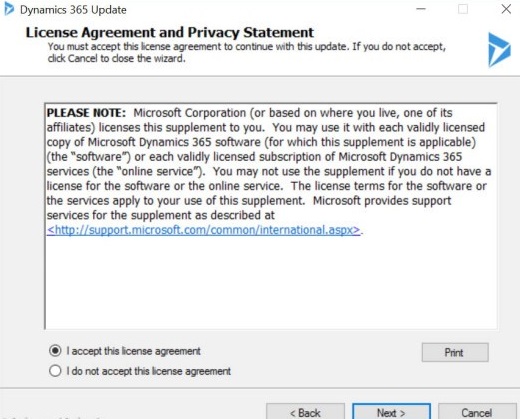
The upgrade wizard can begin to guide through the upgrade method.
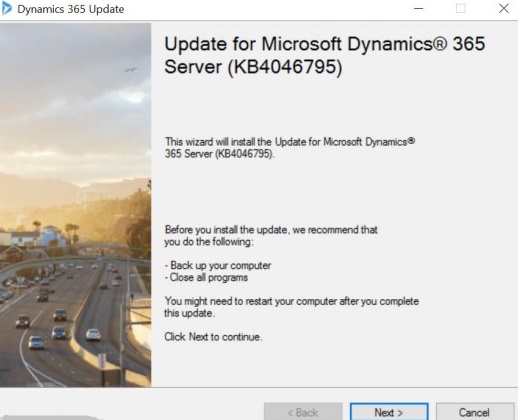
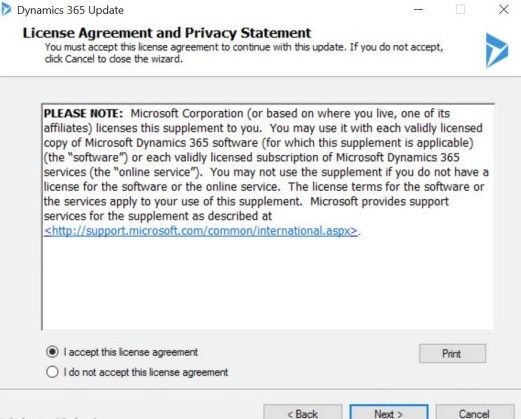
Accept to the license agreement and click on Next.

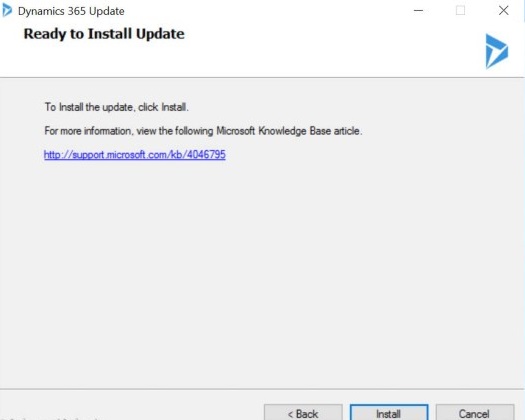
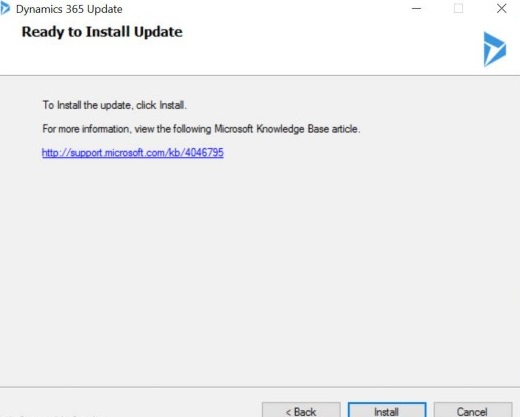
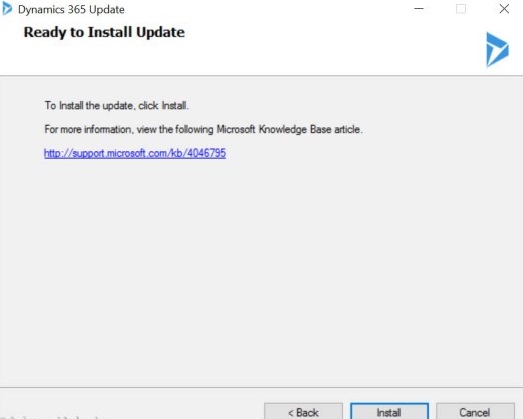
The final confirmation and link to scan through the article for from now on information, click on the Install button to continue.
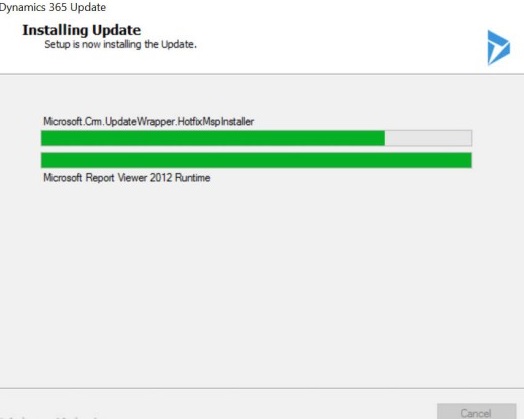
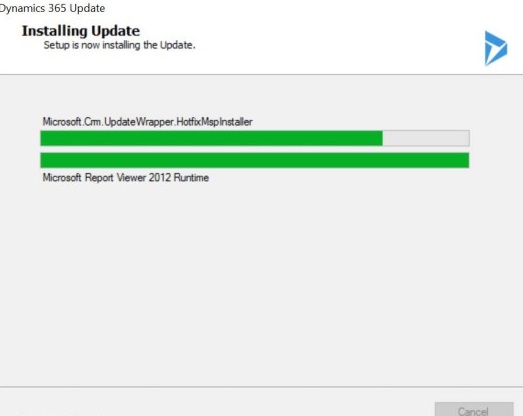
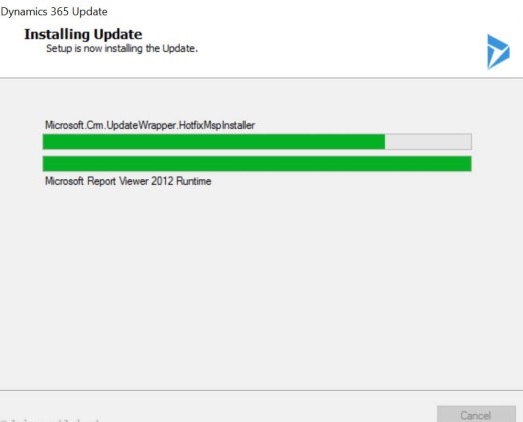
Then the installation will begin.
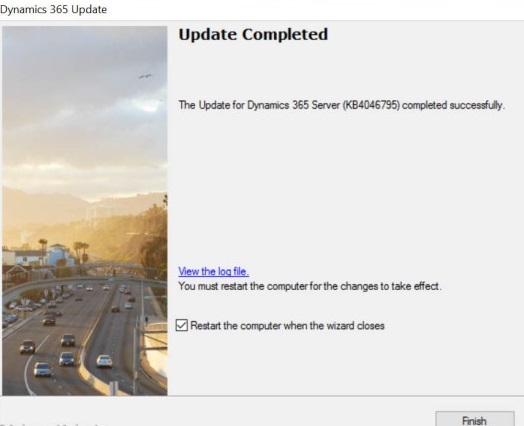
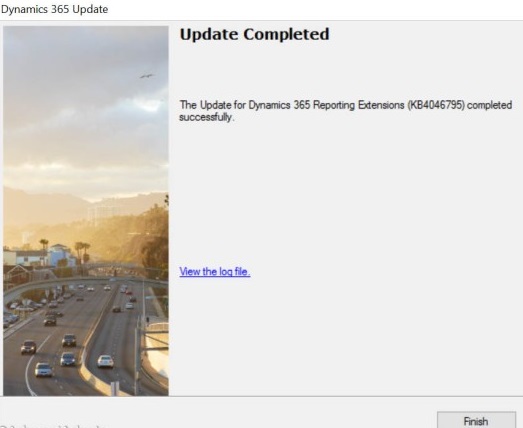
Upon productive completion of the upgrade, the log are offered. Save the file for future references.
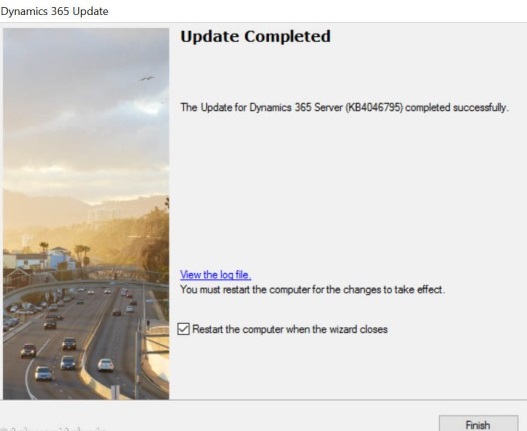
Click Finish to restart the computer and then open the deployment manager to check the update of the server.
The Web Server is updated with the newest version. Next still upgrade the App Server.
App-Server:
Browse to the folder with the newest update:

Double click on the CRM2016-Server-KB4046795-ENU-Amd64 to upgrade.

The upgrade wizard will start to guide through the upgrade process.

Accept to the license agreement and click next.
The final confirmation and link to browse through the article for to any extent further information, click on the Install button to continue.
The upgrading process and installation will begin.
Upon roaring completion of the upgrade, the log are out there. Save the file for future references.
Click on end to Restart the pc.
Open the preparation Manager in internet server to envision for the Server Update:
DB-Server:
Browse to the folder with the newest update. Since our reportage Service lies with the sound unit, Double click on the CRM2016-Srs-KB4046795-ENU-Amd64 to upgrade.
The upgrade wizard will start to guide through the upgrade process.
Accept to the license agreement and click Next.
The final confirmation and link to browse through the article for any longer information, click on the Install button to continue.
The upgrade install will begin.
Upon in completion of the upgrade, the log are out there. Save the file for future references.
Click on end to restart the pc.
Open the preparation Manager in web-server to see for the Server Update:
Return Back to the Web-Server to continue with the Organization creation.
Create Organization in CRM:
After the completion of the Dynamics 365 installation, can finally be ready to produce the primary Organization in CRM.
Open readying Manager. Browse to Organization and beneath Action Pane, Click on New Organization.
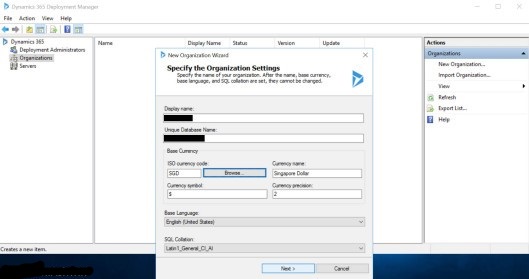
Fill in the organization details required to continue the setup.
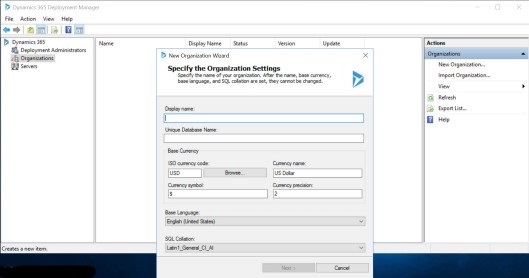
Once completed, click Next to continue.
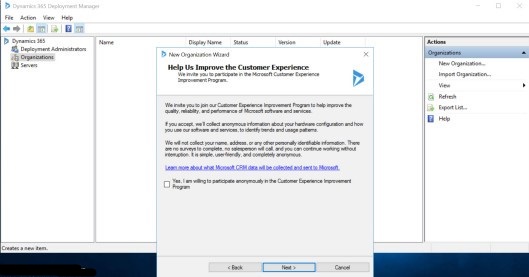
Check on the checkbox if you want to participate within the client expertise Improvement, else skip by clicking on ensuing button.

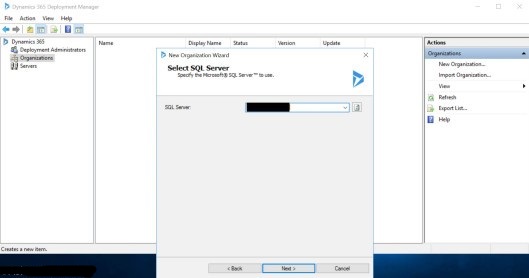
Specify the SQL server.

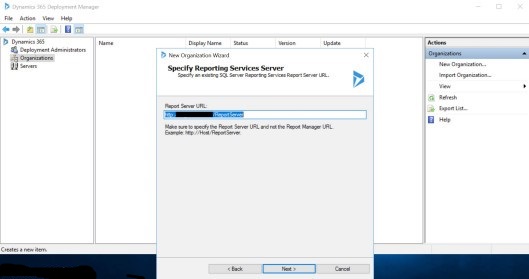
Specify the reporting services server url, click Next to continue.

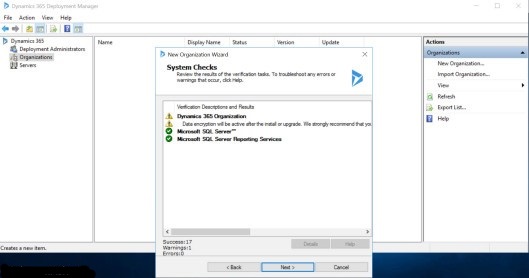
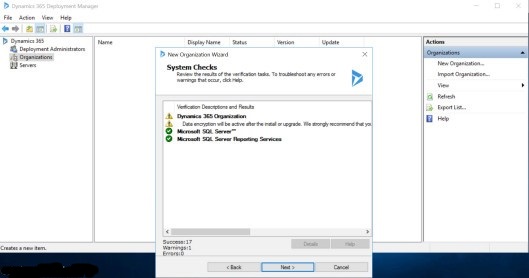
All the settings will be checked and verified before the Installation.
Check on the checkbox if you would like to participate among the shopper experience Improvement, else skip by clicking on succeeding button.
Specify the SQL server
Specify the reporting services server url, click Next to continue.
All the settings will be checked and verified before the Installation.
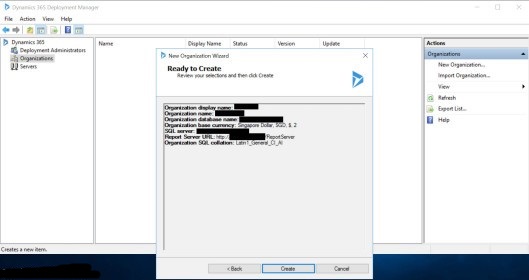
A final review of all the Organization Input is going to be shown before creation. Click on produce button to continue.
The Organization will start to Create.

Once Done you will see the Organization Created finally!
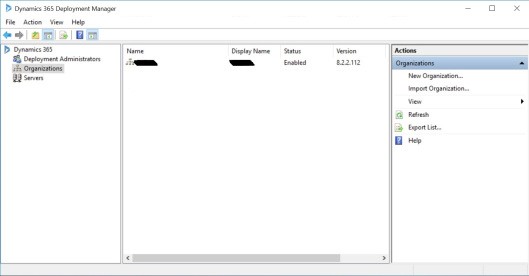
You can still produce multiple organizations supported your wants. Choose the freshly created organizations and click on on Browse to continue victimization the D365.
Hope that was helpful!
Any suggestions are useful to enhance this text just in case I’ve skipped over one thing vital. Thanks once more for all the support.