
In this post, we are going to check Windows Server, SQL Server, and Dynamics CRM installation.
Microsoft Dynamics CRM Server 2015/2016 hardware needs
Component: Development*
Processor: Quad-core x64 design three giga cycle per second mainframe
Memory: 8-GB RAM or a lot of
Hard disk: 500 GB or a lot of obtainable hard disc area
Microsoft Dynamics CRM 2015/2016 system needs and needed technologies This Microsoft Dynamics CRM (on-premises) version needs the subsequent software:
Microsoft Windows Server 2012 R2
A Microsoft Windows Server Active Directory infrastructure
An Internet data Services (IIS) web site
Claims-based security token service (required for Internet-facing deployments)
Microsoft SQL Server
Microsoft SQL Server coverage Services
Microsoft Exchange Server or access to a POP3-compliant email server (required for email tracking)
SharePoint Server (required for document management)
Supported device, Microsoft Dynamics CRM app, or net browsers, like later versions of net soul or the newest versions of Apple campaign, Google Chrome, and Mozilla Firefox
Microsoft workplace for Microsoft Dynamics CRM for Outlook and alternative workplace integration options
Step by Step installation of Windows server, MS SQL server, Report server, Active directory and MS CRM 2015/2016
1- Insert the Windows Server 2012 videodisk, and once you get the subsequent message press Enter also from the setup
2- watch for a short time until the setup masses all necessary files (Depending on your machine, it’ll take few minutes)
3- Once the setup files square measure loaded, the setup can begin with the subsequent screen. you’ll modification these to fulfill your desires (the default values ought to be fine for now)
4- Once you click Next, you’ll begin the installation, click “Install now”
5- you’ll see the subsequent screen, wait till it finishes loading
6- within the following setup screen, you’ll see four choices. Choose Windows Server 2012 Data Center analysis (Server With GUI).
7-After you click Next from the previous screen, browse the License terms, tick the “I settle for the license terms” and click on Next.
8-Now it’ll raise you for the drive (or partition) you would like to put in Windows on. Here I’m putting in it on the one partition I even have here. NOTE: this can take away the content of the partition. Either you produce a partition to put in windows on, otherwise you will check this on a testing machine.
9-Now once we have a tendency to pick our partition, clicking on next from the previous screen can begin the setup. This method may take a short time.
10- Once the setup is finished, it’ll restart and begin your Windows Server 2012 for the primary time. It’ll raise you then to line up a Arcanum for the Administrator user.
11- The setup can end your settings, may take a few of minutes.
12- Once the setup is finished, you’ll log sure the primary time to your Windows Server, because the screen says, press Ctrl+Alt+Delete to log in, and use the Arcanum you set within the setup method.

13 – Once you Log in, Windows Server 2012 can show the Server Manager
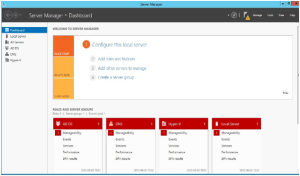
Windows server 2012 put in with Datacenter.
Installing Active Directory on Windows Server 2012:
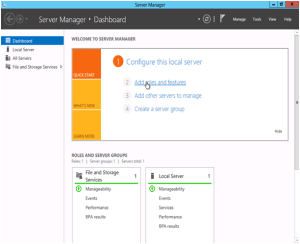
Open theServer Manager from the task bar.
From theServer Manager Dashboard, choose Add roles and options.
This will launch the Roles and options Wizard allowing modifications to be performed on the Windows Server 2012 instance.
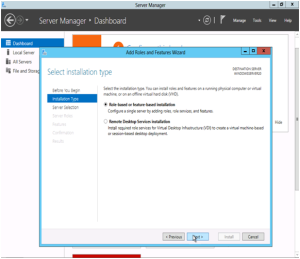
SelectRole-based or features-based installation from the Installation sort screen and click on Next.
Note: Roles square measure the most important feature sets of the server, like IIS, and options offer extra practicality for a given role.
The current server is chosen by default. Click Next to proceed to the Server Roles tab.
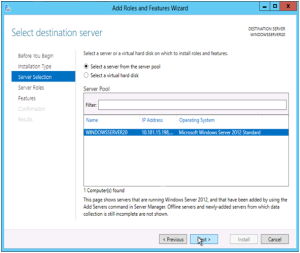
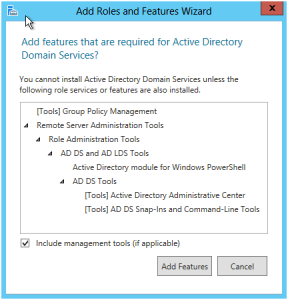
From the Server Roles page place a checkmark within the box next toActive Directory Domain Services. A notice can seem explaining extra roles services or options also are needed to put in domain services, click Add options.
Note: There square measure alternative choices as well as, Certificate services, federation services, light-weight directory services and rights management. Domain Services is that the glue that holds this all at once and desires to be put in before these alternative services.
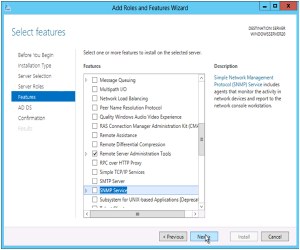
Review and choose elective options to put in throughout the AD DS installation by inserting a sign up the box next to any desired features; Once done click Next.
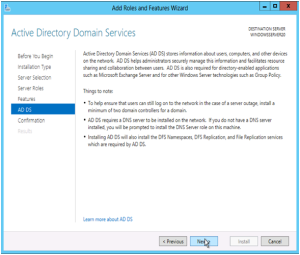
Review the data on theAD DS tab and click on Next.
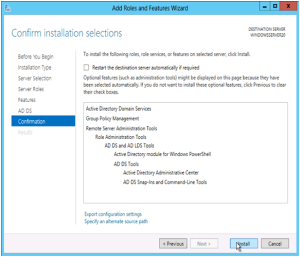
Review the installation and click Install.
Note: The installation progress is going to be displayed on the screen. Once put in the AD DS role are going to be displayed on the ‘Server Manager’ landing page.
Configuring Active Directory:
Once the AD DS role is put in the server can have to be compelled to be organized for your domain.
If you have got not done thus already, open the Server Manager from the task bar.
Open the Notifications Pane by choosing the Notifications icon from the highest of the Server Manager. From the notification concerning configuring AD DS click Promote this server to a site controller.
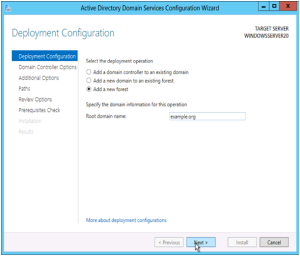
From the readying Configuration tab select Add a brand new forest from the radial choices menu. Insert your root name into the basis name
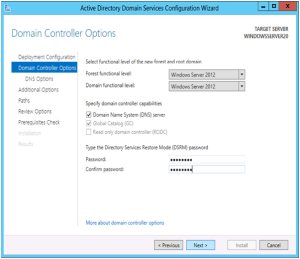
4. Review and choose a site and Forest useful level. Once selected fill during a DSRM arcanum within the provided arcanum fields. The DSRM arcanum is employed once booting the Domain Controller into recovery mode.
Note: the choice created here can have lasting effects to options and server domain controller eligibility. For any data on Domain/Forest, useful levels see official Microsoft documentation.
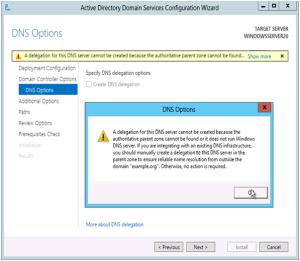
Review the warning on the DNS choices tab and selectNext.
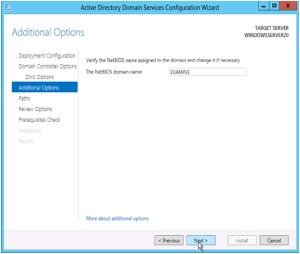
Confirm or enter a NetBIOS name and click on Next.
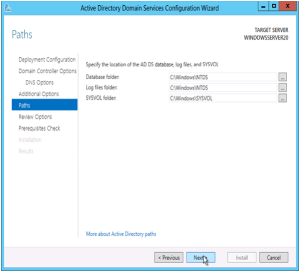
Configure the placement of the SYSVOL, Log files, and information folders and click Next.
Review the configuration choices and click Next.
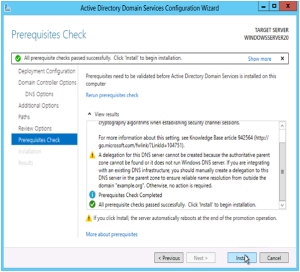
The system can check to confirm all necessary stipulations square measure put in on the system before moving forward. If the system passes these checks you’ll proceed by clicking Install.
Note: The server can mechanically be rebooted once the installation completes.
After the server is finished rebooting, reconnect via RDP. Congratulations on with success putting in and configuring a full of life Directory Domain Services on Windows Server 2012.
User Accounts needed for Dynamics CRM 2015/2016 (give name as per you)
Application Service: !svc.crm-app
Deployment net Service: !svc.crm-deployment
Sandbox process Service: !svc.crm-sandbox
VSS author Service: !svc.crm-monitoring
Asynchronous process Service: !svc.crm-ap
Monitoring Service: !svc.crm-monitoring

for part 2