Today I am aiming to justify manner toga way to put together your VMware integration or backup policy in Veritas NetBackup during a straightforward and straight way.
This Article delivers the step by step method of NetBackup VADP formation, permits adding for various Virtual machine servers for NetBackup to modify the VMware (VADP) backups.
Prerequisites:
1. ensure NetBackup Enterprises consumer license is put in on Master server and media server( just in case of ancient based mostly license)
2. Outline backup host (backup host may be the master or media server additionally alternative server)
3. Outline the Virtual Machine server that has to add has the data regarding the Venter/Exists (name and information processing address)
4. Verify the bi-directional communication between the NetBackup backup host & Master server to Venter over the port 443 and ESXi over the port 902.
5. Get document on Venter for NetBackup to use at the time of backup( if you’d wish to use the Esxi additionally for backups get the document on ESxi also)
Just follow the further down screenshots to organize VMware backup policy in Symantec NetBackup.
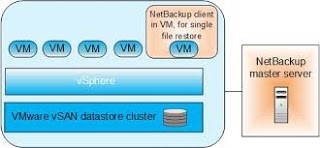
The NetBackup for VMware offers backup and bring back the VMware virtual machines that run on VMware ESXi servers.
NetBackup for VMware takes a plus of VMware storage Apes for information protection. The backup method is off-loaded from the ESXi server to a VMware backup host.
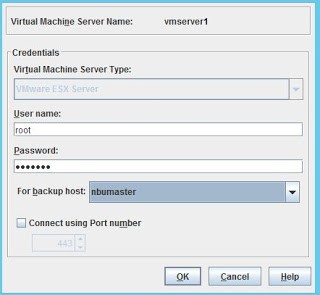
1. Add VMware Venter/cloud Director/VMware ESX server data.
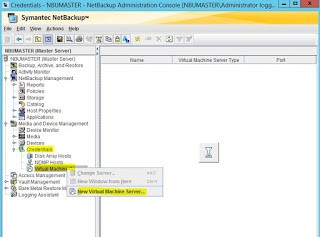
2. Choose your Virtual Machine Server kind.
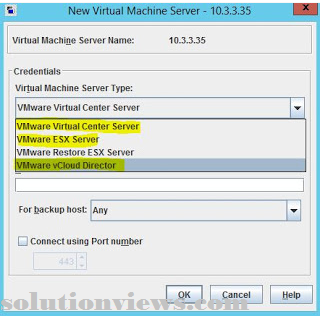
3. Give the server’s user credentials.
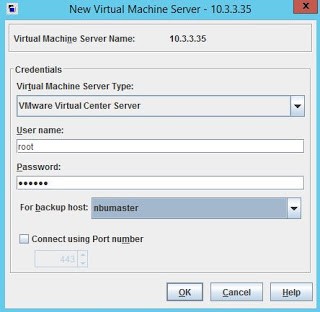
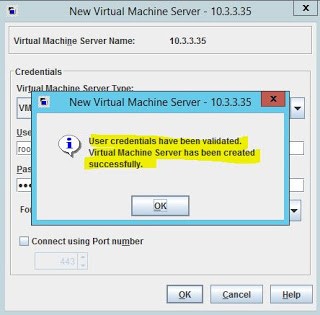
4. User name and parole once attested, then it’ll augment netbackup master server’s virtual machine server.
5. During this example I actually have else the vcenter server.
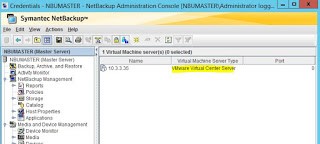
6. Same as I actually have else the VMware ESX server additionally.
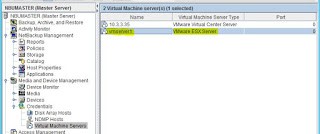
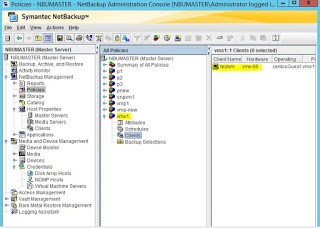
7. Currently able to} able to see each the virtual machine servers.
8. In Master server host assets add the VMware entrance hosts (VMware backup host).
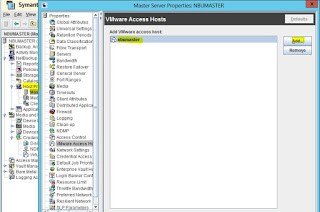
9. You’ll be able to put together the resource limits additionally.

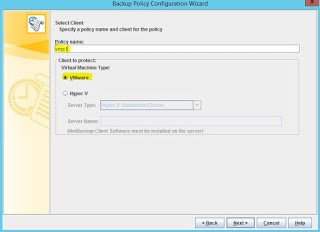
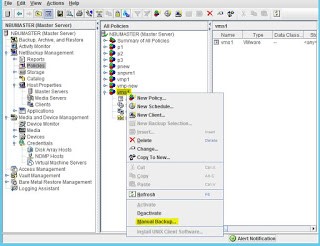
10. Currently produce a vmware kind policy victimisation Admin console wizard or CLI.

11. Choose your policy kind vmware or Hyper-V.
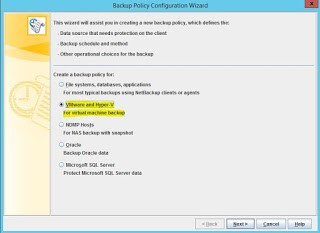
12. Specify the vmware policy name and choose the hypervisor kind (vmware or hyper-V).
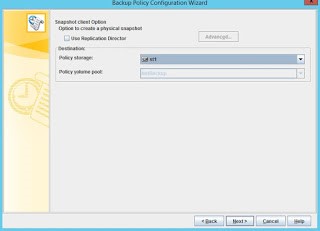
13. Choose the policy storage unit.
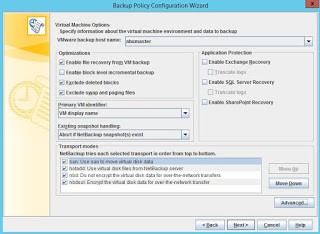
14. Vmware policy options to put together.
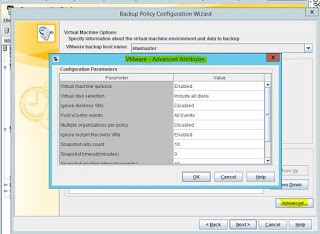
15. Choose the advanced options.
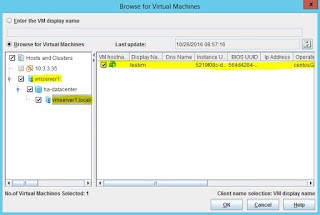
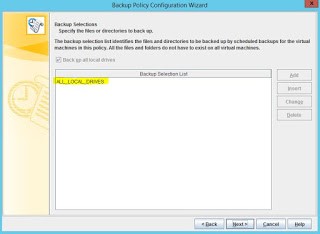
16. Then choose the virtual machines to backup (automatic or Manually)
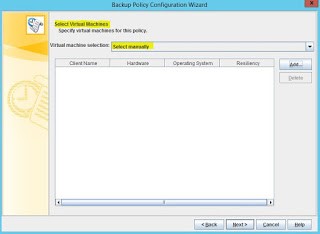
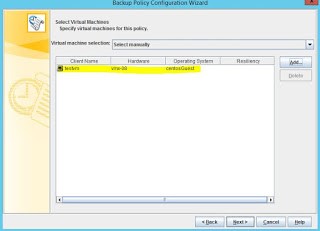
17. Choose the vm’s to backup.
18. Currently the vm is else to backup consumer list.
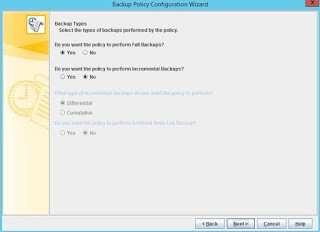
19. Choose the backup sorts.
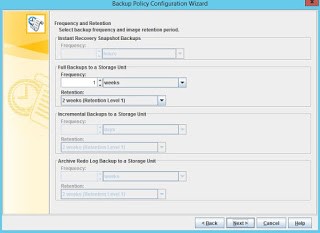
20. Choose the schedule, frequency and retention levels.
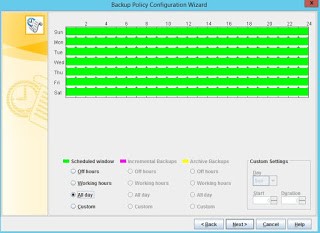
21. Choose the backup window.
22. Outline report of policy.

23. Currently vmware policy got created.
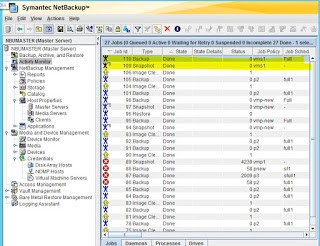
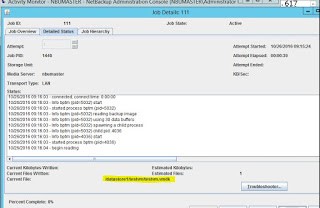
24. To check run a manual backup.
25. Accessing through vSphere consumer, the test is running.
26. Backup got initiated.
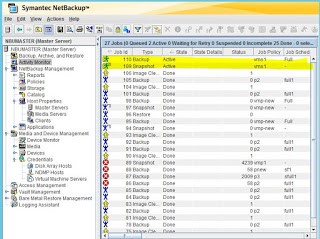
27. it’s initiating the snap and so backup of vm.
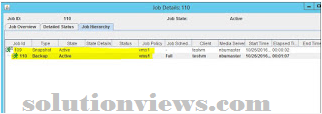
28. Virtual machine backup done with success.
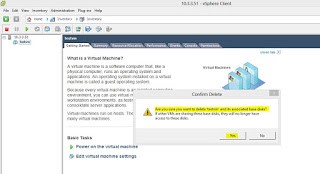
29. For analysis purpose, remove tectum from the EsxServer.
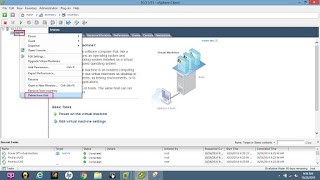
30. Test server got deleted.
31. Currently we tend to go restore and recover the virtual machine from BAR GUI.
Choose your vm backup image.
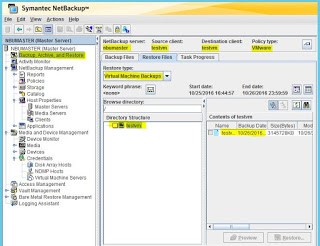
32. Choose your restore choices.
33. Take a look at the restore activity and begin the restore.

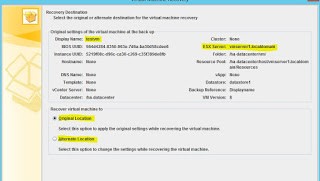
35. Currently it’s restoring the vmdk files to ESX server information store.
36. Then restoration with success completed.
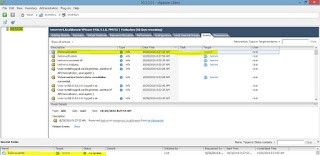
37. Currently sign up the vSphere consumer, able to} able to see the test server.
I
will invariably value more highly to choose VM host victimization machine-controlled choice rather than manual, that you’ll be able
to notice from
the below screenshot and whereas choosing a similar use show name to pick out the VM’s rather than victimization hostname, as a result of if you utilize a hostname as a
selector someday you may notice a DNS problems.
At same time if you’ve got selected the show name then you ought to not amendment it within the VMware Venter, if
it therefore then
backup can fail because of not capable to search out the show name selected within the backup
policy
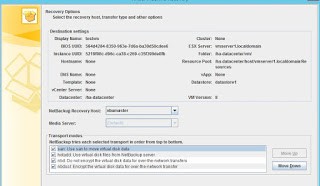
Now you’ve got organized the VMware policy to
schedule the backup. however please
note in VMware policy the necessary one
is transport mode which supplies you the nice information transfer rate as per to the transfer mode you decide on. Commonly I exploit in my surroundings is
nbd it’s nothing however via
network.