The Windows Server Update Services (WSUS) role, which first appeared in Windows Server 2008 (previously, WSUS was installed as a separate app called Software Update Services), allows system administrators to manage the installation of Microsoft product updates and security patches on corporate computers. The Windows Internal Database (WID) or a separate SQL Server instance can be used for the WSUS database. When implementing the WSUS role, this option picks the administrator.
We’ll teach you how to back up this database in a Windows Server 2012 R2/2016 system in this article.
There are no built-in backup and restore utilities in WSUS. To backup WSUS, you can use ntbackup (wbadmin) or third-party tools.
A database (which keeps the information about WSUS settings, update metadata, clients, approvals, and other data) and the directory WsusContent (which includes the update files) make up the WSUS role architecture (it contains the cab update files themselves).
The files in the C:WindowsWIDData directory are saved when using the built-in WID as a WSUS database (as most WSUS installations do). SUSDB.mdf and SUSDB log.ldf are the names of the database files. SQL Server Management Studio cannot access to the WSID WID database remotely. As a result, you’ll need to utilise the sqlcmd.exe command-line application to backup the WID database, which will run a special SQL script.
To backup the WSUS database, follow these four simple steps:
- SQL Server 2012 SP1 Feature Pack is available for download and installation. You will be able to use the SQL command line as a result of this.
- ODBC driver for SQL Server 11 is available for download and installation.
- Create and run the WSUSdb backup script;
- To run the SQL script, create a task in Windows Task Scheduler.
- We’ll skip the first two steps because they’re so simple. So let’s begin with step three.
We must first construct the BackupWSUSdb.sql file, which comprises two lines:
BACKUP DATABASE [SUSDB] TO DISK = N’f:wsus_db_backupWSUS_DB.BAK’ WITH NOFORMAT, INIT, NAME = N’WSUSDB – Full Database Backup’, SKIP, NOREWIND, NOUNLOAD,STATS = 10
GO
F:wsus_db_backupWSUS_DB.BAK is the path to the backup file that you want to create (you can change the path and file name, it’s really up to you).

Running SQL script
To run the script you should use sqlcmd.exe utility:
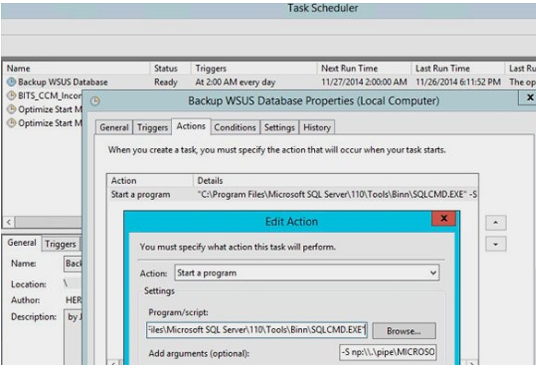
sqlcmd.exe -S np:.pipeMICROSOFT##WIDtsqlquery -if:WSUS_DB_BackupbackupWSUSdb.sqlAction to Launch the Script
It’s fairly simple; just follow the steps in the next screenshot. Start Task Scheduler and create a new job to perform the command above on a regular basis.
Stop IIS and WSUS Service and copy the contents to the E:wsusWsusContent directory if you want to generate a backup copy of the update files so you don’t have to download them again when reinstalling or migrating WSUS to another server.
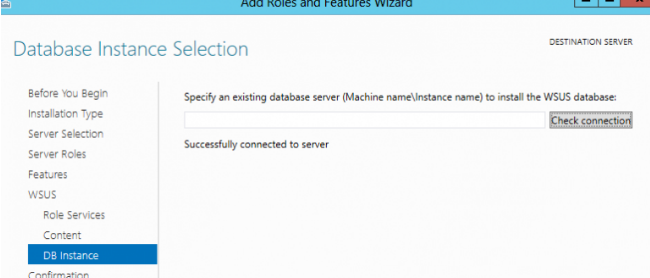
When using a full-fledged SQL Server instance, you can use the SQL Server Management Studio console GUI to configure a backup of the WSUS database using the built-in SQL Server Scheduler tasks.
To build a backup copy of the database, use the PowerShell module for SQL (SqlServer). You can manually download the module from the PowerShell Gallery (https://www.powershellgallery.com/packages/SqlServer/21.0.17224) or use the PoSh command:
Install-Module -Name SqlServerTo back up the SQL database from PowerShell, run the PoSh console as an admin and run the command:
Backup-SqlDatabase -ServerInstance ".pipeMICROSOFT##WIDtsqlquery" -Database "SUSDB" -BackupFile e:backupSUSDB.bakInstall SQL Server Express and restore the database from the backup with the same name SUSDB if you wish to reinstall WSUS using your WSUS database backup file. It’s also sufficient to request that the existing database be used during the WSUS installation.