The Read-Only Domain Controller (RODC) is a new type of domain controller that debuted with Windows Server 2008. Only a read-only copy of Active Directory is stored by RODC (except password hashes and other sensitive information). RODC domain controllers are often used in branch offices and remote offices where physically securing a server that serves as a domain controller is problematic. Attackers will not be able to obtain access to your entire copy of Active Directory if a RODC domain controller is compromised. We’ll show you how to install and configure an additional RODC domain controller on Windows Server 2019 in this article.
Before you begin installing the RODC, double-check that:
Your domain’s functional level is Windows Server 2008 or higher;
There is at least one regular writeable domain controller (RWDC) in the domain.
RODC can be installed on both Full GUI and Core installations of Windows Server 2019.
Install Windows Server 2019, give it a name, and assign it a static IP address on a real or virtual host.
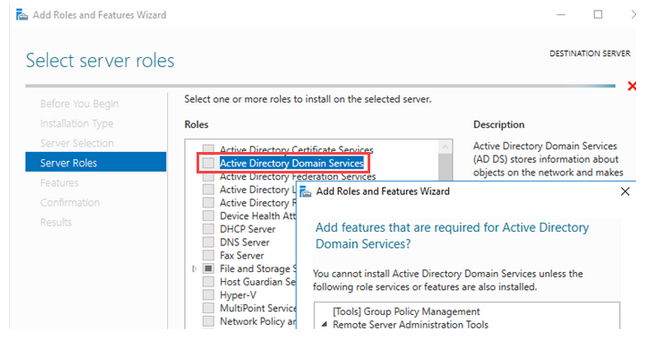
Install the Active Directory Domain Services role in Server Manager (Manage > Add Roles and Features > Roles).
Click on the “Promote this server to a Domain Controller” link.

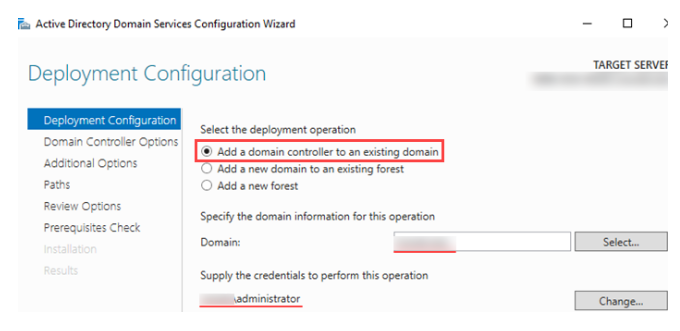
In the Active Directory Domain Services Configuration Wizard, select Add a domain controller to an existing domain.
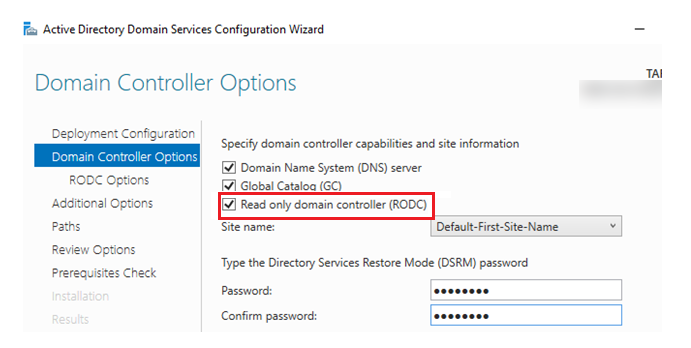
In the next step, check the Read-only domain controller (RODC) box and provide a password for Directory Service Restore Mode
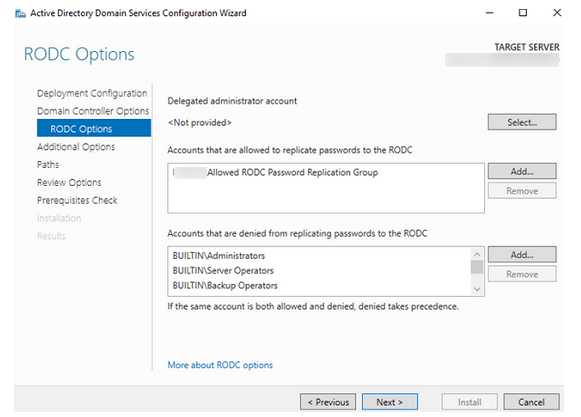
You can specify or create a domain account that will operate as the local admin of the RODC host and can conduct administrative duties in the Delegated administrator account box (on the RODC Option screen). This account, however, will not belong to the Domain Admins group and will have no ADDS access.
You can define a set of users who are permitted to replicate passwords to the RODC in the Accounts that are allowed to replicate passwords to the RODC section. Users from this group will be able to log in to the RODC controller if the WAN link between your distant office and the central site goes down. The DOMAINAllowed RODC Password Replication Group is recommended by default.
Users that are not authorized to duplicate passwords in the RODC are listed in the Accounts that are disallowed from replicating passwords to the RODC field. Passwords of domain administrative accounts with higher rights are not copied to the RODC by default (Domain Admins, Server Operators, etc.).
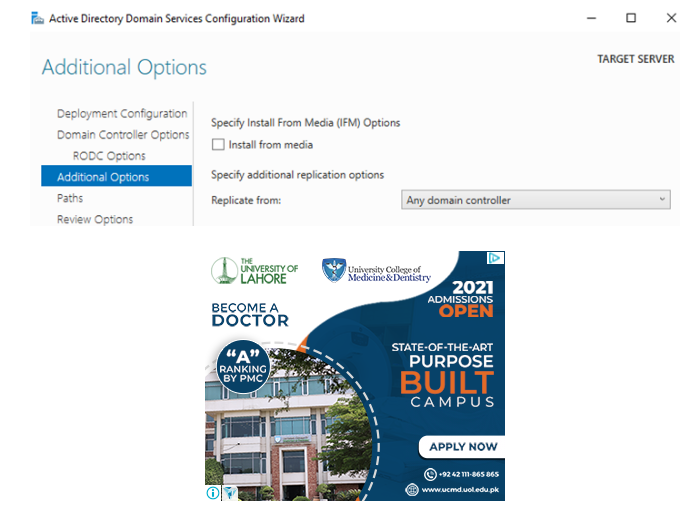
On the next tab, specify the name of the DC that will be used as the replication source or leave the default value Any domain controller.
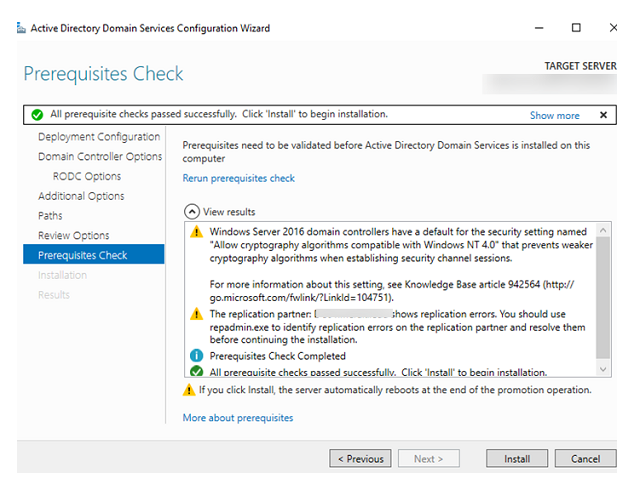
At the last step, if all the prerequisite checks are passed successfully, click Install to begin the installation.
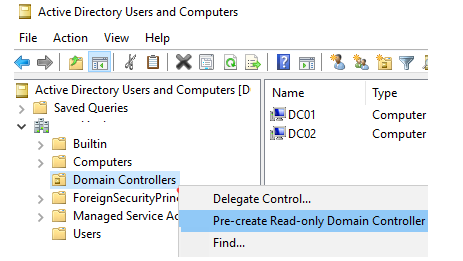
There is still another way to make a RODC. The idea is that you start by pre-creating a domain computer account. To do so, visit the ADUC console (dsa.msc), right-click on the OU titled Domain Controllers, and choose Pre-create Read-only Domain Controller account from the drop-down menu. For the DC, create a new account (this computer does not need to be a member of the domain yet).
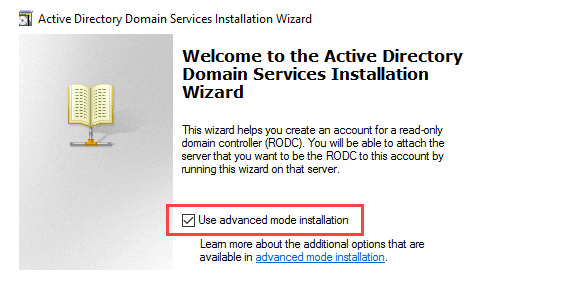
The Active Directory Domain Services Installation Wizard starts. Check the Use advanced mode installation checkbox, click Next.
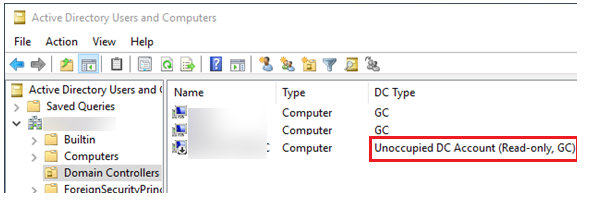
Follow the steps of the wizard and specify the parameters of the future RODC. After completing the wizard, a new disabled RODC computer account with the description Unoccupied DC Account (Read-only, GC) will appear in AD.
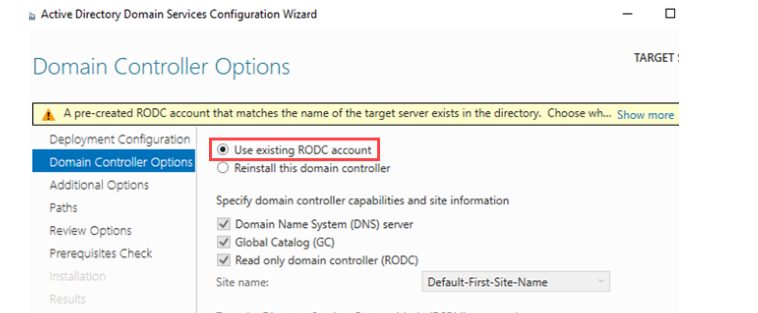
If the name of the target server matches the RODC account in AD, the message A pre-created RODC account that matches the name of the target server exists in the directory will appear, and you will be prompted to select the Use existing RODC account option when promoting a server to a domain controller.
Alternatively, you can install the RODC using PowerShell:
Install-WindowsFeature -name AD-Domain-Services -IncludeManagementTools

Import-Module ADDSDeployment

Install-ADDSDomainController -Credential (Get-Credential) -DomainName Solutionviews.com -InstallDNS:$true -ReadOnlyReplica:$true -SiteName "Default-First-Site-Name" -Force:$true
Or, you can use an alternative way with a pre-created RODC account:
Add-ADDSReadOnlyDomainControllerAccount -DomainName solutionviews.com -Credential (get-credential solutionviews.com\Administrator) -domaincontrolleraccountname "RODC3" -sitename "Default-First-Site-Name" -delegatedadministratoraccountname "SOLUTIONVIEWS\RODCAdmin"

Install-ADDSDomainController -DomainName solutionviews.com -Credential (get-credential solutionviews\Administrator) – UseExistingAccount