In the following post, you will be taken onto the journey which explains the installation of Windows Server 2016 on VMware.
Versions of Windows Server and their Requirements
Windows Server ’16 comes in 3 different versions namely, Server Core – no GUI, Server with desktop experience – with GUI and the last, nano Server. Microsoft headless server is the hindmost in the list, which is completely administered remotely without local logon abilities which renders it astute solution for the deployment of the cloud.
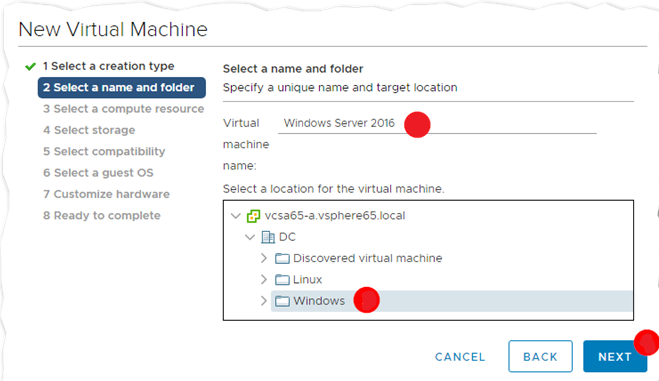
Creation of the base VM
In the following procedures adapted, vSphere Client HTML 5 is used.
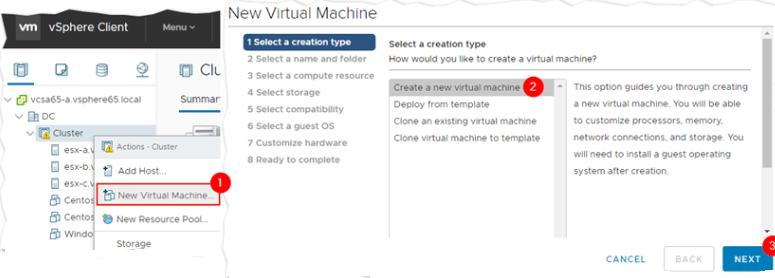
Right click on the cluster/host to select New virtual Machine. Then from the wizard select create a new virtual machine.
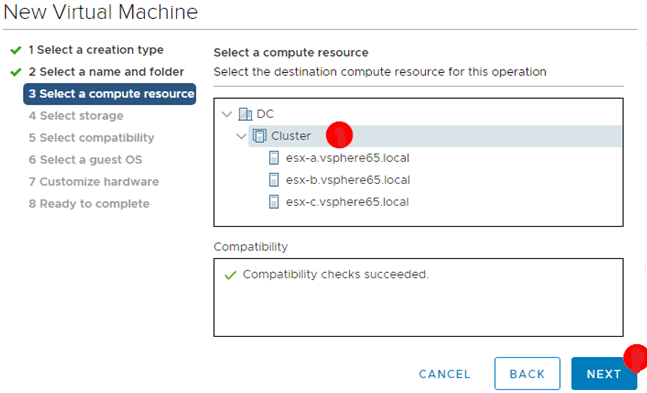
Selection of ESXI host where VM will be deployed will be done, in the following example a DRS enabled cluster is selected.
VM will be created on the datastore which you select. Check for the storage policies, select the correct from the VM storage policy drop down list.

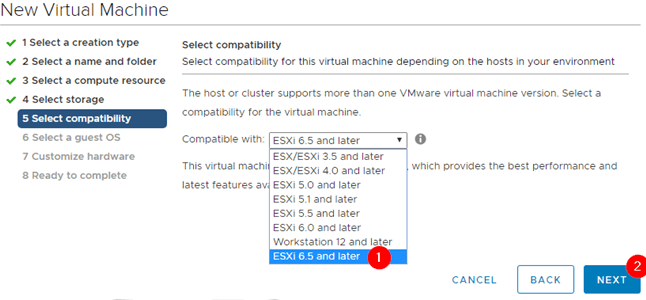
Selection of the right compatibility will be made accordingly which is in line with the ESXi version installed. In the example 6.5 or later is selected.
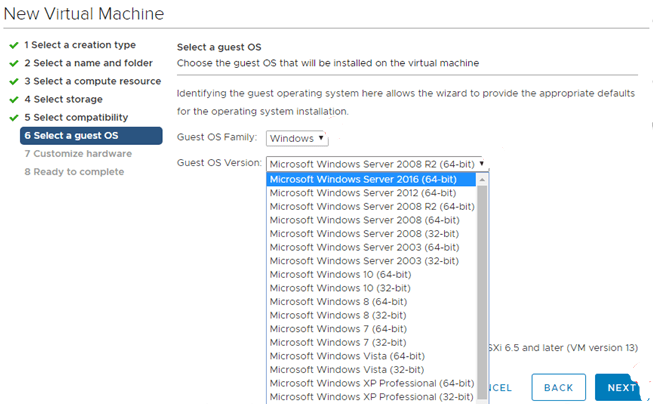
In the next step opt for Microsoft Windows Server 2016 64 Bit guest OS Family and Version types. If the older version of ESXi is being used then select Microsoft Windows Server 2012 64 bit is suggested.
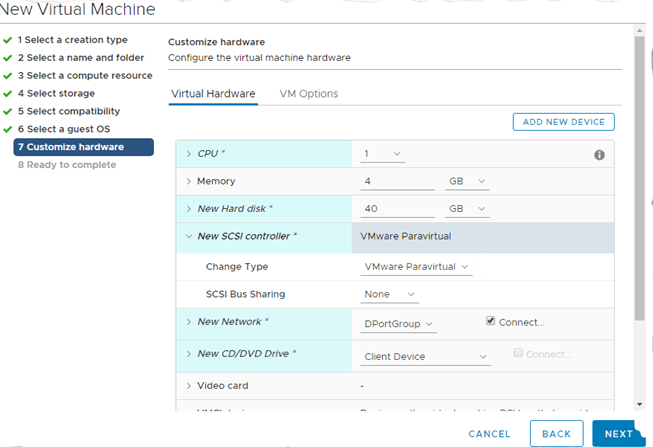
Certain amendments have been made keeping in view the storage space, VMDK type is changed to thin. To enhance the performance of the virtual machine, SCSI controller is changed to VMWare Paravirtual, and the vNIC driver is changed to vmxnet3. And as far as rest are concerned, it is set as per the recommendations of the wizard.
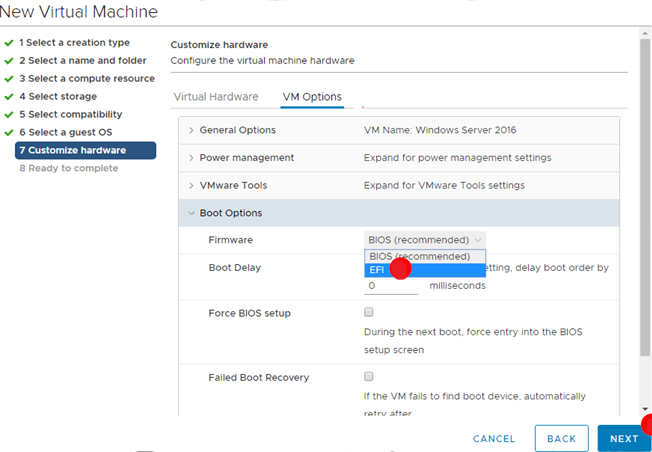
For using the Secure Boot Feature, BIOS firmware settings will be change to EFI by opting the Boot Options. Firmware under the VM Options tab.
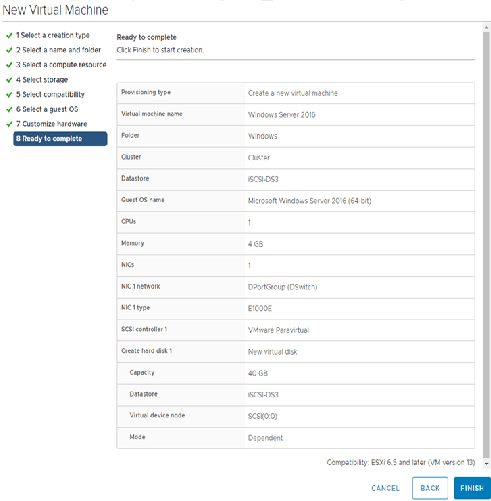
After giving a sight to the configuration and create VM by clicking Finish.
Installation of Windows Server 2016
After the installation of VM, guest OS will be installed. For the said purpose. Remote Console is used for its convenience.
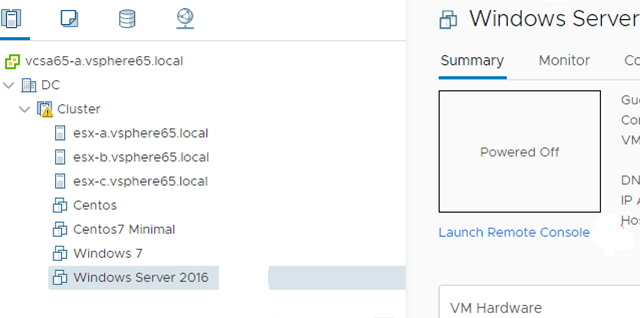
After highlighting the newly created VM, press on Launch Remote Console link.
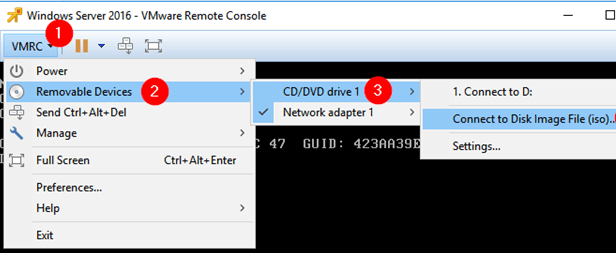
From the VMRC click Connect to Disk Image File > Removable Devices > CD/DVD Drive 1. Move to the concern folder where the Windows Server 2016 ISO image is served and click it.
After selecting language. Localization settings matching your country and time zone.
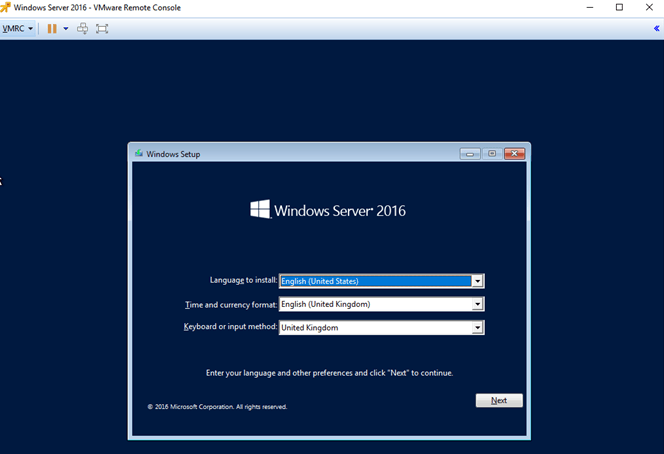
Press Start to initiate installation.

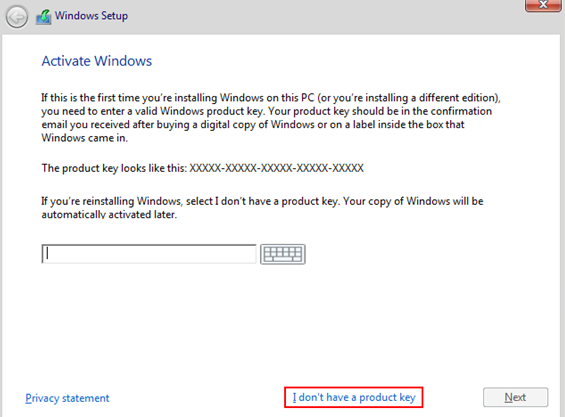
If you have the product key enter one, and if not then simply install windows server in evaluation mode by clicking I don’t have a product a key.
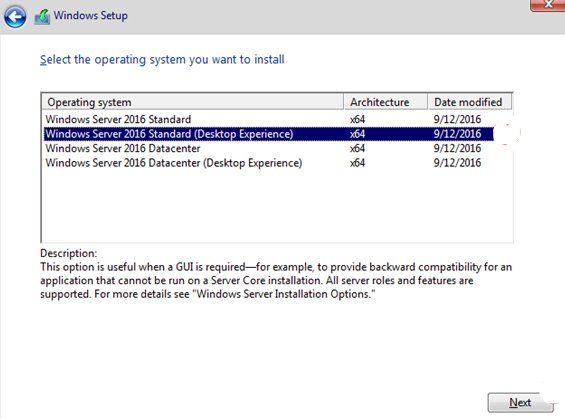
Windows server edition and deployment type will now be selected which in the example it is Windows Server 2016 Standard.
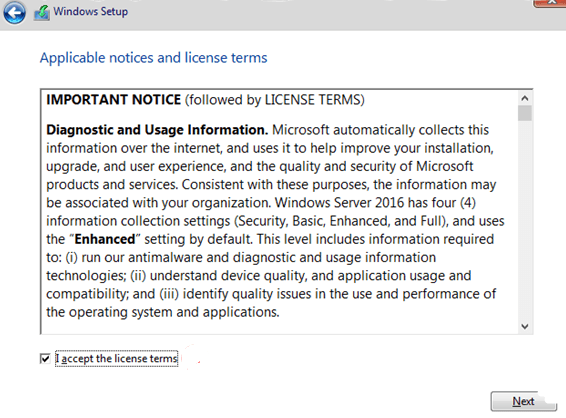
Accept the license terms.
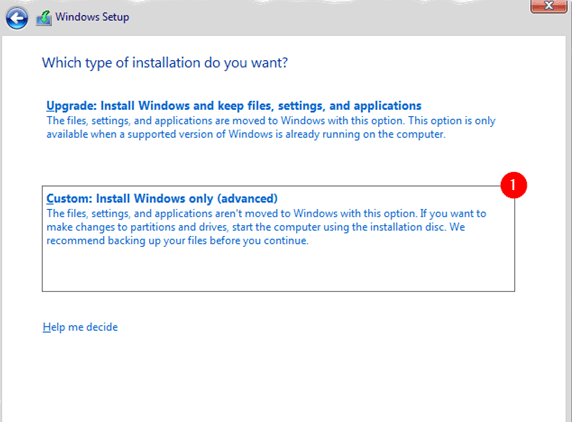
Select as shown in the picture below.
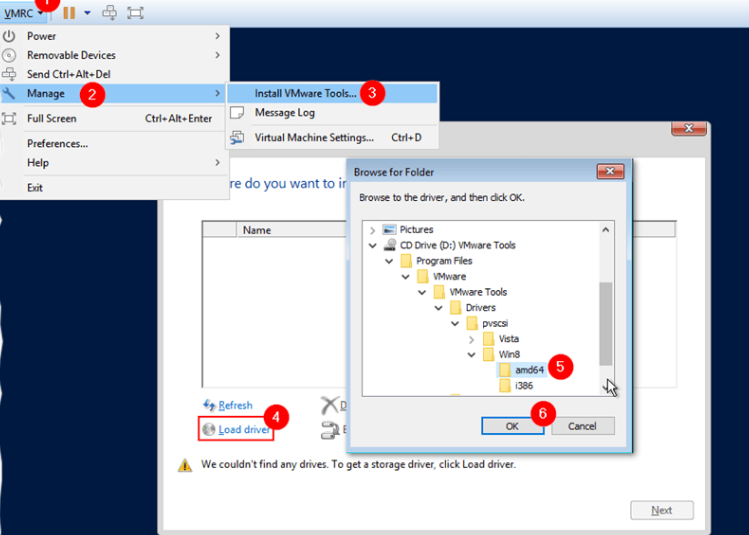
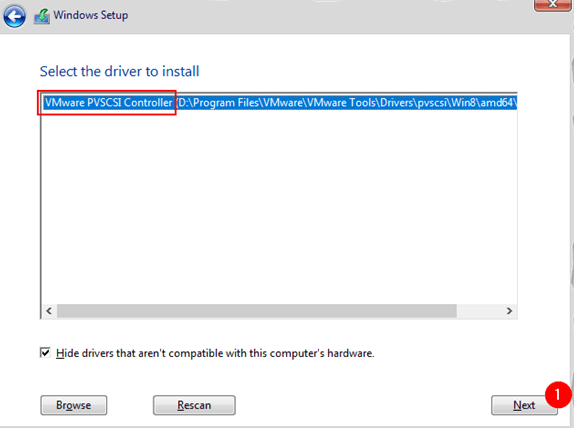
As I selected VMware Paravirtual as the SCSI controller, I must mount the vmtools ISO image at this stage. This will not be required if the default setting were enforced. For this, select install VMware Tools from VMRC > Manage. This will help ion mounting the ISO image onto the VM. Afterwards. Select Load Driver > CD drive Labelled VMware Tools and drill down to the Program Files/ VMware/VMware Tools/Drivers/pvscsi/Win8/amd64 folder as shown in the picture below.
VMware Controller is selected by default, hit the next button.
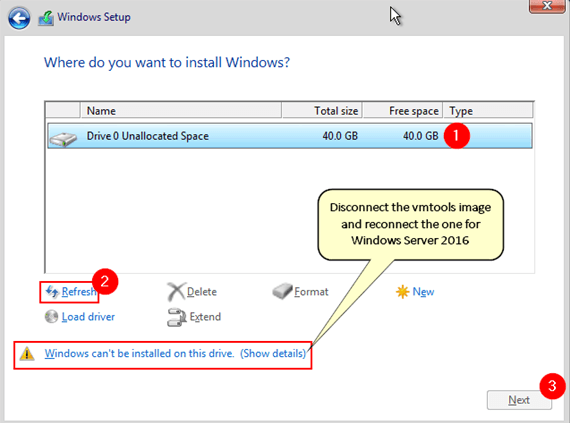
You can easily know whether or not the paravirtual driver has correctly caught the VMDK specified for the VM, if you are seeing DRIVE ) Unallocated Space listed, Reconnect to Windows Server 2016 and cut off from the VMware Tools ISO image prior to hitting the next button. Until you do it, moving ahead will not be possible.

After establishing your connection to Windows Server 2106, be assured that ‘Window’s Can’t be installed…’ at the bottom end is cleared. Then press next to be able to make use of the entire disk for Windows Server installation.
Be patient as the installation process will take some time.

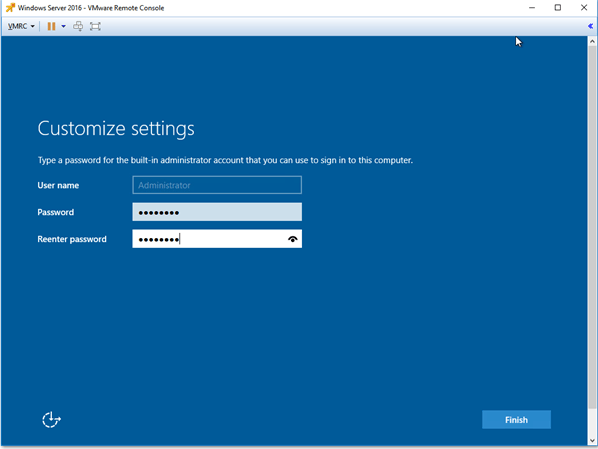
Now, decide with the password for the administrator account.
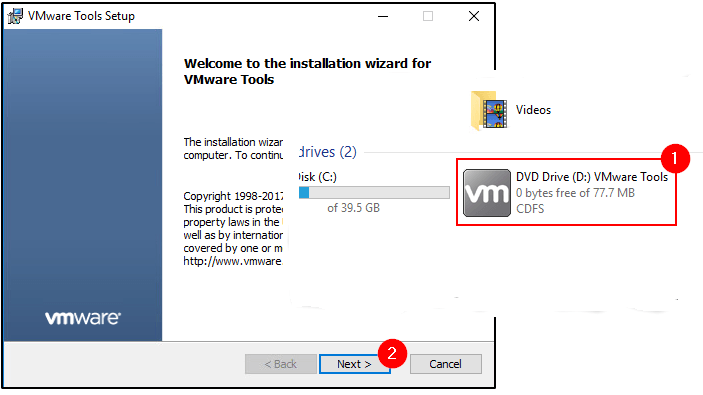
Furthermore, log into your newly created account to install the VMware tools. As previously discussed, cut your connection from the windows server ISO image and mount the VMware tools ISO image by using the VMware Remote Console Client. Hit the recently mounted DVD Drive or taskbar notification for running the vmtools installer. Just guide yourself with the procedures provided and reboot the VM when you are finished.


One Comment on “How to Install Windows Server 2016 on VMware”