Configuring the Start screen on a reference machine and then exporting the layout is the simplest approach to generate a custom layout for other Windows 10 devices. In this example, we’ll utilize a machine with the 10 Enterprise edition. To begin, modify the Windows 10 Start menu to look the way you want it to. You can customize the Start menu by adding necessary elements, arranging them in the appropriate order (creating your own columns and groups of programmes), and removing unnecessary applications. To keep the Start menu uncluttered, you can remove all options except File Explorer.
Now all we have to do is right-click and eliminate things. Simply shrink it after it’s finished. As you can see, customizing your Start menu is simple.
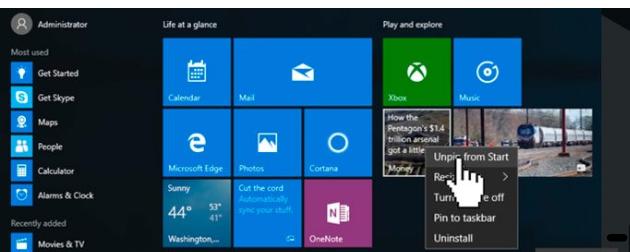
It’s only an example, so do anything you like; the choice is all yours.
Now we need to use PowerShell to capture that Start menu. We’ll launch file explorer and navigate to the C: drive. We don’t have anything here right now, so it’s the identical C: drive that you’d get when installing an operating system. Now we must make a folder in this location.
So, go to Command Prompt by right-clicking on the Start menu (as Administrator). Use the following command:
mkdir c:\layout
You can create a folder manually by going to the C: drive without command prompt,
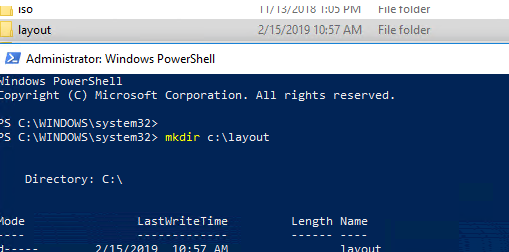
The next step is to take a screenshot of our Start menu. We must switch to PowerShell. Simply type powershell and the PS letters will appear in front of the system32 path.
Now navigate to the layout folder, and you’ll notice that there’s nothing there. Using the Windows PowerShell cmdlet Export-StartLayout, you can export the current Start menu layout’s settings to XML format.
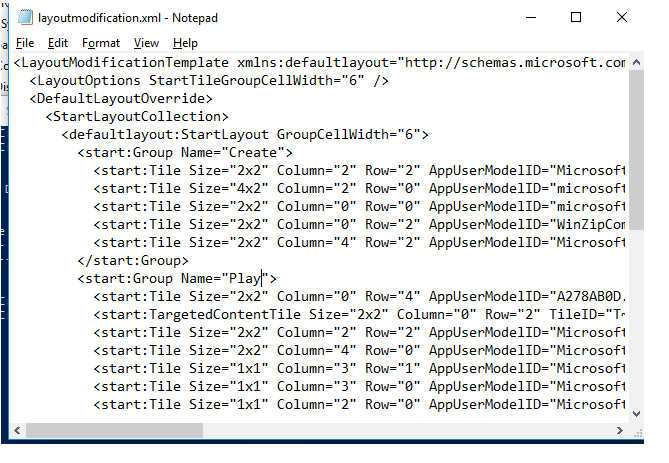
export-startlayout -path c:\layout\layoutmodification.xmlOnce it is done, you will see that you have that XML file in your folder.
You need to make sure that this is .XML file, it’s really important

The screenshot below shows the contents of XML file, which is the export of custom Windows 10 Start menu layout.
After that, Command Prompt can be closed.
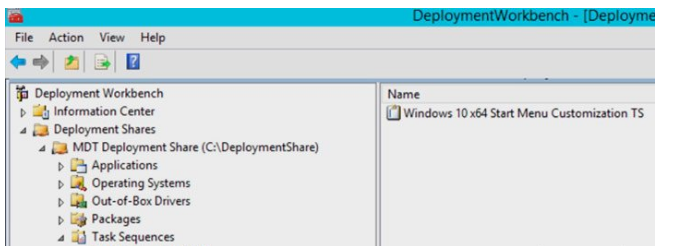
Now we’ll take a look inside MDT. You’ll need to make a new Task Sequence now:
Go to Deployment Shares > MDT Deployment Share in the Deployment Shares section.
Select New Task Sequence from the context menu when you right-click on Task Sequence.
Specify Task SequenceID (WIN10STARTMENU) and TaskSequenceName (Windows 10 x64 Start Menu Customization TS) in the Task SequenceID (WIN10STARTMENU) and TaskSequenceName (Windows 10 x64 Start Menu Customization TS) fields.
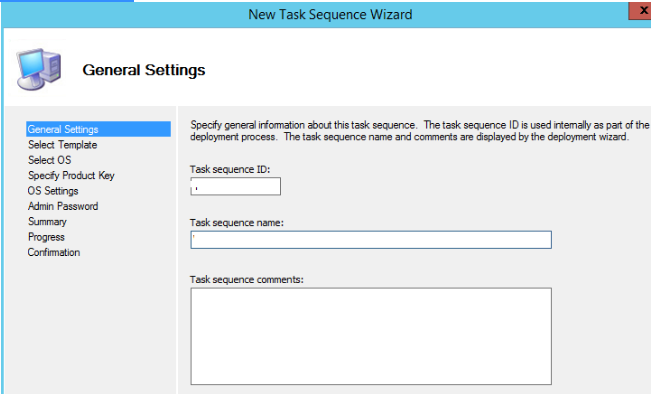
Select Standard Client Job Sequence as the Task Sequence type, and then select the OS image on the MDT for which you wish to apply this task.
Copy the layoutmodification.xml file from your Windows 10 reference computer to the MDT server’s Deployment Repository folder (..\DeploymentRepository\Scripts\Username\StartMenu).
You must establish a folder structure named UsernameStartMenu on your own.
So let’s proceed to the Task Sequence area by double-clicking on your new Task Sequence. We’ll go into Custom Tasks because that’s where we’ll be sending everything out. We’ve made four custom tasks here.
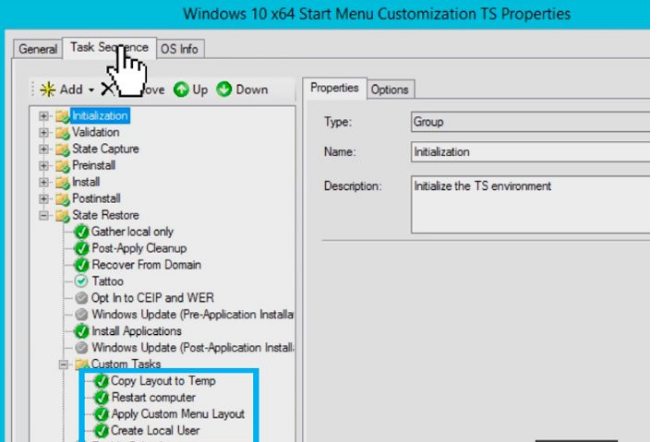
The first note is Copy Layout to Temp. We are running it as a command line (Add > General > Run Command Line).). The command line basically says that we are going to use layout modification and copy it to the Windows temp folder. We need to type in the next command:
xcopy /e /s /y /h /i %SCRIPTROOT%\Username\StartMenu\LayoutModification.xml c:\Windows\TempRestart Computer is the second note. We must restart the machine after exporting the.XML file with our captured layout.
Apply Custom Menu Layout is the third note. We’re going to add a new powershell script command to the mix. The import will be started with this command. We performed the export, so now it’s time to do the import. In the ApplyCustomMenu.ps1 file, we’ve written a PowerShell script.
The following code is included in this code:
import-startlayout -layoutpath c:\Windows\Temp\LayoutModification.xml -MountPath $env:SystemDrive\Tip. If you do not want to use the import-startlayout cmdlet, you can simply copy your LayoutModification.xml file to the directory C:\Users\Default\AppData\Local\Microsoft\Windows\Shell\). To do this, you can use the command:
xcopy /e /s /y /h /i “%SCRIPTROOT%\Username\StartMenu\LayoutModification.xml” “C:\Users\Default\AppData\Local\Microsoft\Windows\Shell\LayoutModification.xml”
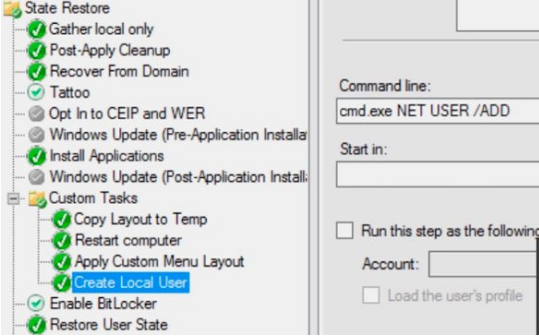
The last point to remember is to create a local user. We’re going to show you how it works, therefore we’ve created a local user for you. When the deployment is complete, it will leave you in the administrative account, where the Start menu will remain unchanged. When you log into another account, you’ll notice the modifications.
So, after you’re finished, click OK. You can now start installing your operating system. We’re going to employ a virtual computer in our situation.
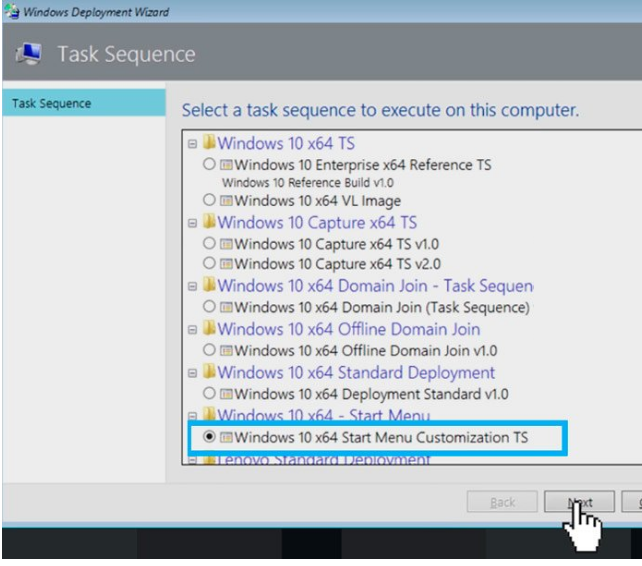
You must choose a task sequence to run during the deployment process. Simply select the task sequence that we previously created (Windows 10 x64 Start Menu Customization TS).
Let’s go to the Start menu after the deployment is finished. We are logged in as administrators, as we previously stated, and the personalization of the Start menu does not appear. Now all we have to do is change the user. Let’s log out and back in to the account we created in the last note.
If some tiles are missing after deploying a personalised initial screen, it’s most likely because you’re utilising tiles that require a.url or.lnk file. These.url or.lnk files must be moved to one of the following directories:
- %APPDATA%\Microsoft\Windows\Start Menu\Programs;
- %ALLUSERSPROFILE%\Microsoft\Windows\Start Menu\Programs.
The Export-StartLayout cmdlet for the.url shortcut in Windows 10 1703 uses DesktopApplicationLinkPath. The DesktopApplicationLinkPath must be changed to DesktopApplicationID, and the URL must be specified.
Let’s start by going to the Start menu. As you can see, our modified Start menu is present, just as it is on your reference PC. What a fantastic idea! It’s not ideal, but you could pretty much make it your own.
You can use your XML file to customise the partial Start layout to block users from editing certain groups of the Start layout. You can lock various groups of items in the Start layout. Users will be unable to alter (remove, unpin, or add) elements in these groups as a result.
To create a partial start screen layout, follow these steps:
Use the export-startlayout cmdlet to export the layout.
Use a text editor to open the generated xml file; if you want to block a specific item, add a special attribute to the tag. For instance:
Save the XML file to your computer.
The previously added groups will be erased and the groups in the new layout will be added if the partial start layout is applied to a machine that already has the StartLayout.xml file installed.
- HKCU\Software\Microsoft\Windows\CurrentVersion\CloudStore;
- HKCU\Software\Microsoft\Windows\CurrentVersion\Explorer\SlowContextMenuEntries;
- HKCU\Software\Microsoft\Windows\CurrentVersion\ContentDeliveryManager;
- %APPDATA%\Microsoft\Windows\Start Menu\Programs).