Since upgrading from WinPE 2.0 to WinPE 3.0, I’ve recently developed a new library of commands. With the release of Windows 7, Microsoft introduced a new approach to produce bootable USB drives called Deployment Image Servicing and Management (DISM.exe). You could be thinking to yourself, “What might I do with this?” At my workplace, we use it to re-image PCs, capture backup images, mount images, and so on. There are other applications for it, but I will not go into detail about them here. I’ve performed this method several hundred times. In a future article, I’ll teach you how to automate this procedure using a simple batch script.
WinPE 3.0 Boot Environment
You will need the following to proceed:
- Windows® Automated Installation Kit (AIK) for Windows® 7 RC (Download from Microsoft) : 08.06.09
- Bootable Flash drive (500MB or larger)
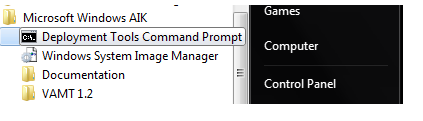
Once you have installed WAIK then you will need to browse to your start menu and click on “Deployment Tools Command Prompt”. I have provided a picture below.
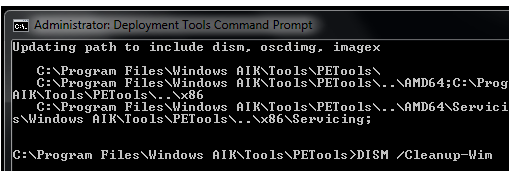
After you’ve started DTCP, you’ll need to run through the commands I’ve listed below. I’ve included a screenshot of the first one.
Prep/Cleanup
[vb]DISM /Cleanup-Wim[/vb]The DISM cleanup command clears out any prior wims/mounts you’ve worked with. If you do this frequently, you’ll need to use this command, otherwise you’ll start getting issues from prior wims that may still be on the system.
Copy WinPE 3.0 to your local C Drive
[vb]copype.cmd x86 c:winpe_x86
copy c:winpe_x86winpe.wim c:winpe_x86ISOsourcesboot.wim [/vb]
This creates a winpe_x86 folder on your C: drive and then copies the contents of the WinPE folder from the WAIK installation to your folder.
Mounting .Wim File on your local C Drive
[vb]Dism /Mount-Wim /WimFile:C:winpe_x86winpe.wim /index:1 /MountDir:C:winpe_x86mount [/vb]
This command mounts the wim file copied over in step #2, allowing you to explore the system32 folder and insert custom scripts, among other things.
Adding Packages to your WIM
[vb]Dism /image:C:winpe_x86mount /Add-Package /PackagePath:”C:Program FilesWindows AIKToolsPEToolsx86WinPE_FPswinpe-wmi.cab”
Dism /image:C:winpe_x86mount /Add-Package /PackagePath:”C:Program FilesWindows AIKToolsPEToolsx86WinPE_FPsen-uswinpe-wmi_en-us.cab”[/vb]
Adding Drivers to WinPE
[vb]DISM /image:c:winpe_x86mount /Add-Driver /driver:C:YOUR_FOLDER_OF_INF_DRIVERS /recurse[/vb]
The ability to install drivers using the /recurse command in DISM is a nice improvement over the prior peimg command in WINPE 2.0. We can now just put all of our drivers in their own directory and instruct DISM to scan the root folder and everything beneath it using the /recurse command. It makes no difference how many subdirectories there are. I have a large collection of drivers; for example, you’ll need network and vga drivers for everything you do in the WinPE environment. You can access network shares for capturing and deploying by adding the network driver to your WinPE boot environment. images created by wim
Adding Custom Scripts, Batch Files, Etc.
[vb]xcopy /e /y “C:YOUR_FOLDER_OF_SCRIPTS” C:winpe_x86mountWindowsSystem32[/vb]
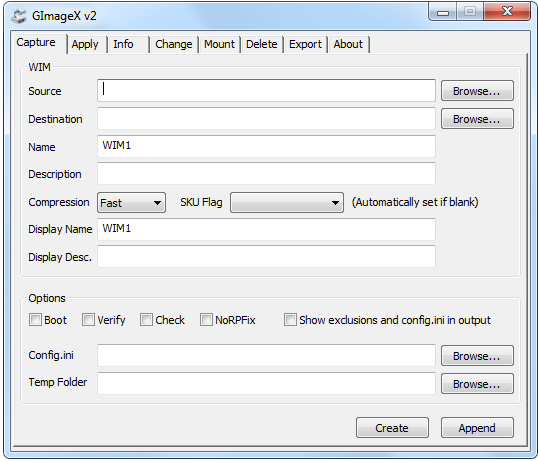
If you don’t add anything to your WinPE boot environment, you’ll just get a command prompt window when you boot it up on a computer. I’ve included over 15 separate batch scripts, each with its own set of functionalities. GImageX is one thing I strongly advise you to include. GImageX is a tiny GUI tool that you may add to your WinPE boot environment to capture, deploy, and mount images. Below is a screenshot of the GImageX GUI.
Unmounting your finished .WIM
[vb]Dism /Unmount-Wim /MountDir:C:winpe_x86mount /Commit[/vb]
This commits the final changes to your .WIM file and anything you added to it. It is very important to unmount your .WIM file when you have finished.
Copies your .WIM to Boot ISO
[vb]copy c:winpe_x86winpe.wim c:winpe_x86ISOsourcesboot.wim /Y[/vb]
Creates bootable .ISO of WinPE 3.0
[vb]oscdimg -n -bc:winpe_x86etfsboot.com c:winpe_x86ISO c:winpe_x86winpe_x86.iso[/vb]
Now, if you wish to utilise a flash drive, you must first format it in a specific way, and then copy the contents of the c:winpe x86ISO to your flash drive. That is all there is to it! Put it in a computer, turn it on, and it will boot to it. The is the. The ISO created in step #9 can simply be written on a CD using Nero or another programme capable of creating bootable CDs, and then booted in the same manner.
Optional Backup
[vb]xcopy /e /y “C:winpe_x86” E:BACKUP_FOLDER_FOR_LATEST_BOOT_BUILD[/vb]
This step is optional, but I always like to keep a backup for the future. Also, if you ever need to create another bootable flash stick or CD you can simply go to your backup and grab the files.