It’s not always possible to manage some Windows or application settings using Group Policy (GPO) in a domain context. It’s true that some settings can only be changed through the system registry. A GPO can be used to control registry keys on domain computers in an Active Directory domain. In this post, we’ll teach you how to manage, add, change, import, and delete registry keys across a domain using Group Policy.
GPP (Group Policy Preferences) is a new Group Policy extension in Windows Server 2008. The Group Policy allows you to handle registry keys and parameters. On domain-joined computers, GPP allows you to add, remove, or alter registry settings, values, and keys. Let’s have a look at these options.
Domain administrators previously had to construct their own administrative GPO templates (.adm/.admx) or.bat logon scripts to modify registry settings on domain computers. Saved *.reg files were also frequently used, which had to be imported into customers’ PCs using the reg import or Regedit.exe /s import.reg commands).
How to Add/Set Registry Key via GPO?
Assume we need to turn off automatic driver updates on domain computers in a specific OU. The SearchOrderConfig key in the registry must be changed.
HKEY LOCAL MACHINE\SOFTWARE\Microsoft\Windows\CurrentVersion\DriverSearching.
The registry settings can be found in the GPO area for Computer and User Configurations. You must apply the settings through the Computer or User configuration GPP, depending on the registry hive (HKEY LOCAL MACHINE / HKEY CURRENT USER).
On the target PCs, you have three options for selecting the registry key:
- The built-in GPP registry browser allows you to use a local remote computer as a reference with the Registry Wizard.
- Creates and organises registry objects in a folder with Collection Item. If you need to add a collection of registry keys, this is a good option.
- You can manually update a single registry key, parameter name, and value with Registry Item.
To set the registry parameter value, use the GPO Registry Wizard:
- Gpmc.msc is the Group Policy Management Console.
- Link a new GPO (or an existing one) to the relevant Active Directory Organizational Unit. Switch it to GPO Edit mode after that.
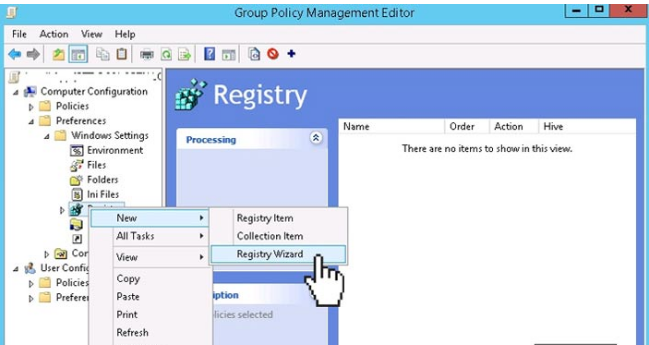
- Expand the following portion of the GPO: Preferences > Windows Settings > Registry > Computer (or User) Configuration Choose from the context menu: > Registry Wizard (new);
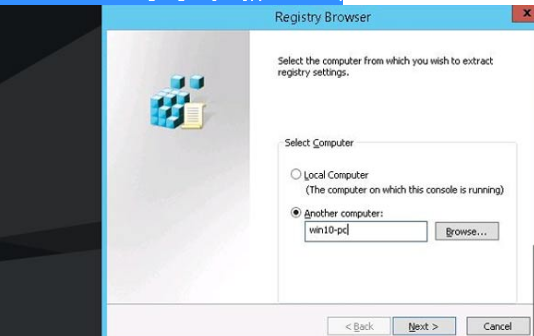
4. You can use Registry Wizard to look through the registry on a local machine. You can connect to the remote computer’s registry and choose an existing registry key and parameter.
5. To connect, type the name (or IP address) of the remote computer. Locate and choose an existing registry key/parameter using the Registry Browser tree.
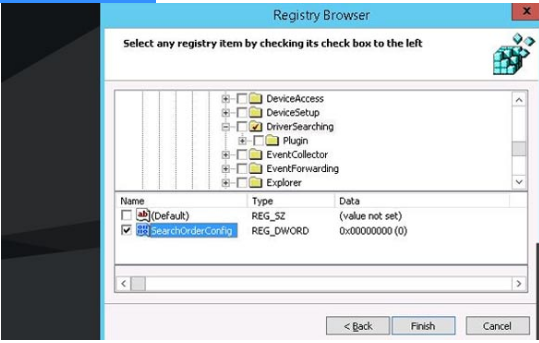
6. In this example, we want to add only one registry item to our GPP — REG_DWORD parameter named SearchOrderConfig;
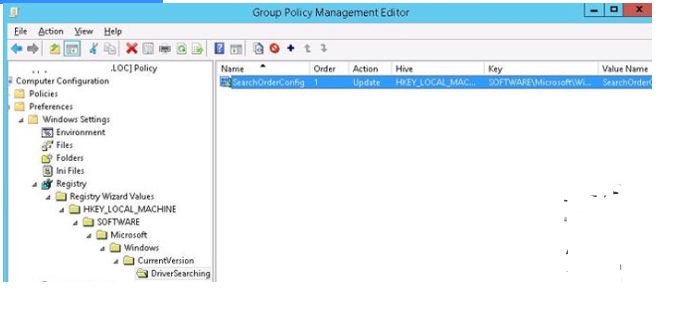
7. This parameter with the full reg path and value will be imported into the GPO editor console. You can change its value and the desired action. To set a specific registry parameter value, use the Update option (look below);
8. The registry policy setup is now complete. The given regisPtry settings will be applied to all computers in the OU the next time Group Policy is updated on machines (or after performing the gpupdate command).
You may also manually specify the whole registry key path as well as a parameter name:
- Select New > Registry Item

2. In the following fields (Hive, Key path, Value type, Value data) you have to specify the registry hive (HKLM, HKCU, etc.); registry key; parameter name, type, and value;
Note. You can use the following Hive names:
HKEY_CLASSES_ROOT (HKEY_LOCAL_MACHINE\Software\Classes),
HKEY_CURRENT_CONFIG (HKEY_LOCAL_MACHINE\System\CurrentControlSet\Hardware Profiles\Current), HKEY_LOCAL_MACHINE, HKEY_CURRENT_USER (HKEY_USERS\.Default will be used if you’ll set HKCU registry key using Computer Configuration Policy);
HKEY_USERS — affects individual user profiles.
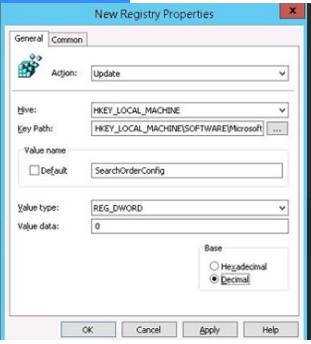
3. As a default, set the policy option to the Update mode.
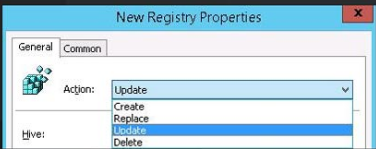
There are 4 types of operation with the registry items:
- Create a registry parameter — this command creates a registry parameter. The value of the argument does not change if it already exists.
- If the parameter already exists, the value will be updated with the value supplied in the GPP. If this is not the case, a parameter will be generated with the supplied value;
- Replace — deletes and recreates the registry item if it already exists (rarely used);
- Delete — deletes a registry key, as well as all of its subkeys and values.
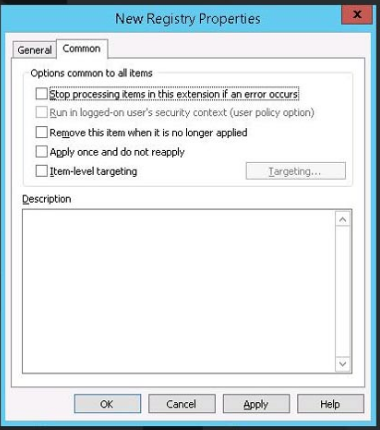
The Common tab has a lot of handy options:
Run in the security context of the currently logged-on user — the registry parameter is created in the current user’s context. The parameter will be created with the current user permissions if this option is selected. The policy will only be applied to the HKEY CURRENT USER hive if the user does not have local admin permissions. However, this does not apply to HKEY LOCAL MACHINE.
When you unlink GPO from the AD container, the altered registry settings will revert to their original state;
Apply once and don’t apply again – just apply the policy once for each computer.
Item-level targeting — can be used to target registry settings via GPP based on computer settings, and/or user properties at a granular level.
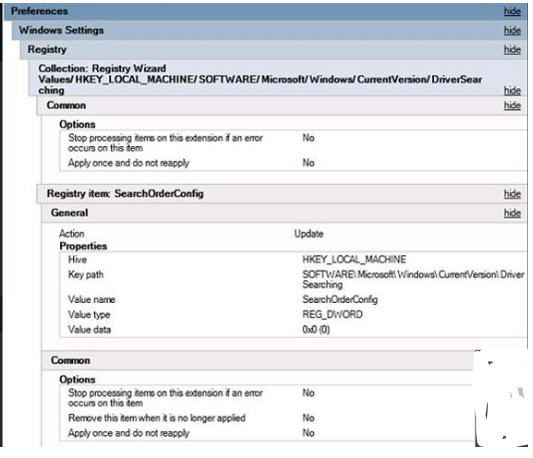
The final report with policy settings in the GPMC console looks like this:
How to Delete Registry Key Using the Group Policy Preferences?
On PCs in a domain, you can also use GP Preferences to delete a single key or registry record.
For example, suppose you want to remove a parameter from the HKEY CURRENT USER registry key.
Make a new registry entry. In the area User Configuration > Preferences > Windows Settings > Registry, there is a GPP item.
Select a parameter or key using the Registry Browser;
In the GPO console, expand the registry key. Change the Action to Delete in the parameter properties;
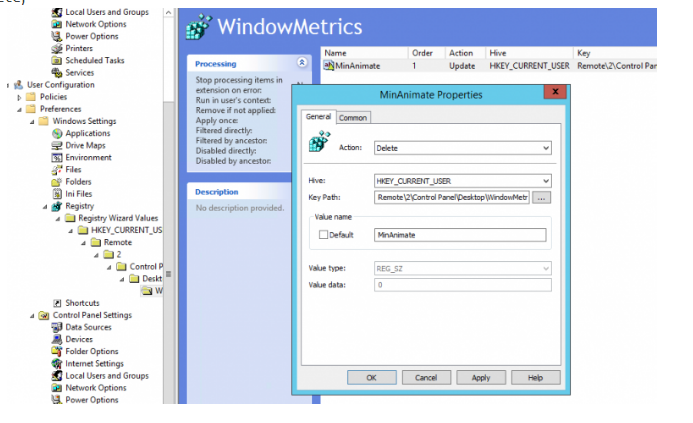
Save the adjustments; the given parameter will now be removed from the user’s registry hive after changing the group policy settings on clients.
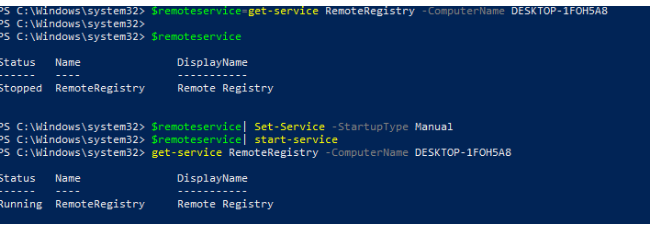
$remoteservice=get-service RemoteRegistry -ComputerName PC2212ba

$remoteservice| Set-Service -StartupType Manual

$remoteservice| start-service
How to Deploy a Reg File on Domain Computers Using GPO?
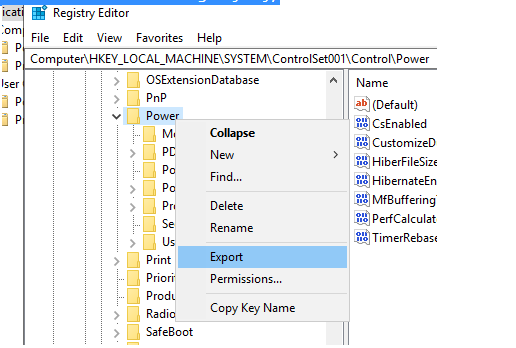
Consider another case in which you need to distribute a reg file containing a significant number of registry settings to all domain computers. Instead of manually defining each registry settings in the GPP editor, you can use the GPO startup script to import the reg file with the settings.
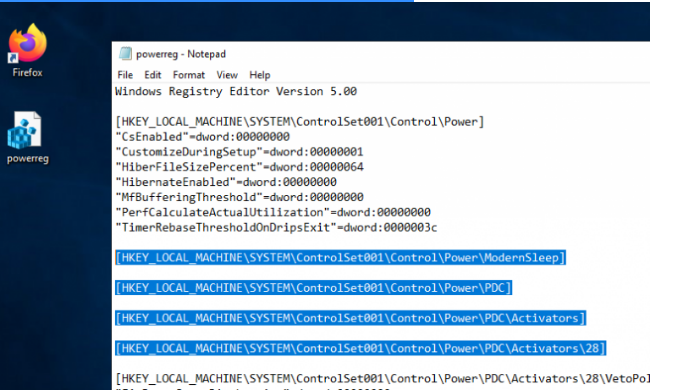
- To a reg file, export the registry key contents on the reference computer. To do so, open the registry editor (regedit.exe), right-click on the registry key, and select Export from the context menu. Name the file where you wish the contents of the registry key to be saved;
2. You can open this reg file in any text editor and make manual changes to it. Remove any empty registry keys, make any necessary changes to parameter values, and add new keys or parameters;
3. Start the Group Policy Management console, make a new GPO, and link it to the OU containing computers (if you wish to use the HKLM registry hive’s parameters);
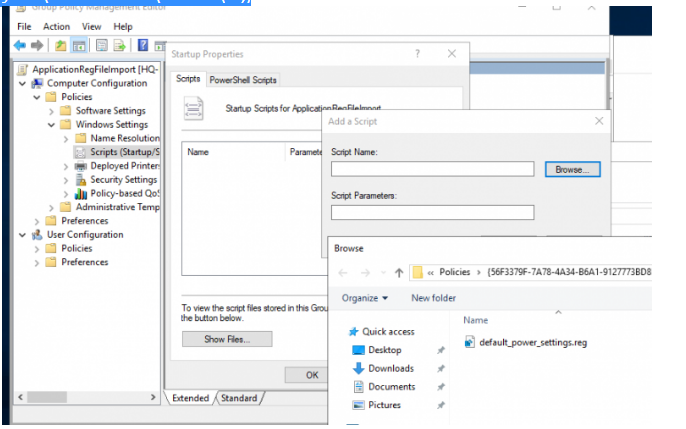
4. Go to the following section of the GPO: Scripts > Logon > Computer Configuration > Windows Settings > Scripts;
5. To add a new Startup script, click the Add button.
6. Click the Browse button in the next window and copy your reg file to this directory (domain-nameSysvoldomain-namePolicies…);
7. Specify the following parameters of the logon script:
Script Name: regedit.exe

Script Parameters: /s your_reg_file.reg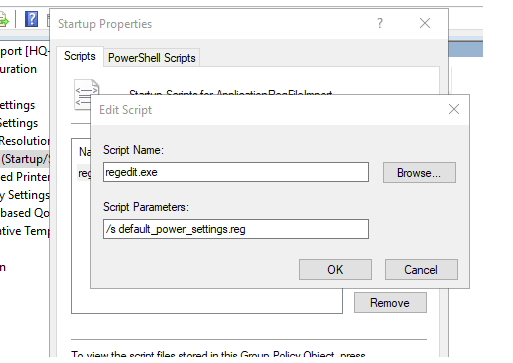
8 . Save the policy modifications;
9. After rebooting, the registry adjustments from your reg file will be applied to all computers in the selected OU.