To Transfer FSMO roles by using PowerShell is an easy and fastest method without clicks.
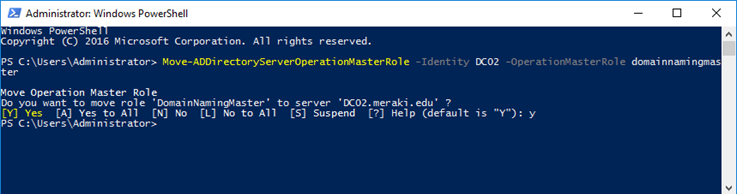
We can transfer easily Server’s FSMO roles to other Domain Controllers by using the following command.
For example, For transferring the PDC Emulator.

On the -OperationMasterRole switch you can declare FSMO roles, separated by a comma (,). So we can easily transfer all roles with just single command.

After this pressing Enter, a window will be prompted to confirm the transfer action.
Now Finally, We can confirm that all roles were transferred by using the PowerShell commands.
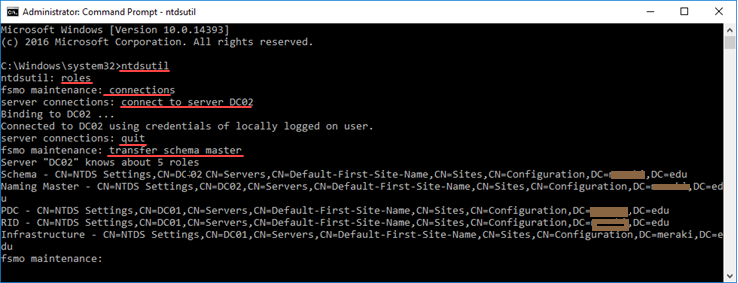
Transfer FSMO roles using the NTDSUtil tool
open the command prompt window with administrative rights.
Type ntdsutil and press Enter.
Type roles and press Enter.
Type connections and press Enter.
Type connect to server DC-01 and press Enter, where DC-01 is the server computer name that will transfer the FSMO roles to.
Type quit and press Enter.
After this, we will transfer all FSMO roles one by one with the PowerShell command, Then each line and Enter will appear in a confirmation window. Just we have to click Yes to continue.
Schema Master, type transfer schema master and press Enter.
RID Master, type transfer rid master and press Enter.
Domain Naming Master, type transfer naming master and press Enter.
PDC Emulator, type transfer pdc and press Enter.
Infrastructure Master, type transfer infrastructure master and press Enter.
After transferring all the roles, press quit exiting the NTDSUtil environment.
Thank you very much 🙂