This post will demonstrate how to combine Server 2016 Essentials with Office 365 for Exchange. This is one of the possibilities I’ll address in my session, “Exploring the options for migrating a small Exchange or Small Business Server installation to Office 365 or remaining on-premises.” It’s a lengthy title for a session, but it’s appropriate given the variety of possibilities available to you or your customers.
My Objective and Strategy
I’ll be installing the Windows Server Essentials Experience Role, configuring the environment as if it were a small business, and connecting it to an Office 365 tenant in this article. I chose to use the server role in this method (rather than a full Essentials OS setup) for my personal convenience. The experience should be identical; the only difference should be in the licensing. After completing these steps, we’ll look at user administration, specifically how to manage Office 365 mailboxes from the Essentials Dashboard. Additionally, we’ll examine how passwords are synced to O365 (yep, Essentials included Password Sync before the full version of DirSync did!).
What’s New in Essentials for Windows Server 2016?
- Integration of Azure Active Directory with Office 365
- Manage Active Sync Policies for Exchange
- Manage the libraries in SharePoint
- Integration with Microsoft Intone
- Virtual Network in Azure
- Backup in Azure
- Site Recovery in Azure
Requirement for Infrastructure:
- 1 DC SERVER (DC-CLOUD.Sifad.ae) Experience with ADDS, DNS, and Windows Server Essentials
01 – Adding the Server Role for Windows Server Essentials Experience
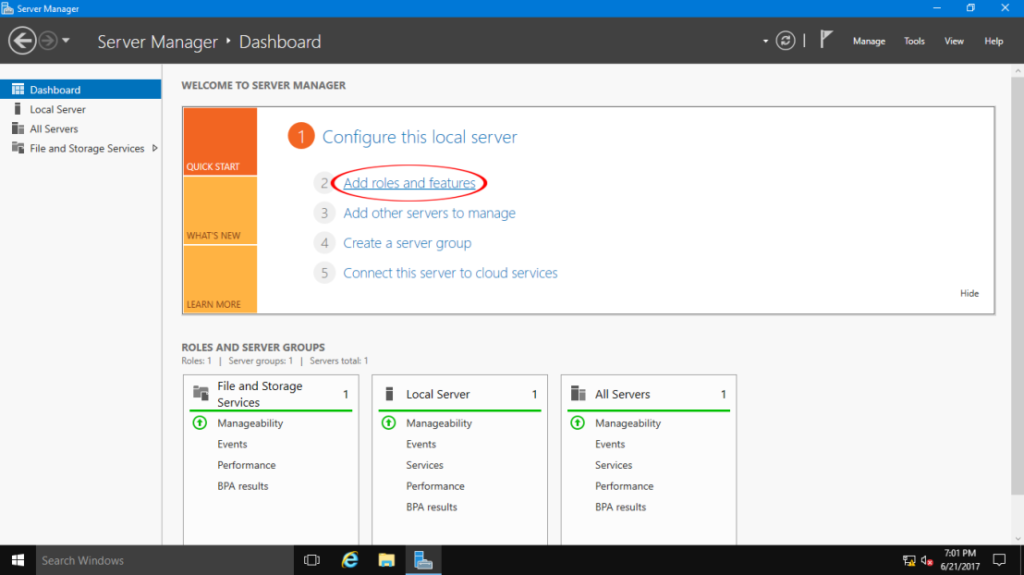
1 – Open Server Manager and then select Add Roles and Features on the Dashboard.
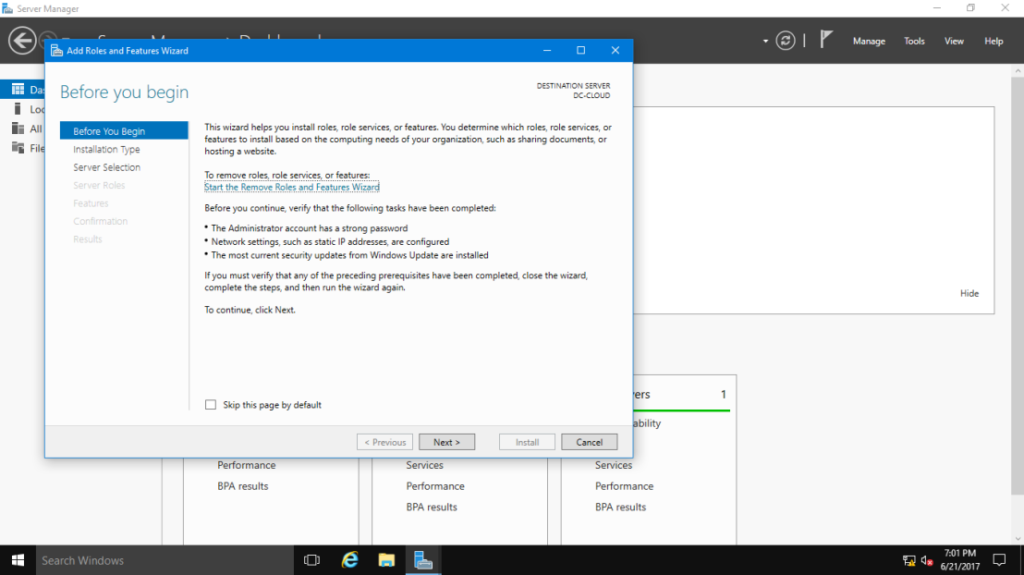
2- Next, click Next in the Add Roles and Features Wizard window.
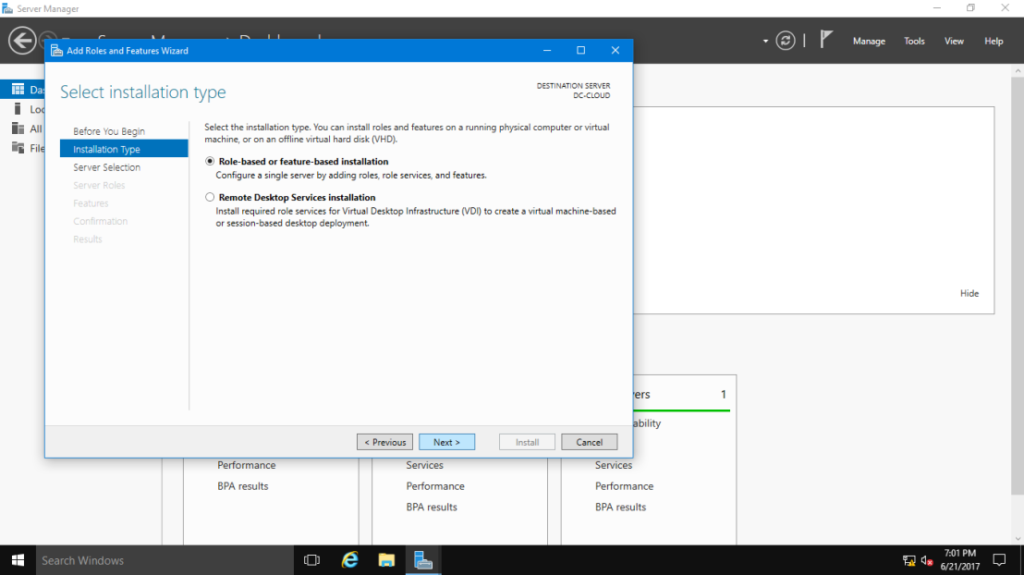
3- On the Select installation type page, confirm that you have selected Role-Based or feature-based installation, and then click Next.
4- Now choose the server on which you want to install Windows Server Essentials Experience.

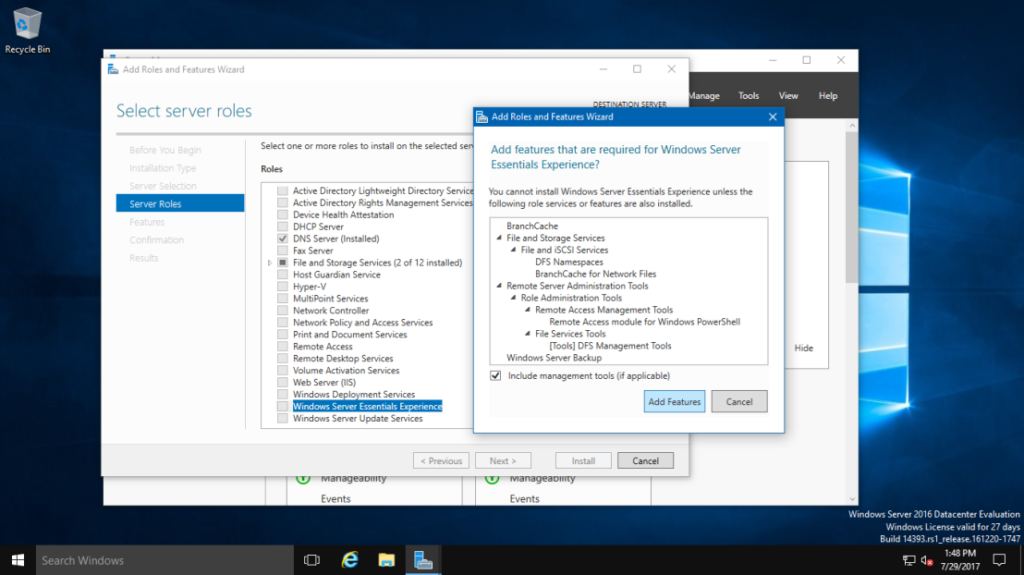
5- Select the Windows Server Essentials Experience from the Select server roles screen. In the popup window, click Add Features, then Next
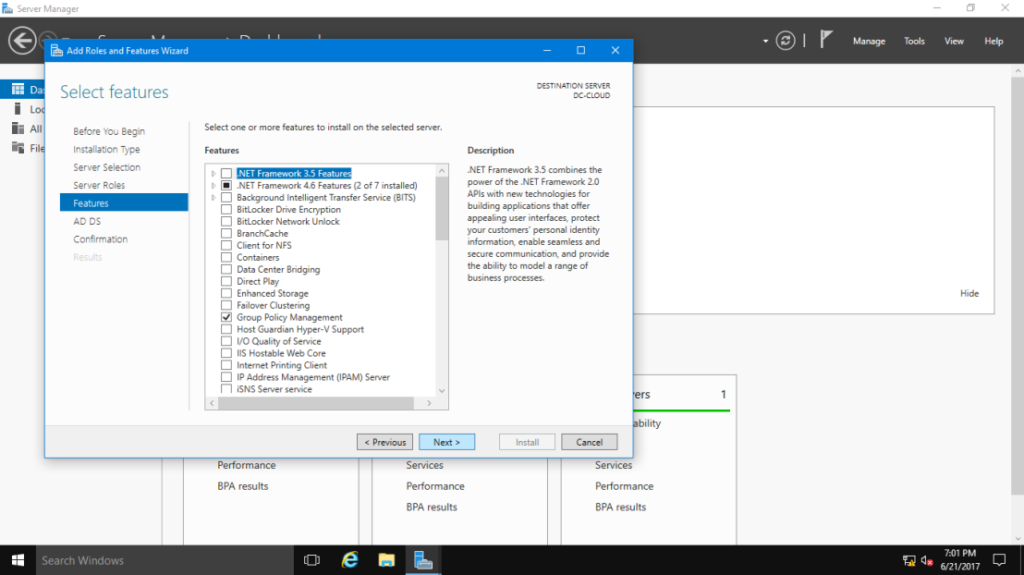
6 – Click next in the Select features box.
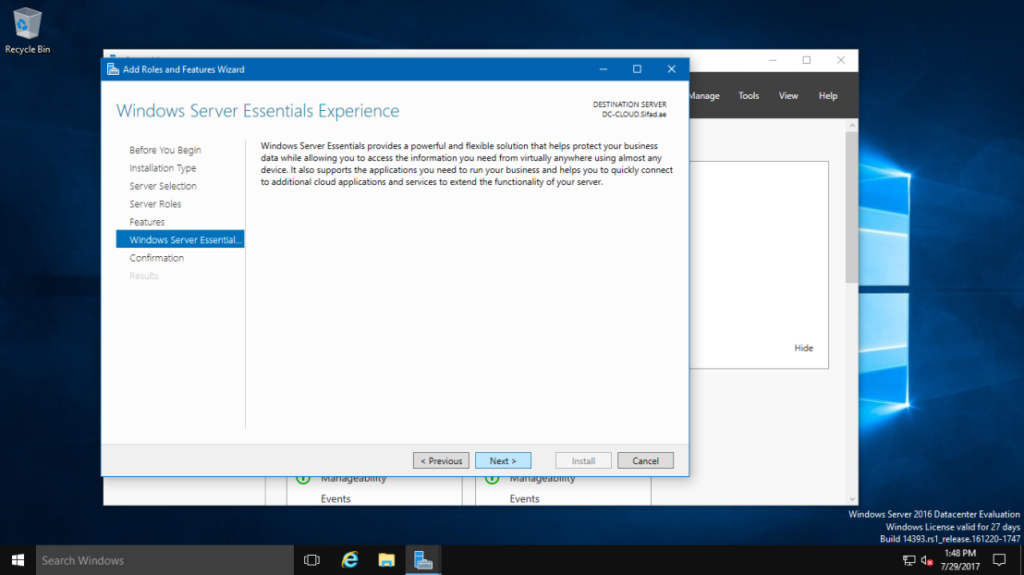
7 – Review the information displayed in the Windows Server Essentials Experience box and then clicks next.
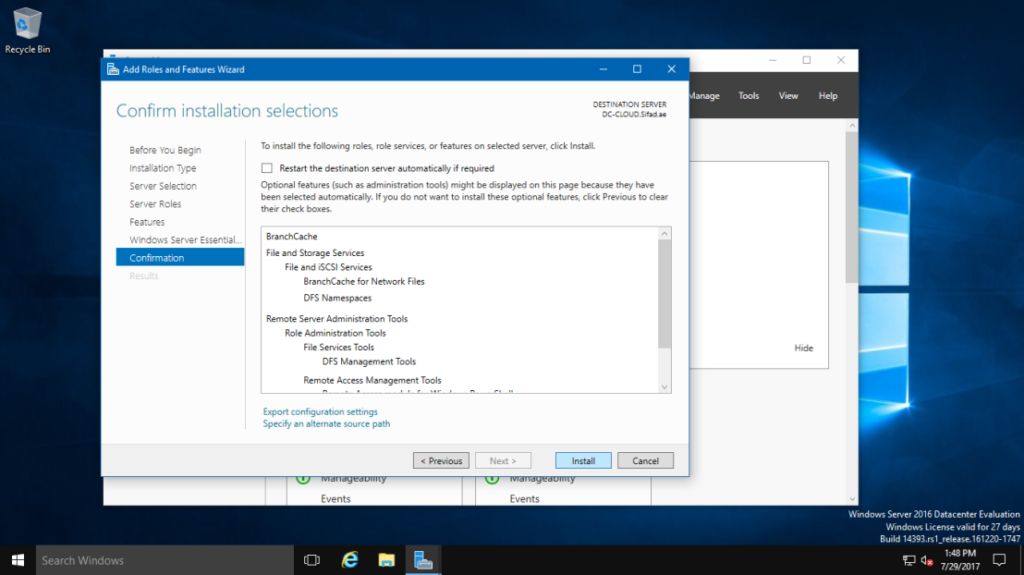
8 – Click Install in the Confirm installation selections box.
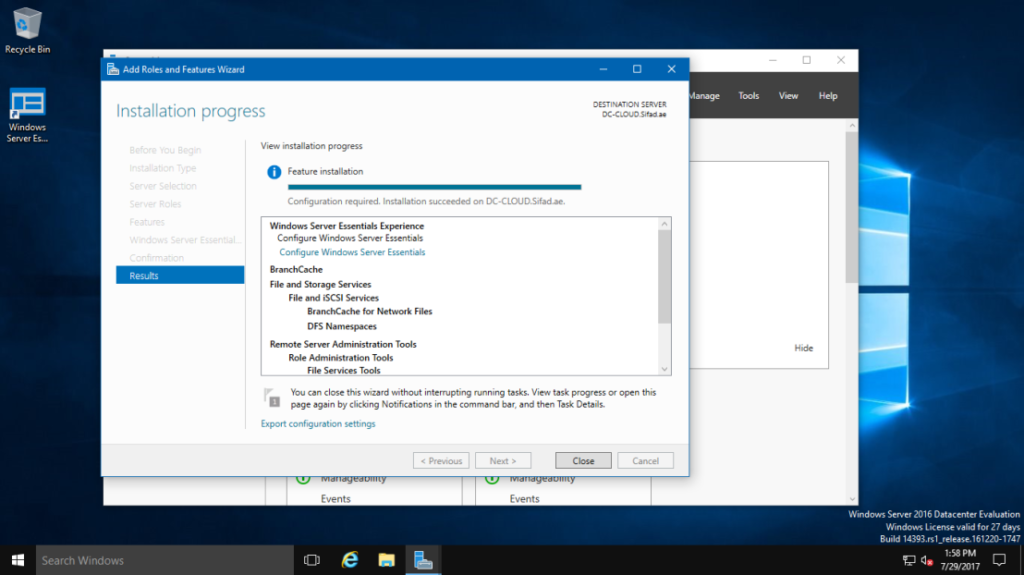
9 – Once Windows Server Essentials Experience has been successfully installed, simply click Close and then reboot your server.
02 – Investigating & Configuring Fundamentals
1 – After logging into the server again following the reboot, open Server Manager and click the flag in the top-right corner of the screen indicating post-deployment tasks that require action.
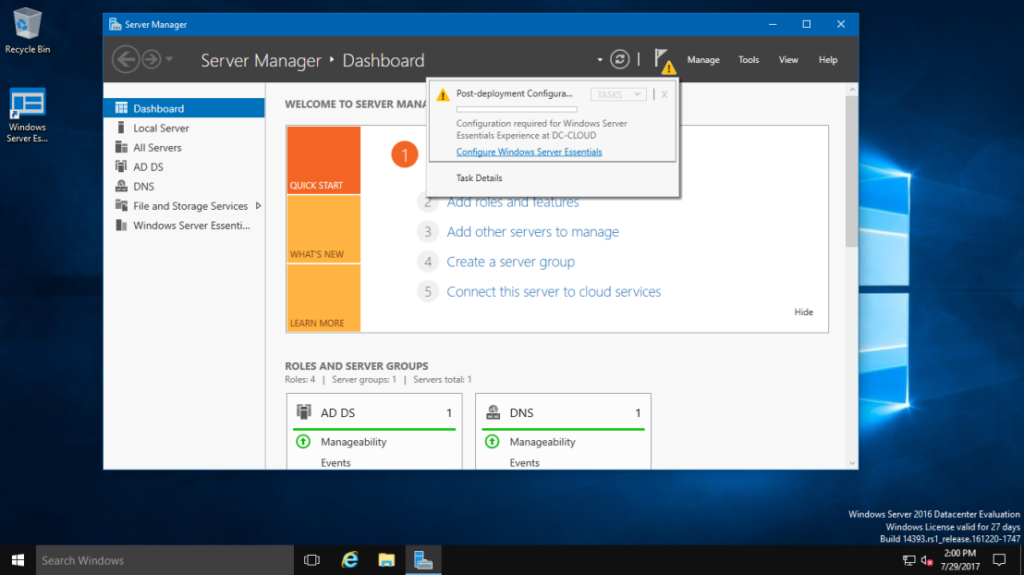
2 – Note the initial page and then click Configure.
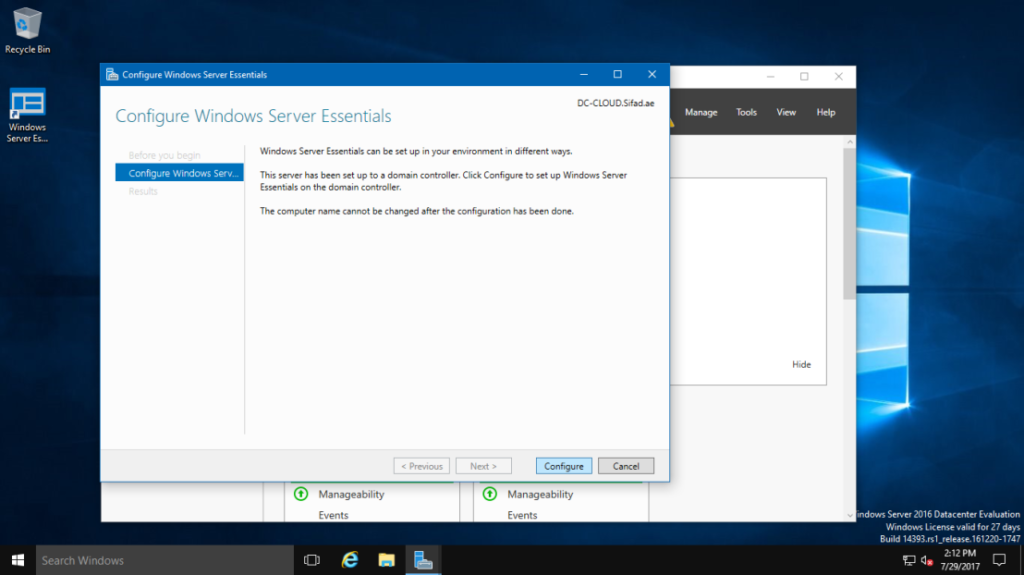
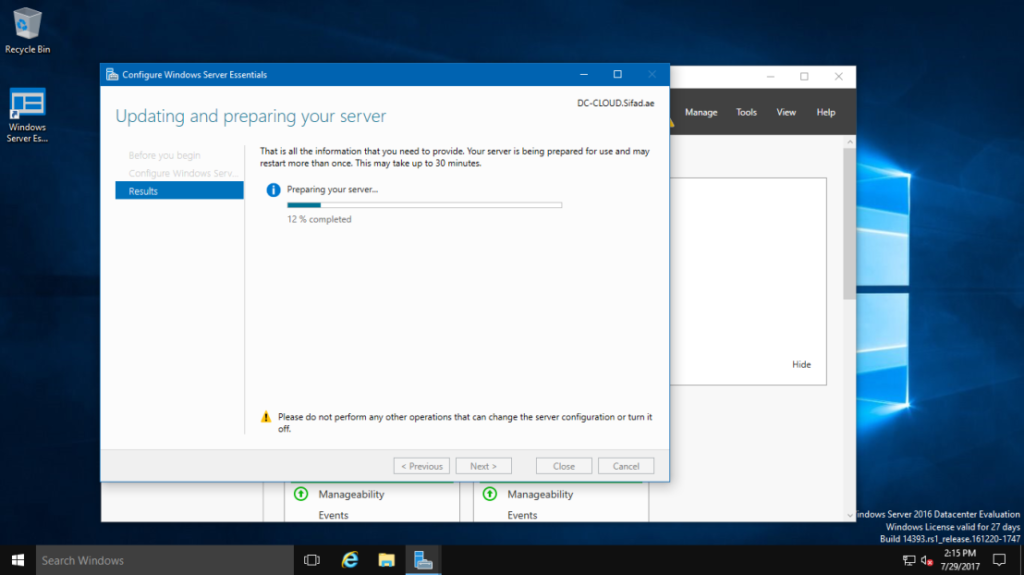
3 – The following step may take up to 30 minutes.
4 – Following that, the message indicates that the configuration is complete. Close the window.
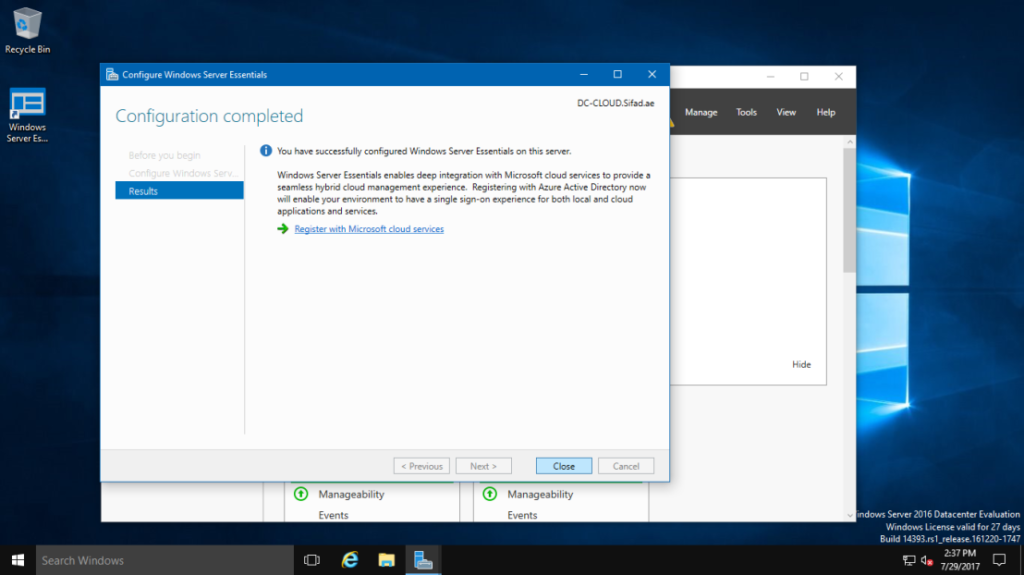
5 – My server has been designated as the Sifad.ae domain’s Domain Controller. From the desktop, click the “Dashboard” icon. The Essentials Dashboard will greet you.
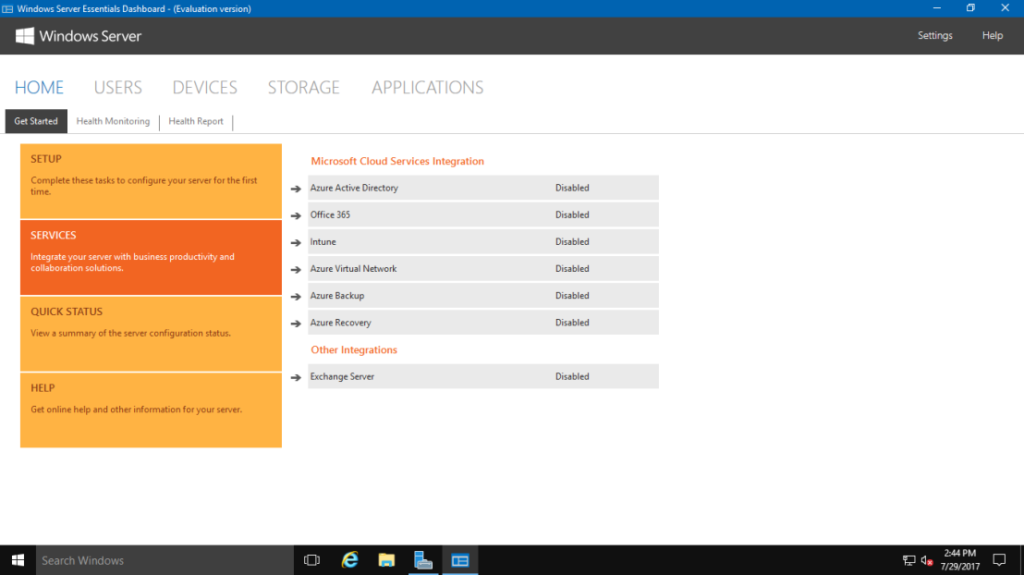
03 – Integrating Office 365
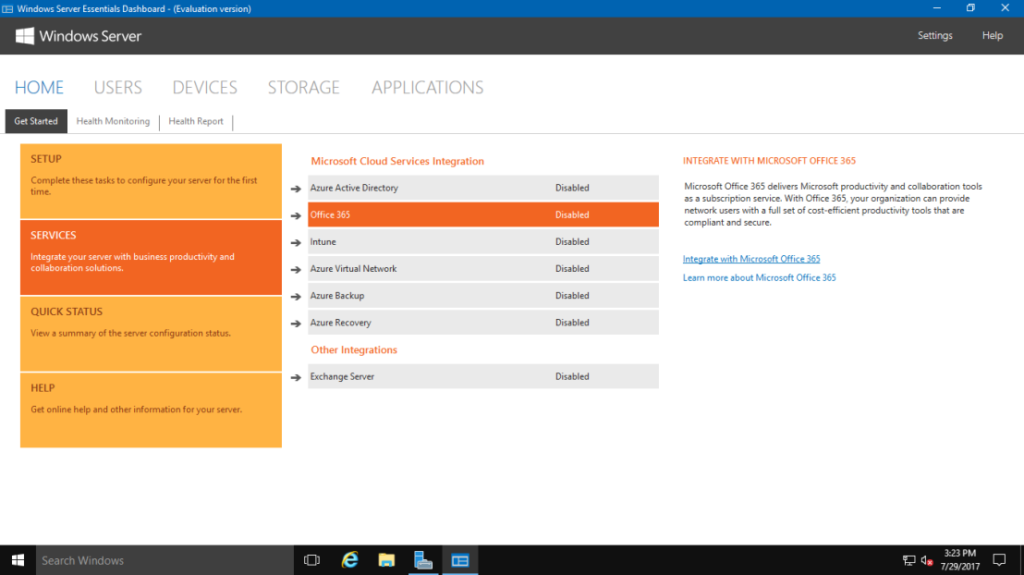
1 – To begin, let us connect our Essentials Dashboard to Office 365. To accomplish this, visit SERVICES on the left and then click Integrate with Microsoft Office 365.
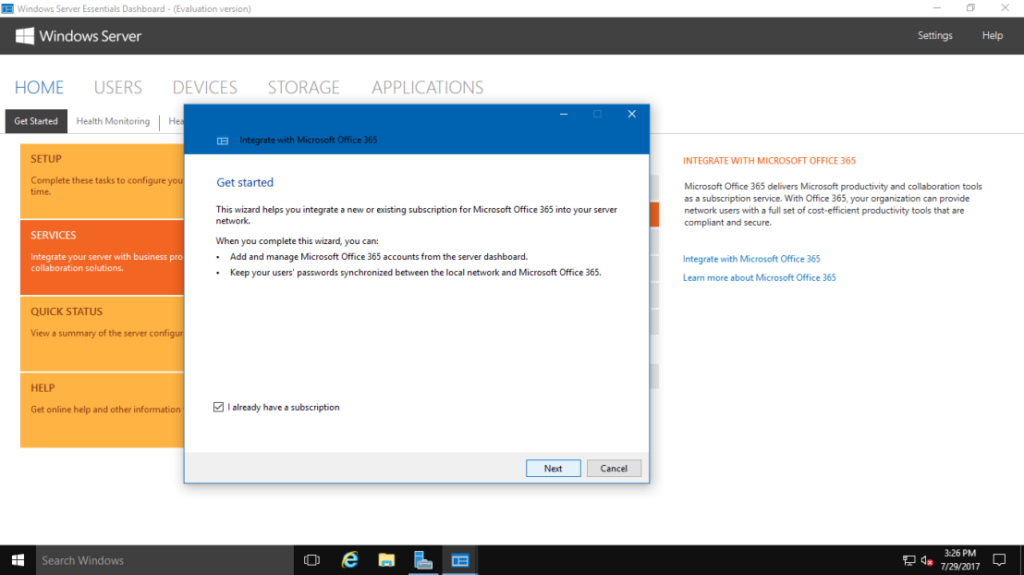
2 – To begin the integration wizard, select Integrate with Microsoft Office 365. On the first screen, I selected I already have a subscription because I’m connecting with an existing Office 365 tenant, and then clicked Next.
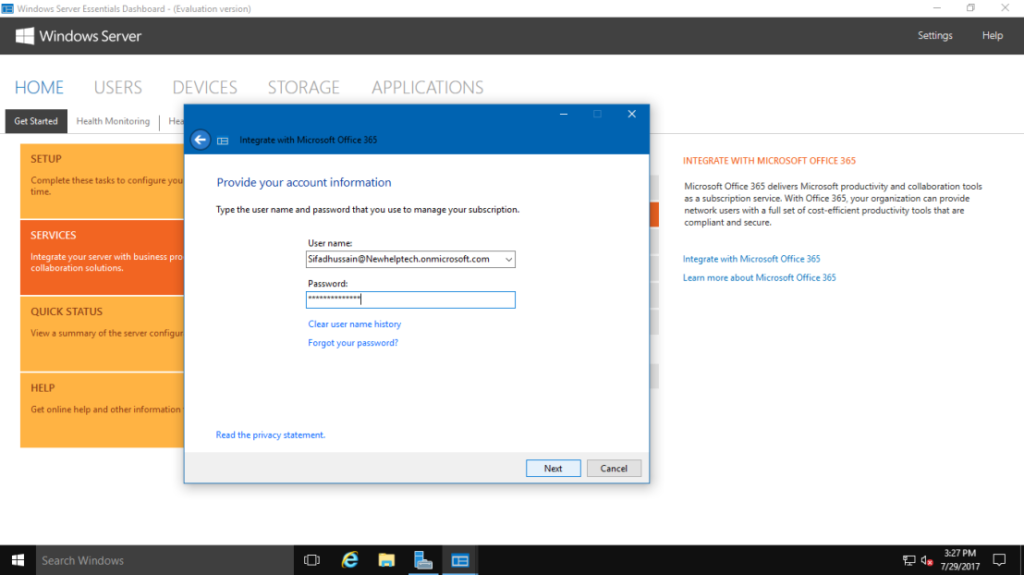
3 – Click next after entering your Office 365 tenant administrator credentials.

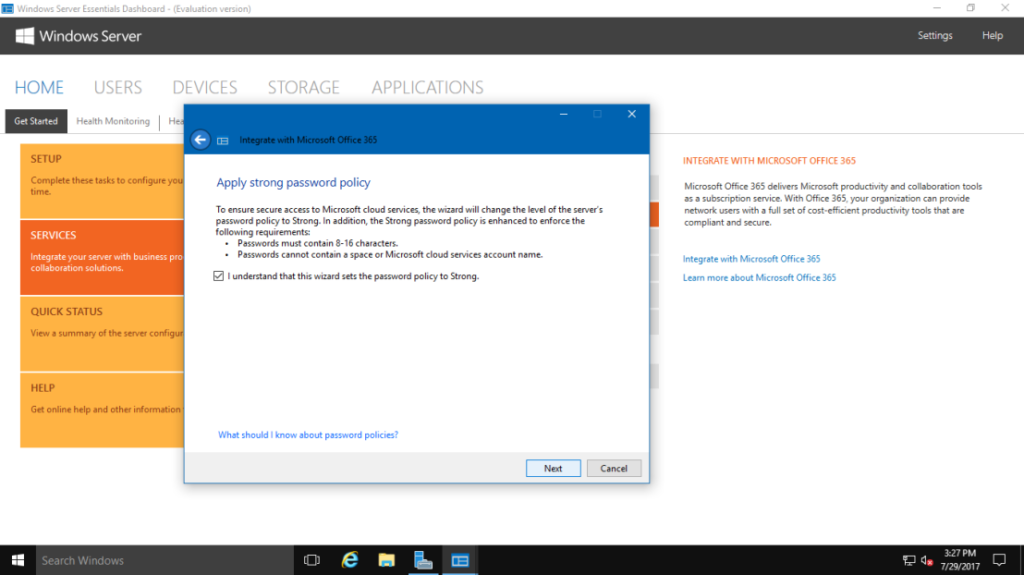
4 – Verify that you’re comfortable with the strong policy password by picking I understand that this wizard selects the Strong option for the password policy and clicks Next.
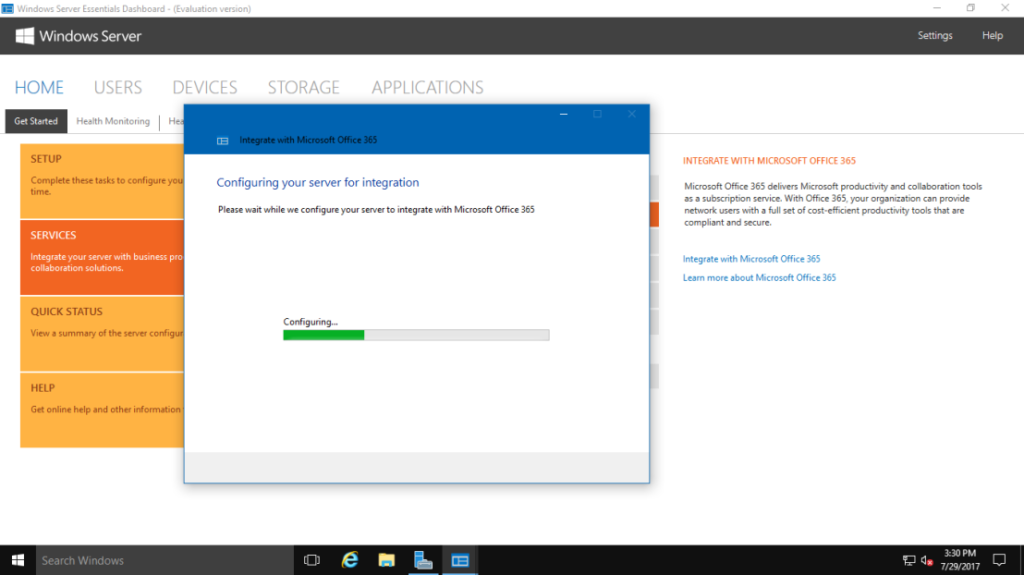
5 – The wizard will now proceed to configure the server for Office 365 integration.
6 – When finished, click Close.
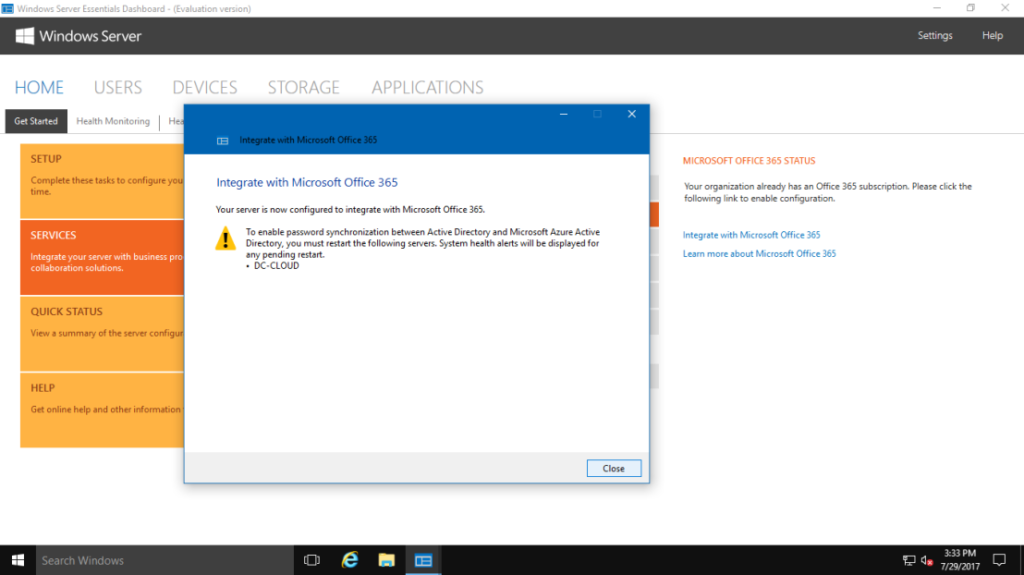
7 – Returning to the Essentials Dashboard, we can see that we have successfully integrated with Azure Active Directory and Office 365, but not with an on-premises Exchange server.
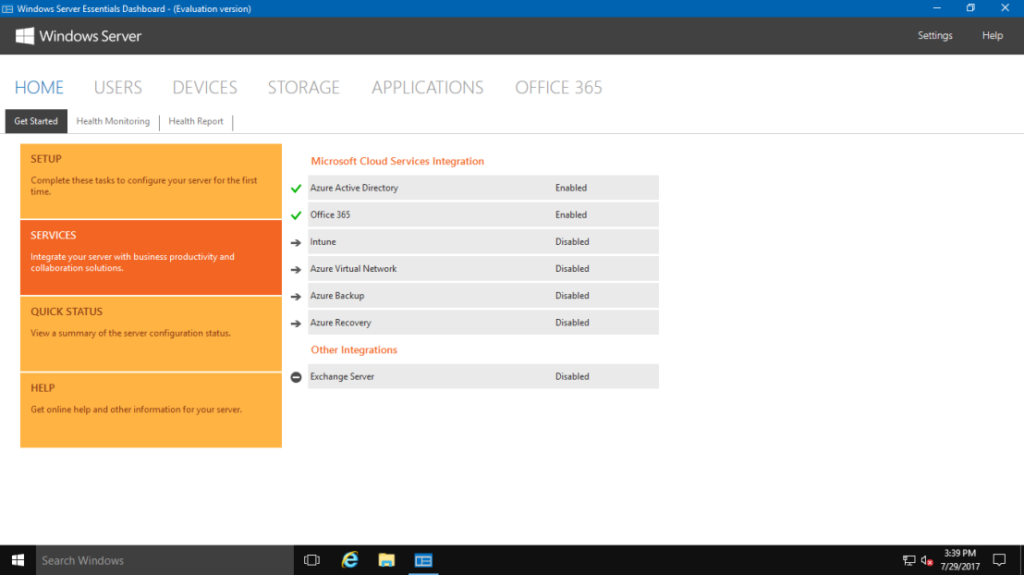
04 – Online Exchange Management
Managing on-premises and cloud resources can be challenging at times. To assist enterprises in this endeavor, the Windows Server Essentials Dashboard was created to centralize the majority, if not all, of day-to-day management duties. The following new administration tasks are now available in Windows Server 2016 Essentials:
- Online management of user accounts (for both Office 365 and Windows Intone).
- Management of distribution groups.
- Management of user groups (for both local network and the Windows Azure Active Directory security group).
- Management of the SharePoint Online Library
- Management of Exchange ActiveSync.
- Multiple subscription options are supported, and licenses can be assigned via the Essentials Dashboard.
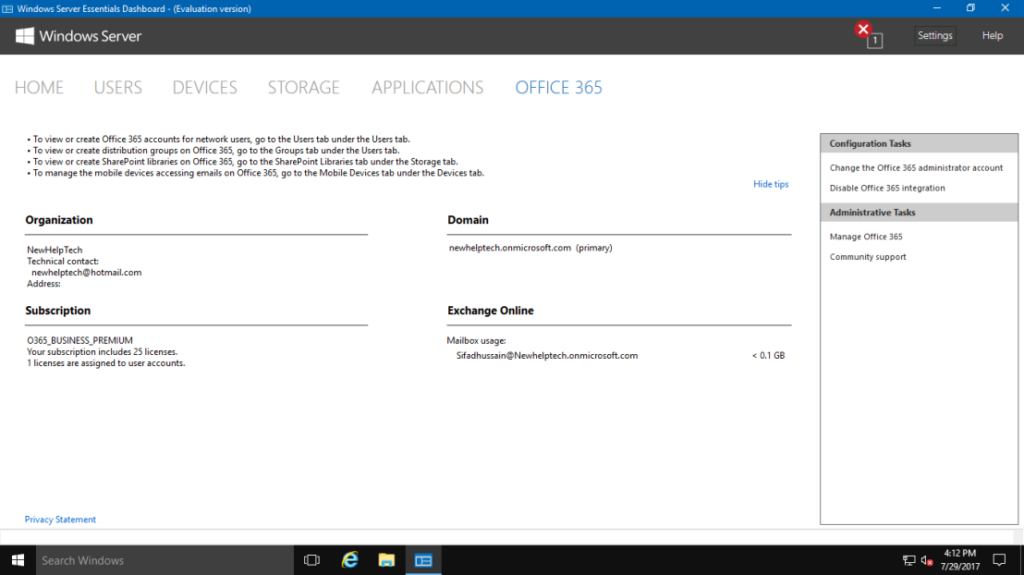
1 – Let’s begin with user account management. If we navigate to the OFFICE 365 part of the dashboard, we can view a variety of information about our tenant, including contact information, the number of licenses purchased and available, the domains we added to the tenant, and the tenant’s
1. mailbox.
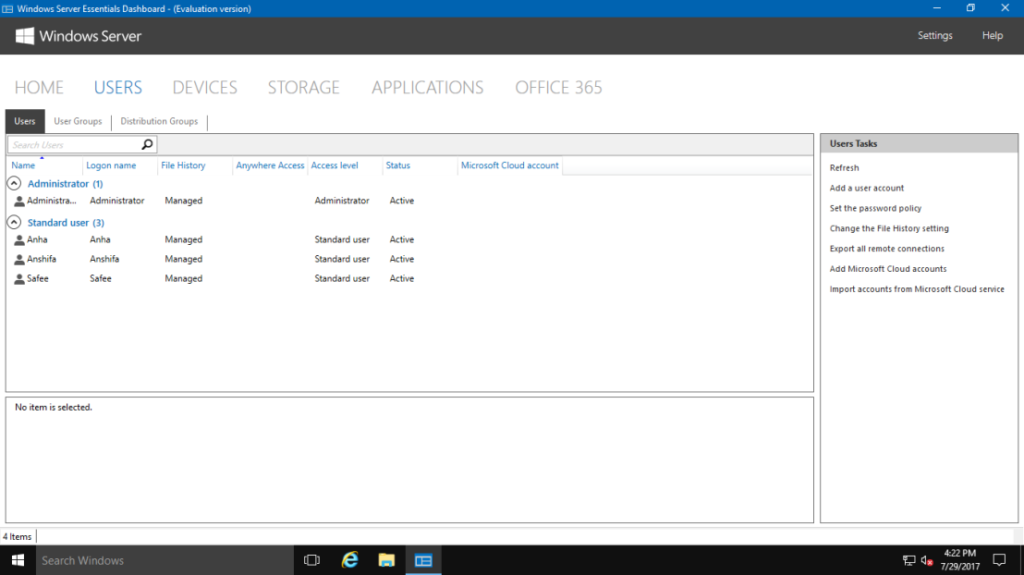
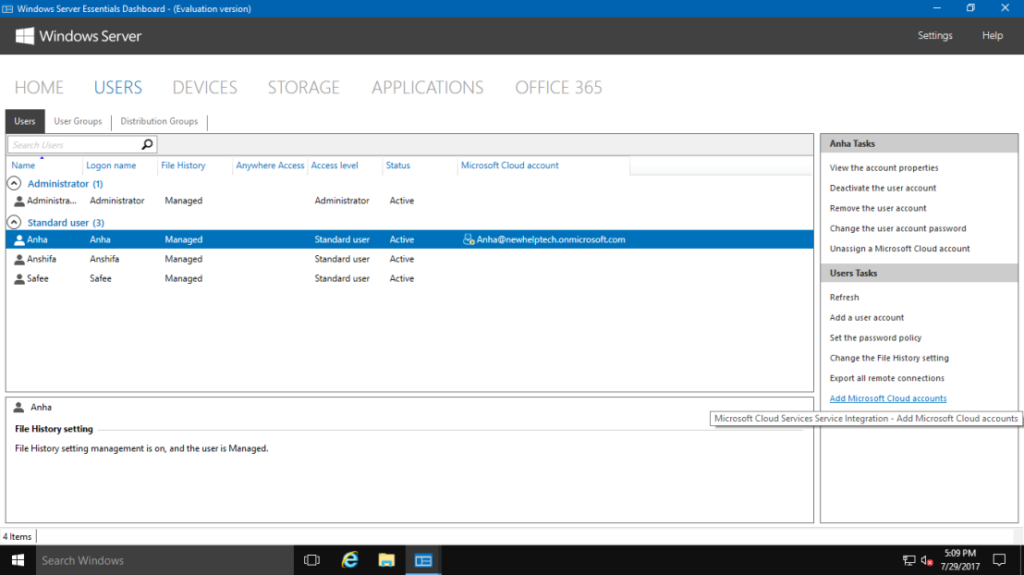
2 – By navigating to the USERS section, we are provided with a list of our Active Directory users on-premises. Here we can see three specific people with whom we will be collaborating: Ana, Anshan, and Safi.
3 – Selecting one of the users, say Ana and clicking on View account properties gives us access to some of Ana’s account information.
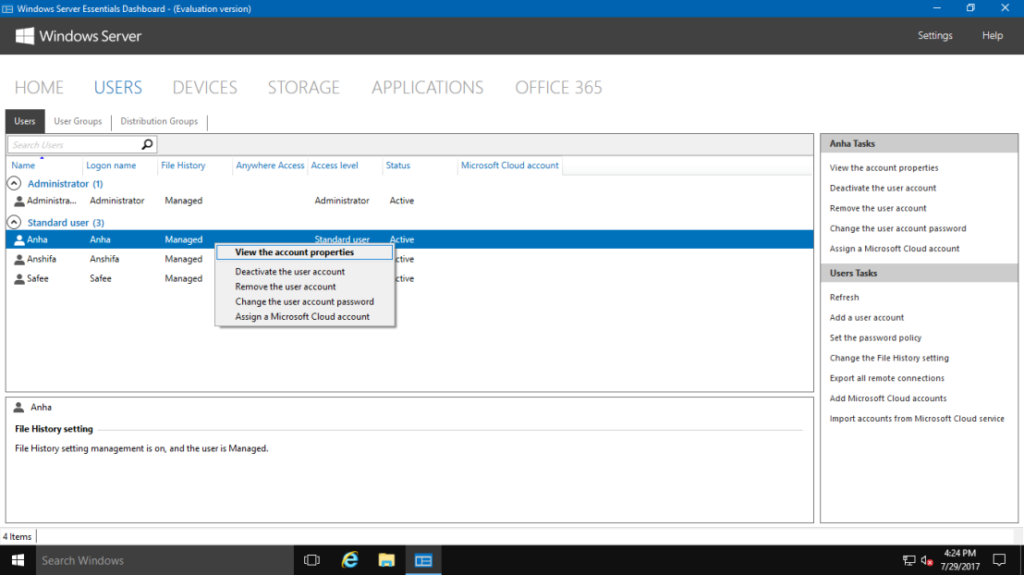
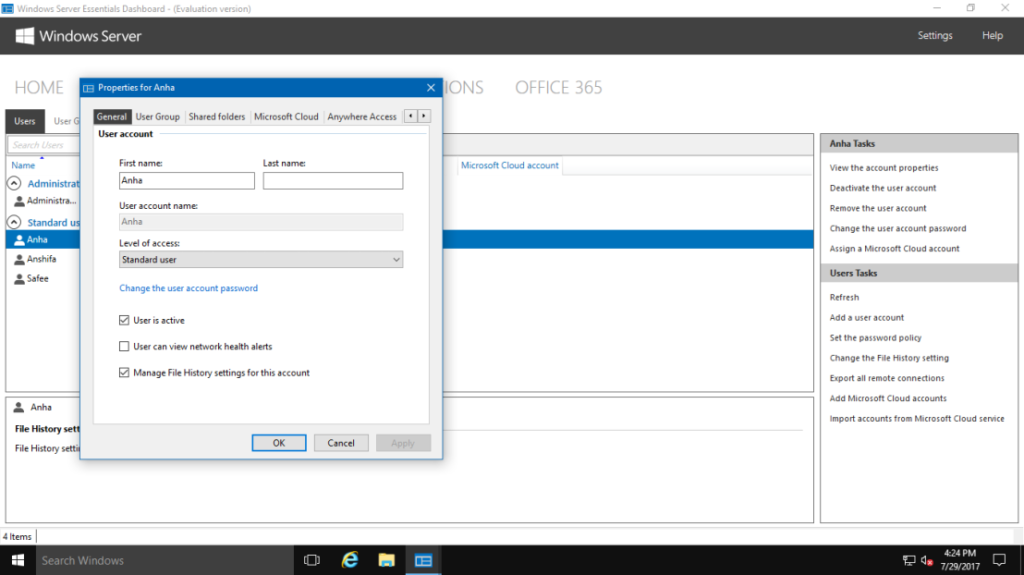
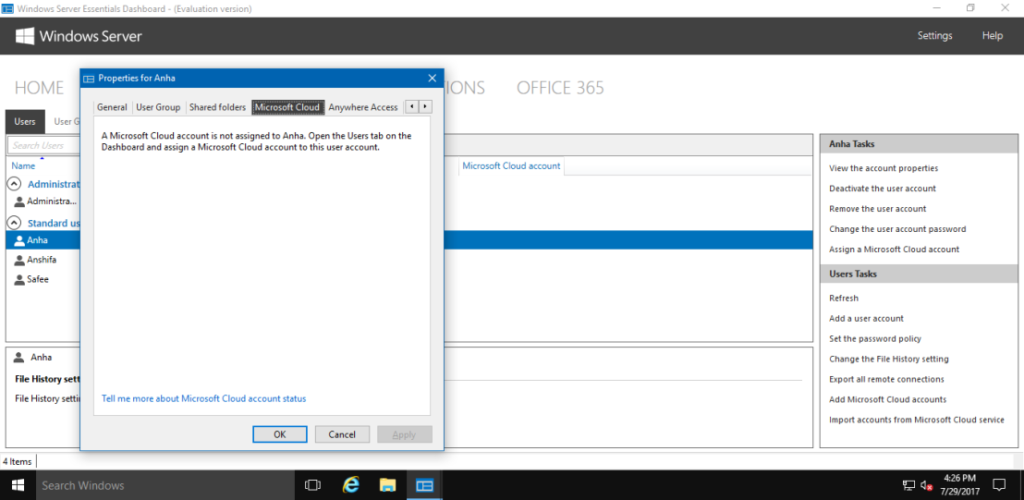
4 – Navigating to the Microsoft online tab reveals that this on-premises account is not connected to an Office 365 online account.
05 – Affecting an Existing On-Premises User with an Office 365 License
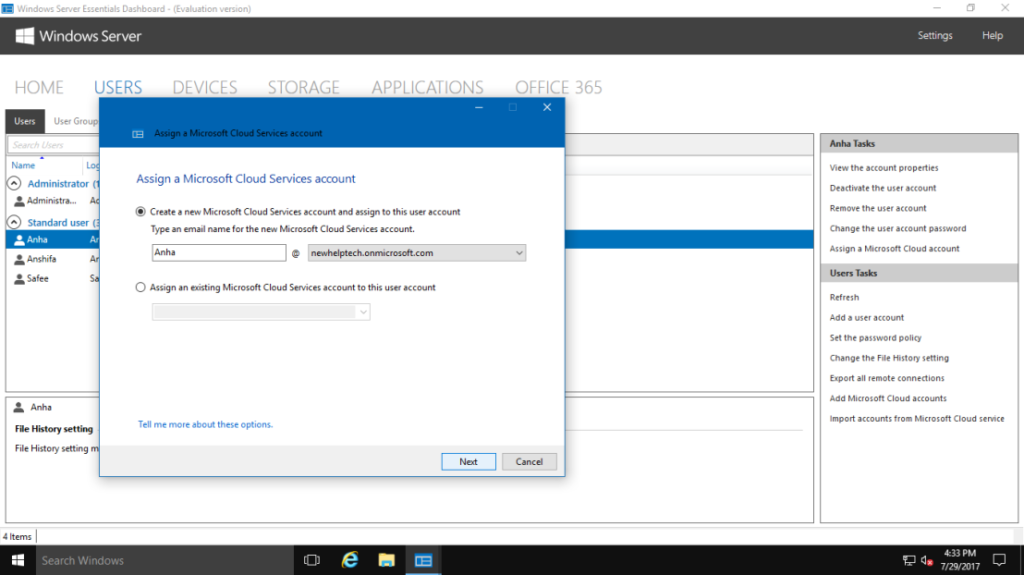
Then, let us examine how we can build an Office 365 mailbox for this user. To begin, we must associate an online account with an on-premises user account. This can be accomplished by creating a new online account and connecting it to the on-premises account, or by connecting an existing online account (which may have been pre-created) to the on-premises account. In this instance, we’ll create a new one:
1 – On the Dashboard, click Users. From the list, select the user account you want to assign a Microsoft online account to.

2 – The process for assigning a Microsoft Online Services account opens. Assign the user to an existing online account or create a new one. The user name is the default online ID for a new account. For the domain portion of the e-mail address, the tool will always default to the tenant’s default domain. Click Next.
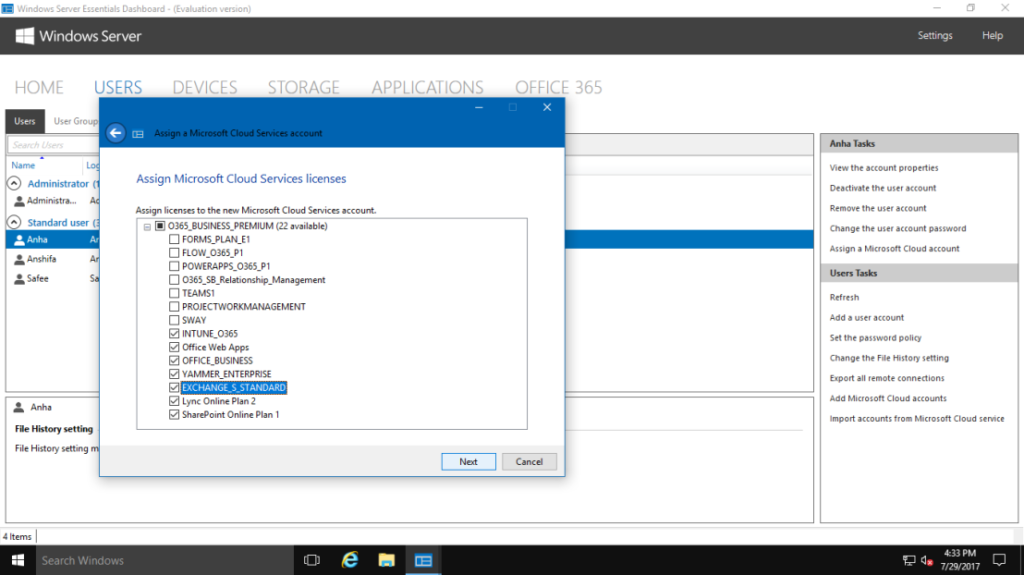
3 – Then click next to go to Assign Microsoft Online Services licenses, where we can assign an Office 365 license to the user account, as the name implies.
4 – On the final page of the wizard, review the information and then click
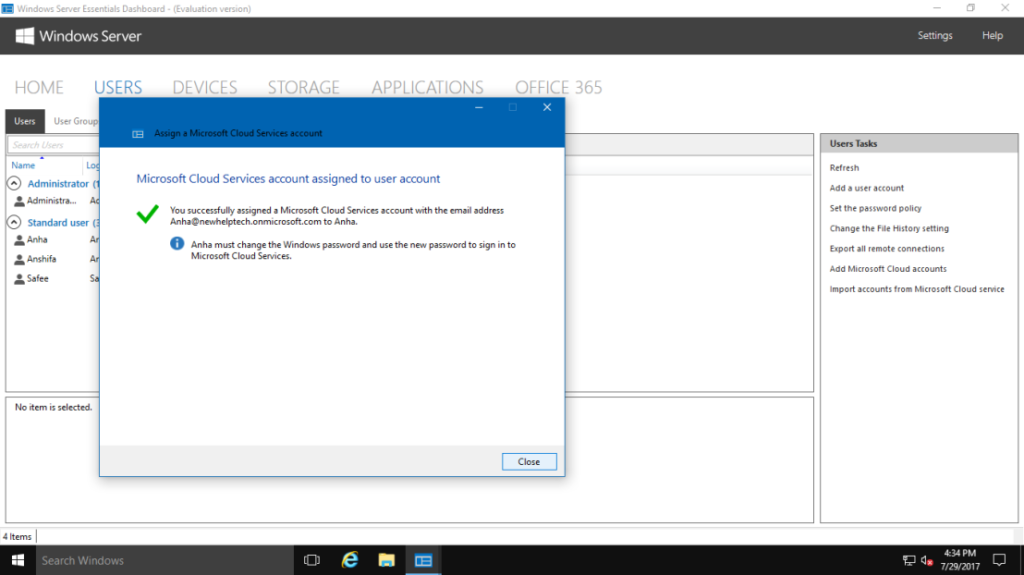
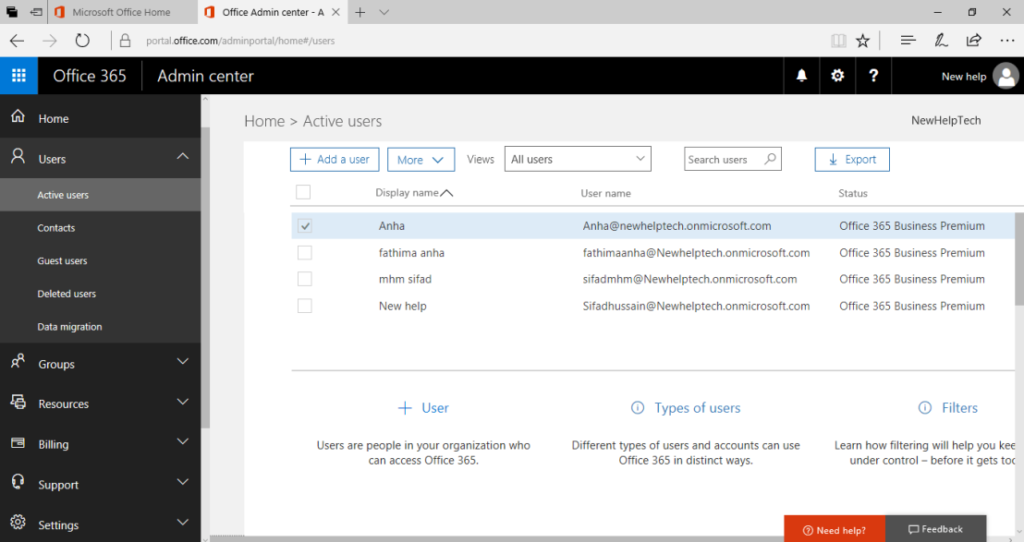
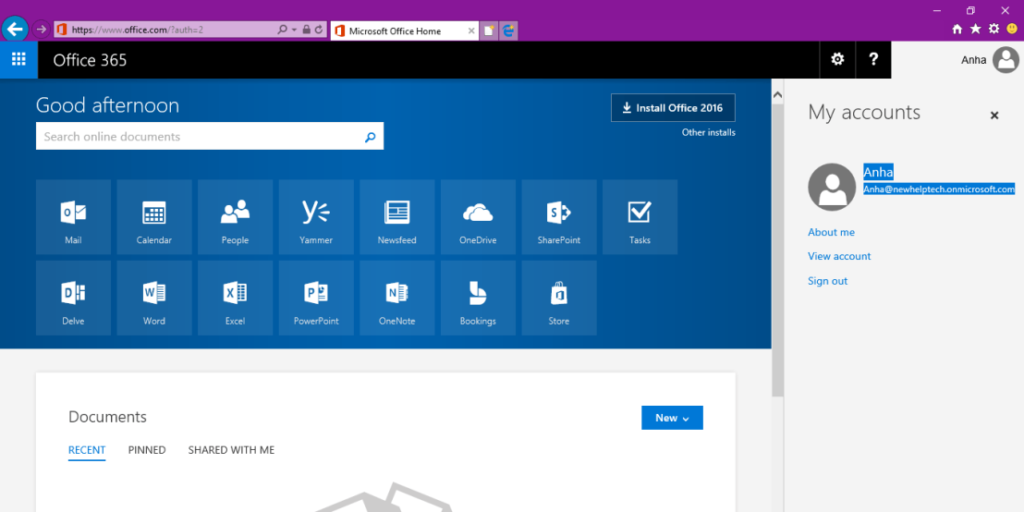
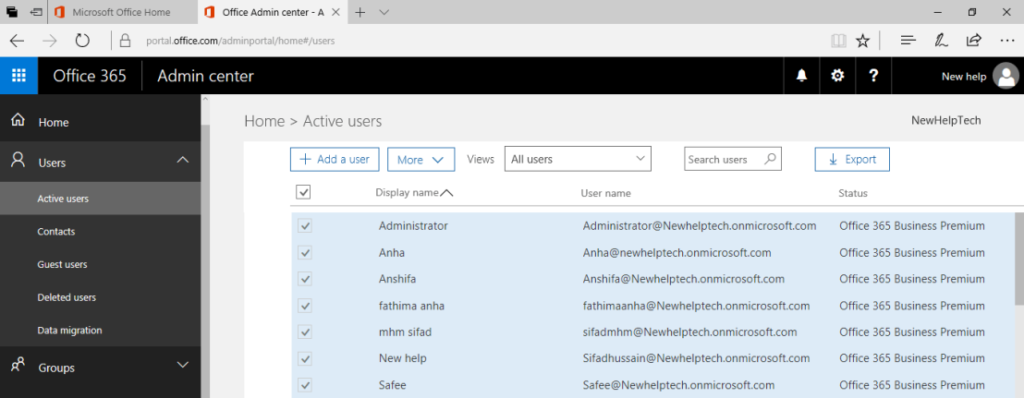
5 – Returning to our Office 365 interface reveals that the account has been created.
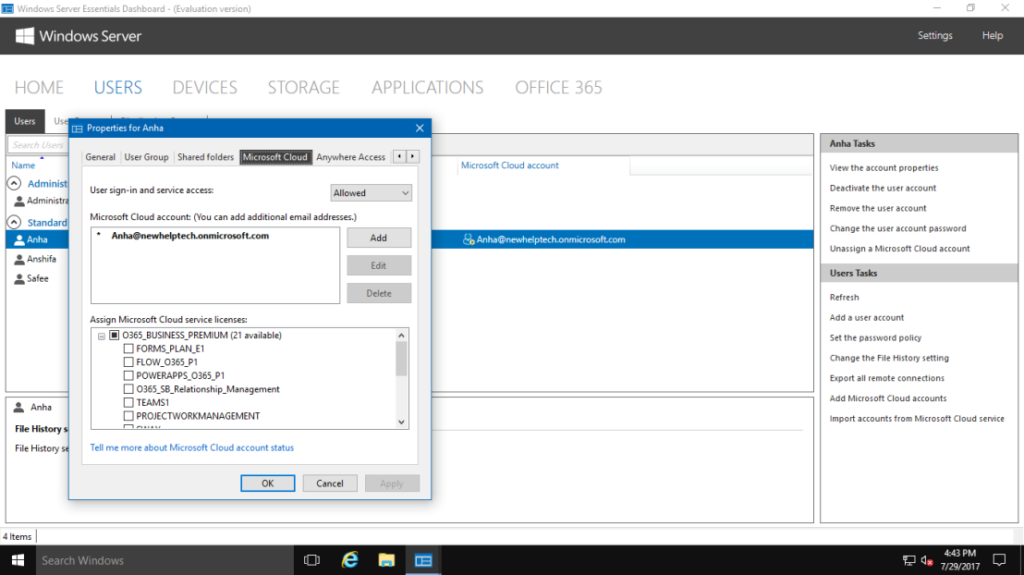
6 – Additionally, we can see in the Essentials Experience panel that the account now has a Microsoft online account associated with it.
06 – Authentication
After creating an online account and connecting it to our on-premises account, the user should be able to just login to Office 365, correct? Not precisely. Due to the way password synchronization works in Essentials, when we create or match user accounts, we must essentially change their passwords to initiate password synchronization with Office 365. Hopefully, this will be addressed in the future.
As such, to begin utilizing your new Microsoft online account, follow these steps:
1 – Now, simply visit https://login.microsoftonline.com/and log in with the new online ID and password for the user account.
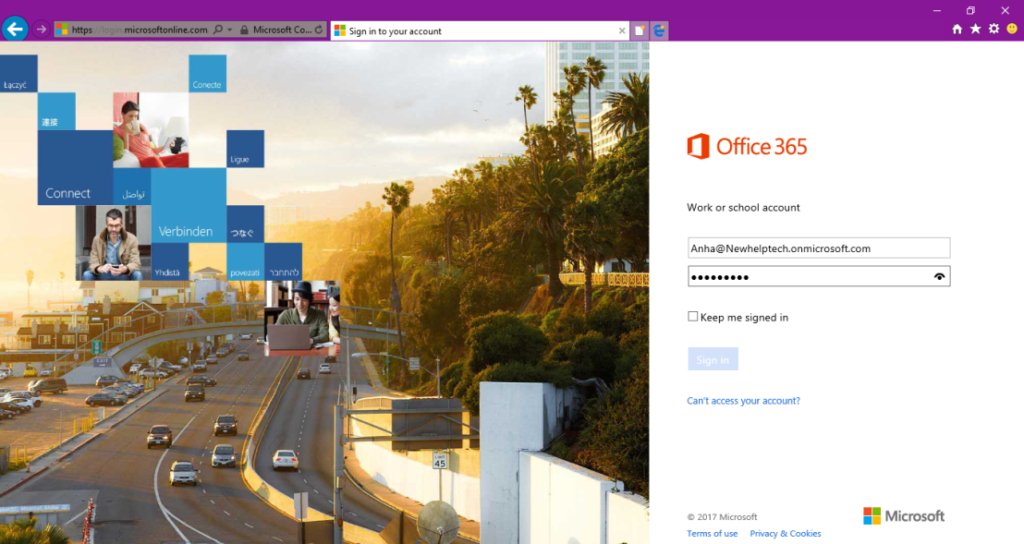
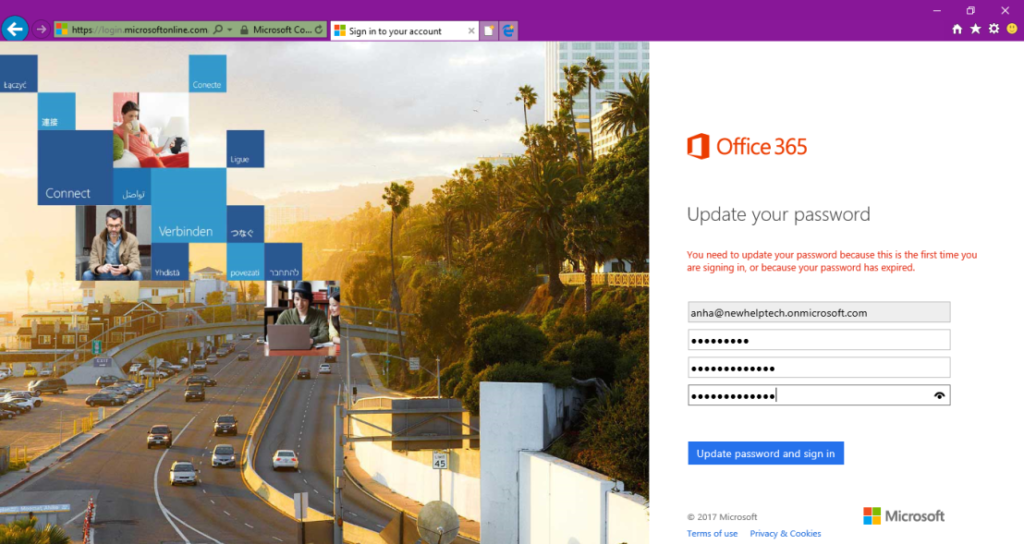
It is critical that customers are taught about the dangers of changing their Office 365 online account password, as this will disrupt password synchronization. When using DirSync , the ability to change Office 365 passwords is disabled, but not when using Essentials.
2 – Once the user or administrator resets his password, he will almost immediately be able to login.
07 – Multiple Offices 365 Licenses Assigned to Existing Users
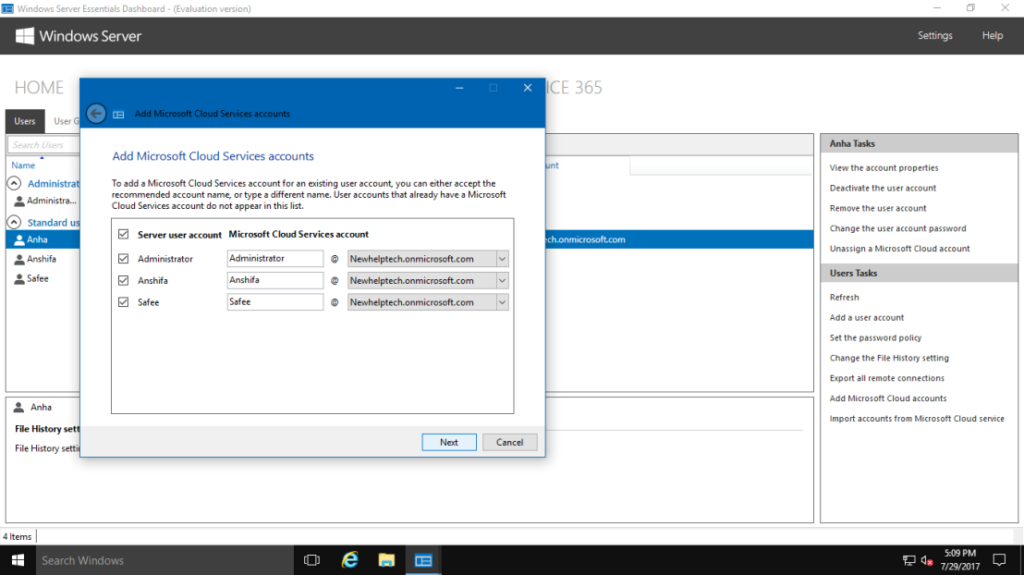
What if we wish to establish or match dozens of on-premises users in Office 365? Additionally, the procedure for accomplishing this is uncomplicated. 1 – Launch the Windows Server Essentials Management Console. Open the Users page from the Dashboard. Click Add Microsoft online accounts under Users Tasks
2 – The wizard’s Add Microsoft Online Services accounts page appears. After selecting all user accounts, click next.
3 – Select the Office 365 services to which users will have access on the Assign Microsoft Online Services licenses page.
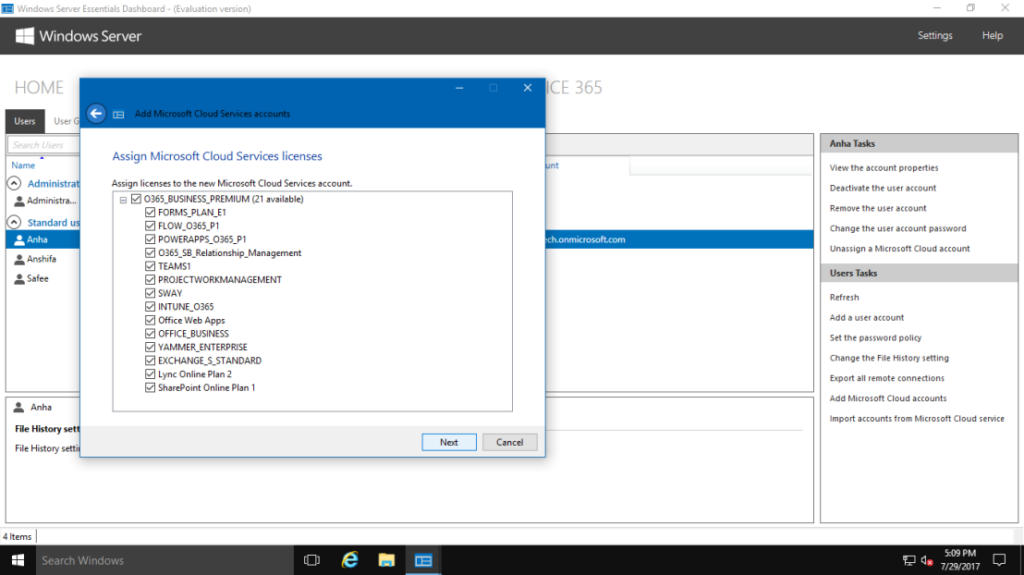
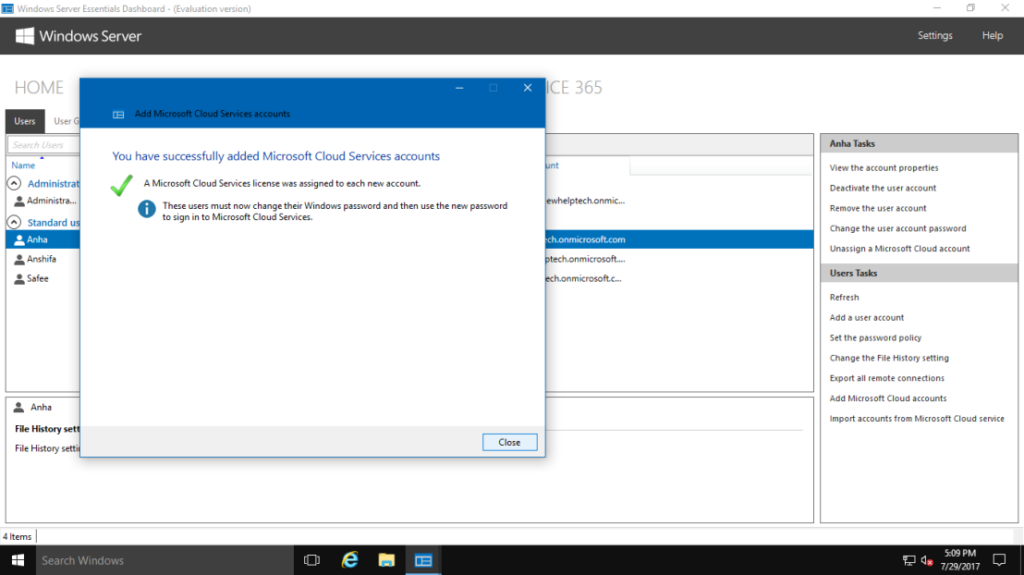
4 – After clicking next, the account creation process will begin.
We examined the features of the Windows Server 2016 Essentials Experience Role in managing Office 365 Online in this article. We showed how Essentials can simply establish or match user accounts in Office 365, as well as synchronize their passwords for a more consistent user experience, all from a single user panel and without the need for an on-premises Exchange server.